
Epoxy floor coating boast excellent wear resistance, pressure resistance, and chemical corrosion resistance. They are easy to clean and maintain, highly decorative, and feature strong adhesion, with a low overall cost. Additionally, they can be extended to have special functions such as anti-static and anti-slip properties. As a result, they are widely favored in the floor coating industry and are mostly applied in scenarios like industrial workshops, commercial spaces, and underground parking garages.
The construction quality directly determines the performance and service life of epoxy floor coatings. Therefore, proper construction is extremely crucial. Jincheng Resin will share some correct construction steps with you, hoping to provide some help for your projects.
1.Before-construction Preparation: Lay a Solid Foundation for the Base Surface
(1)Base Surface Inspection and Evaluation
The condition of the base surface is the core factor determining the adhesion of epoxy floor coatings. Of course, different application scenarios have different requirements. Jincheng Resin can only provide some references, and professional evaluation and testing are required on your side.
Strength Requirements
The strength of the base surface is of great importance. Insufficient base strength can lead to cracking, peeling and other defects of the epoxy floor coating. The base layer can be likened to the bones of a human body: if the bones are fragile, the body cannot withstand heavy pressure. The base layer of epoxy floor paint must have sufficient compressive strength. For example, in industrial scenarios where heavy vehicles or equipment frequently move and park, the base layer requires a higher compressive strength (the compressive strength of the concrete base layer shall be ≥ C20; for heavy-duty areas such as workshops and garages, it shall be ≥ C25).
Flatness Requirements
The flatness of the base surface is similar to building blocks: if the bottom blocks are crooked, it will be difficult to build a stable structure with the upper blocks, and the same principle applies to the construction of epoxy floors. The following are the common reference requirements for the base surface: tested with a 2m straightedge, the gap shall be ≤ 3mm, and ≤ 2mm for heavy-duty areas; the slope of drainage areas shall be ≥ 1.5% to avoid water accumulation. Areas with excessive height differences shall be marked and repaired later.
Dryness Requirements
Excessive moisture in the base layer is like a damp box, which can cause mold growth on the epoxy floor coating. When the humidity is too high, the epoxy floor coating is prone to pinholes and delamination. The moisture content of the construction base surface for solvent-based epoxy floor paint shall be ≤ 6%, and this requirement can be relaxed to ≤ 8% for water-based epoxy. The moisture content can be tested with a moisture meter, or by covering the base surface with a plastic film for 24 hours—if no condensation droplets form, the base surface is deemed qualified.
Cleanliness Requirements
The base surface must be kept clean and tidy. Oil stains, dust, loose particles, laitance and other contaminants will hinder the bonding between the epoxy floor coating and the base surface, reducing adhesion. Oil stains can be wiped with acetone or a special cleaning agent first; laitance and loose particles can be removed by grinding with a floor grinder, followed by rinsing with clean water and drying; dust shall be completely cleaned up.
(2)Materials and equipment
Material Preparation and Inspection
Epoxy floor coatings come in many different types, such as metallic epoxy flooring, rock chip flooring, and colored sand flooring. Prepare epoxy primer, intermediate coat, topcoat, hardener, and other corresponding materials according to different needs. Materials should be stored in a ventilated, dry, and cool place. The construction temperature should be controlled between 5-35℃ (temperature affects the curing time of the epoxy floor coating). Keep away from fire and oxidizers, and avoid direct sunlight. Before use, check the expiration date of the materials and confirm that there is no clumping, sedimentation, or separation. It is best to conduct a small-scale test application to verify performance before construction. The thinner must be used in conjunction with the epoxy coating; mixing with non-specified thinners is strictly prohibited.
Equipment and Personnel Configuration
Core construction equipment includes: grinder, angle grinder, mixer, airless sprayer, wool roller, trowel, scraper, 2m straightedge, moisture content meter, dry film thickness gauge, etc. Check the equipment’s performance in advance.
Safety protection equipment must be fully equipped: gas masks, protective goggles, non-slip gloves, spiked shoes, paint-resistant work clothes, and fire-fighting equipment, placed in easily accessible locations. Construction personnel must undergo professional training, be familiar with the process and safety regulations, and hold valid certificates to work. The responsibilities of the technical supervisor, construction worker, and safety officer must be clearly defined.
Environmental Condition Control During construction and curing, the ambient temperature must be controlled between 10-30℃: below 5℃, epoxy resin cures slowly, requiring the addition of a winter-grade curing agent; above 35℃, direct sunlight must be avoided to prevent rapid surface drying and blistering of the coating. Air humidity ≤75% (water-based epoxy ≤85%), anGrinding the Base Surface
Grind the entire base surface with a floor grinder to remove surface laitance and loose layers, exposing the fresh concrete base. The surface should be roughened to a roughness of Ra 0.3–0.5 μm to enhance coating adhesion. For hard-to-reach areas such as edges and wall corners, use an angle grinder or manual sandpaper for grinding to ensure no spot is missed.
(3)Repair of Uneven Base Surfaces
Potholes/Depressions
Fill them with epoxy mortar (epoxy resin + curing agent + quartz sand) and screed flat with a trowel. For repairs with a thickness of >5 mm, apply the mortar in layers, allowing each layer to dry for 24 hours before applying the next one.
Cracks
For fine cracks with a width of <0.5 mm: Fill them with elastic epoxy putty.
For cracks with a width of ≥0.5 mm: Widen the cracks into V-shaped grooves, clear the dust, fill with epoxy mortar, and grind to a smooth finish.
Hollow Areas
Chisel out the hollow layer until reaching the solid base layer. After cleaning the dust, apply a primer, then repair the area with epoxy mortar to make it flush with the surrounding base surface.
Cleaning and Dust Removal
After grinding and repair, first remove floating dust by high-pressure air blowing, then perform a thorough cleaning with an industrial vacuum cleaner. Ensure no dust or particles remain on the base surface to prevent any adverse impact on coating adhesion.d the substrate temperature must be at least 3℃ above the dew point; in high-humidity environments, a dehumidifier must be used for regulation. Good ventilation must be maintained during solvent-based epoxy construction.

2、Core construction procedures: Standardized operating procedures
(1)Surface preparation: The most important step, directly determining the success or failure of the construction.
Grinding the Base Surface
Grind the entire base surface with a floor grinder to remove surface laitance and loose layers, exposing the fresh concrete base. The surface should be roughened to a roughness of Ra 0.3–0.5 μm to enhance coating adhesion. For hard-to-reach areas such as edges and wall corners, use an angle grinder or manual sandpaper for grinding to ensure no spot is missed.
Potholes/Depressions
Fill them with epoxy mortar (epoxy resin + curing agent + quartz sand) and screed flat with a trowel. For repairs with a thickness of >5 mm, apply the mortar in layers, allowing each layer to dry for 24 hours before applying the next one.
Cracks
For fine cracks with a width of <0.5 mm: Fill them with elastic epoxy putty.
For cracks with a width of ≥0.5 mm: Widen the cracks into V-shaped grooves, clear the dust, fill with epoxy mortar, and grind to a smooth finish.
Hollow Areas
Chisel out the hollow layer until reaching the solid base layer. After cleaning the dust, apply a primer, then repair the area with epoxy mortar to make it flush with the surrounding base surface.
Cleaning and Dust Removal
After grinding and repair, first remove floating dust by high-pressure air blowing, then perform a thorough cleaning with an industrial vacuum cleaner. Ensure no dust or particles remain on the base surface to prevent any adverse impact on coating adhesion.
(2)Primer Application: Seal the Base Surface and Enhance Adhesion
Material Mixing Ratio
Strictly mix the epoxy primer and curing agent in the proportion specified in the product manual, and weigh the components with an electronic scale (error ≤ 1%). This is to avoid coating softening caused by insufficient curing agent or increased brittleness caused by excessive curing agent. Stir the mixture at low speed with an electric mixer for 3–5 minutes to ensure it is uniform, free of particles and color differences.
Application
Adopt the roller coating or airless spraying method, with the coating thickness controlled at 0.1–0.2 mm. The mixed primer must be applied within 30 minutes.
Drying and Curing
In an environment with a temperature of 20℃ and humidity ≤ 75%, the surface drying time is about 2–4 hours, and the hard drying time is 24 hours. When the temperature is below 10℃, the drying time shall be extended to 72 hours. The coating must be tested with a dry film thickness gauge; only when the coating hardness reaches pencil hardness H or above and there are no wrinkles or pinholes can the next construction process be carried out. Close the construction area during the drying period and set up warning signs to prevent personnel trampling and dust contamination.
(3)Intermediate Coat Application: Fill Pores and Ensure Flatness and Wear Resistance
Material Preparation
Mix the epoxy intermediate coat and curing agent in the ratio specified in the product manual, and stir thoroughly. Test the viscosity with a viscosity cup: if it is too thin, sagging may occur; if it is too thick, application will be difficult. Use up the mixture within 30 minutes after blending.
Application and Grinding
The designed total thickness of the intermediate coat is 0.5–1.0 mm, which should be applied in two coats with an interval of 4–6 hours between coats.
Apply the first coat evenly with a trowel or scraper to fill the pores of the primer.
Smooth the second coat with a power trowel, and monitor the thickness in real time with a thickness gauge, ensuring the margin of error is ≤ ±0.1 mm.If the thickness is insufficient, apply an additional coat; if it is too thick, grind the surface to make it smooth.
Curing and Acceptance
The curing time is approximately 24 hours. Keep the environment well-ventilated to prevent the accumulation of solvent vapors.The surface can be prepared for topcoat application only when the Shore hardness (Type D) reaches ≥ 45 and the surface is smooth without particles.If blisters or cracks appear, check the moisture content of the base surface or potential material defects, and reprocess the surface before conducting further application.
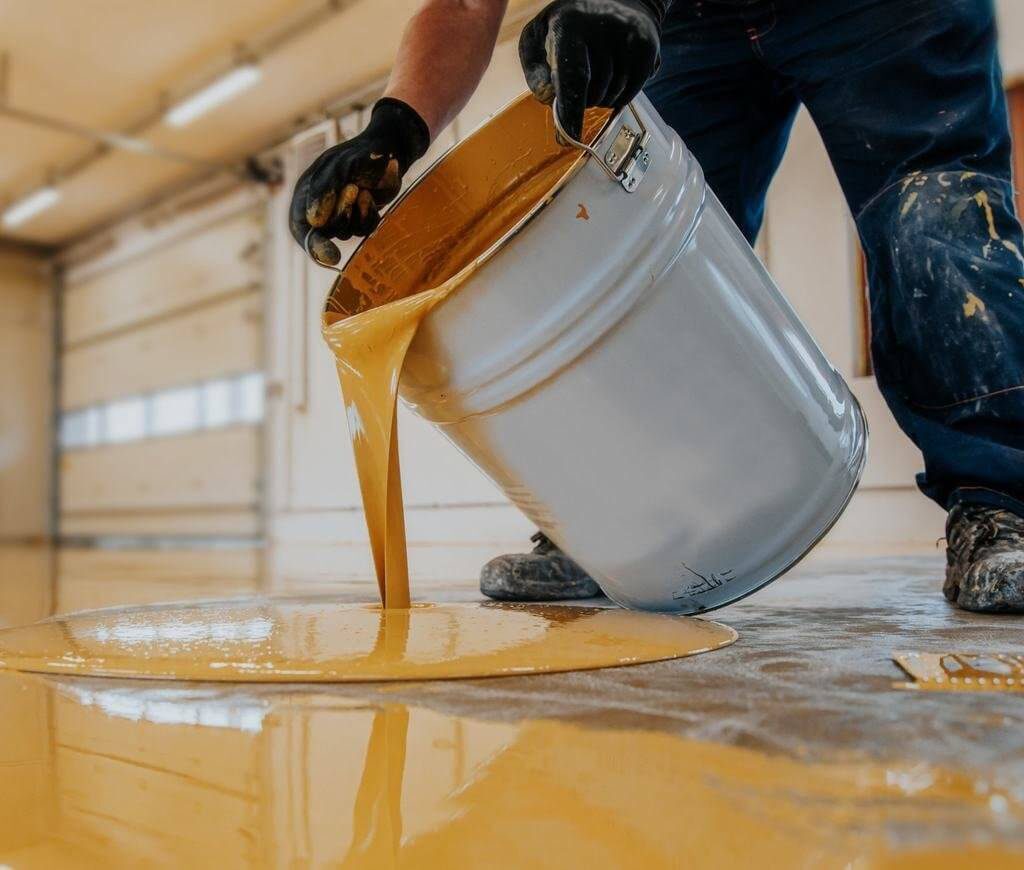
(4)Topcoat Application: Deliver the desired appearance and ensure the final performance
Preliminary Preparation
Prior to topcoat application, lightly abrade the surface of the intermediate coat with fine sandpaper to remove surface impurities and gloss, thereby enhancing interlayer adhesion. Subsequently, thoroughly clean away the dust with a vacuum cleaner.
Material Mixing and Application
Mix the topcoat and curing agent in the ratio specified in the product manual and stir thoroughly. Select either airless spraying or roller coating according to requirements:
Airless SprayingSet the spray gun pressure to 20–25 MPa and use a nozzle with a diameter of 1.2–1.5 mm. Maintain a moving speed of 40–50 cm/min and control the coating thickness at 0.1–0.3 mm. Overlap each coating pass by 50% and execute the application from the inner area to the outer perimeter.
Roller CoatingDip a short-pile roller into a small amount of topcoat, apply with light pressure and slow strokes to avoid air bubbles, and ensure uniform coverage of the base surface.
Application Requirements
The topcoat is typically applied in two coats with an interval of 2 hours between each coat. The total thickness of a standard epoxy topcoat shall be ≥ 0.5 mm (the topcoat thickness can be adjusted based on specific application scenarios).Conduct the application in an environment with a temperature of 15–30℃ and relative humidity ≤ 80%. Avoid construction on rainy days, under high-temperature exposure or in high-humidity conditions to prevent coating defects such as blushing, orange peel or pitting.During application, inspect the leveling property in real time. If any defects are found, immediately touch them up by gently wiping with a dedicated solvent.

3、Precautions
Post-application Curing
No foot traffic is allowed on the coated surface within 24 hours after topcoat application, and the surface can only bear loads after complete curing in 7 days. During the curing period, the construction area shall be closed off and warning signs shall be posted to prevent the coating from coming into contact with water, oil and chemical substances.
Maintain a well-ventilated curing environment with the temperature controlled between 10–35℃. After 48 hours, the stain resistance can be tested by gently wiping the surface with a damp cloth; avoid scratching with hard objects.
The recoating interval shall be strictly followed in accordance with the material instructions. Ensure that the subsequent coating is applied after the previous coat is surface-dry but before it is completely dry, so as to prevent the reduction of interlayer adhesion.
Safety and Environmental Requirements
During the application of solvent-based epoxy materials, adequate ventilation must be maintained at all times. Construction personnel shall wear a full set of protective equipment (including gas masks, gloves, goggles, etc.). Smoking and open flames are strictly prohibited in the construction area.
Material wastes (such as discarded paint buckets and solvent-soaked rags) shall be treated as hazardous waste and disposed of by professional institutions; random disposal is strictly forbidden.
In case of sudden conditions such as rain or temperature drop during construction, stop the operation immediately. Cover the coated areas with plastic sheeting for protection, and pay special attention to moisture-proofing of the solvent-based epoxy coatings.
Summary: The core of epoxy floor coating construction lies in attention to details. From base surface preparation and material proportioning, to process operation and post-application curing, every step must strictly comply with construction standards and product specifications. It is recommended to select professional floor coating suppliers and construction teams, which can maximize construction quality and extend the service life of the floor.