
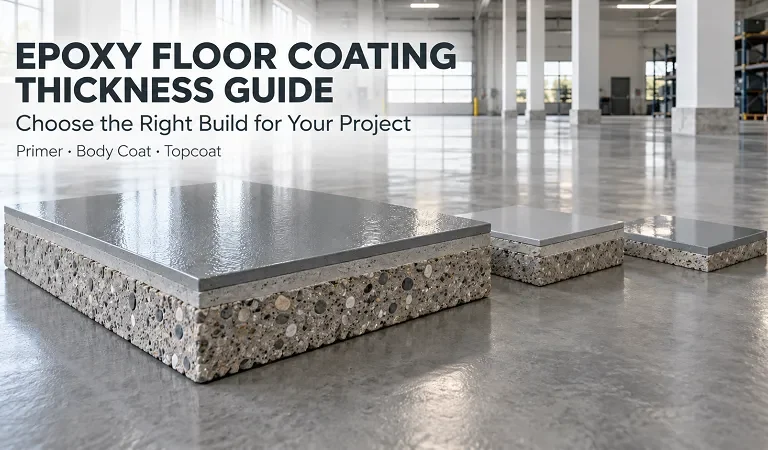
Coating Solutions

How Do Coating Solutions Help Improve Floor Protection?

Modern floors in industrial, commercial, and outdoor environments face challenges such as heavy traffic, chemical exposure, impact, and weather conditions. Choosing suitable coating materials is essential for improving surface durability, extending service life, and maintaining better performance. Different coating materials provide different advantages, making it important to understand how each system works before selecting the right option.

A complete floor protection system usually includes primer, middle coating, and topcoat layers. Materials such as epoxy, polyaspartic, polyurea, and polyurethane can be combined to create effective coating solutions for different application requirements. This guide explains the structure, materials, benefits, and selection factors of modern floor coating systems.

Coating Solutions2

What Are Coating Materials and How Do They Work?

Coating materials are essentially surface protection systems designed primarily to enhance the durability and performance of flooring and other underlying materials. Unlike simple paint applications, professional coating systems often use multiple layers to achieve better adhesion, strength, and resistance.

The Three Layers of Floor Coating Solutions

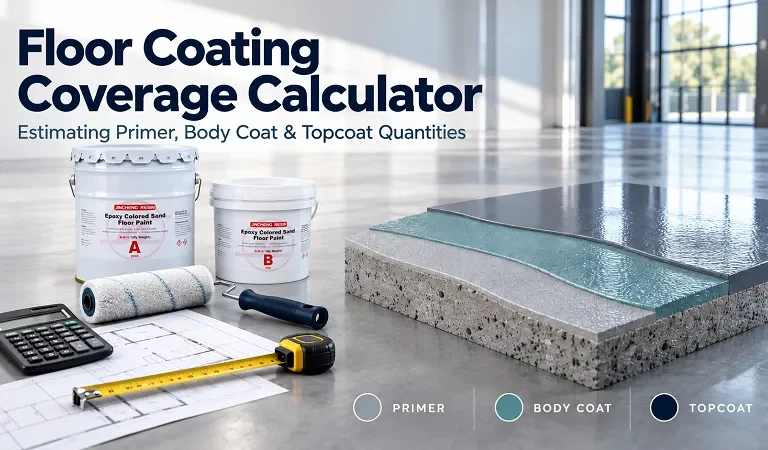
A typical floor coating system includes three main layers:

  • Primer Layer
    The primer creates a strong connection between the substrate and the coating system. Epoxy is commonly used as a primer because it provides excellent adhesion and helps prepare the surface for further coating layers.
  • Middle Coating Layer
    The middle layer increases coating thickness and improves overall protection. Depending on project requirements, it may include metallic coatings, decorative flakes, or other mixed coating materials to enhance both performance and appearance.
  • Topcoat Layer
    The topcoat provides the final protective surface. Materials such as polyaspartic, polyurea, polyurethane, or epoxy can be selected according to requirements for wear resistance, chemical protection, UV resistance, and surface performance.

Why Are Multi-Coating Methods Popular?

Most industrial applications require floors to endure constant wear, mechanical stress, and changing environments. Simple layering may offer some protection, but it usually does not suffice for tough requirements.

Key Benefits of Advanced Coating Materials

Modern coating solutions offer several advantages:

  • Improved resistance against abrasion and impact
  • Better protection from moisture and chemicals
  • Enhanced surface appearance and cleanliness
  • Longer floor service life
  • Flexible material combinations for different applications

By combining different coating materials, users can create a floor system that matches specific working conditions and performance expectations.

What Materials Are Used in Coating Solutions?

Different coating materials provide unique properties. Understanding their characteristics helps users select the right system for different environments.

Epoxy Coating Materials for Versatile Floor Protection

Epoxy is one of the most commonly used materials in floor coating solutions because of its strong bonding ability and wide application range.

Epoxy can be used as:

  • Primer for improving surface adhesion
  • Middle coating for adding thickness and strength
  • Topcoat for creating a smooth protective surface

Its versatility makes epoxy suitable for many industrial and commercial flooring applications where durability and cost efficiency are important.

Polyaspartic coating materials for High Performance

Polyaspartic coatings are generally used as topcoats in advanced coating solutions due to their excellent performance characteristics.

They provide advantages including:

  • Strong abrasion resistance
  • Good load-bearing capability
  • Improved UV resistance
  • Long-lasting surface protection

Because of these properties, polyaspartic coatings are often selected for areas requiring higher durability, such as heavy-duty floors and outdoor applications. Although the material cost is usually higher, it provides enhanced protection in demanding environments.

Polyurea and Polyurethane Coating Materials

Polyurea and polyurethane play a crucial role in modern floor protection systems. Polyurea coatings are available in different forms, including transparent and waterproof colored systems. They are suitable for applications requiring flexibility and strong protective performance.

Polyurethane coatings are commonly used as finishing layers, providing surface protection and improving resistance against daily wear. The selection depends on factors such as environment, performance requirements, and application purpose.

How to Choose the Right Coating Technologies?

Selecting suitable coating solutions requires considering the actual working environment, surface conditions, and expected performance.

Important considerations for selection

The right floor coating system will increase the floor’s longevity and reduce maintenance needs. When deciding on a floor coating system, one should consider:

  • Application environment: Indoor, outdoor, industrial, or commercial conditions affect material selection.
  • Performance requirements: Wear resistance, chemical resistance, and UV protection should match usage needs.
  • Layer structure: Primer, middle coating, and topcoat should work together for better results.
  • Surface conditions: Existing floor materials and preparation requirements influence coating performance.

Where are floor coating materials commonly applied?

Different industries rely on coating solutions to improve floor performance and maintain safe working environments.

l Industrial and Manufacturing Floors

Factories and workshops often experience heavy equipment movement, impact, and frequent cleaning. Multi-layer coating systems help protect surfaces and maintain stable performance during continuous operation.

l Commercial and Public Spaces

Shopping areas, garages, and commercial facilities require floors that combine durability with attractive appearance. Decorative coatings such as metallic finishes and flakes can provide both visual effects and surface protection.

l Outdoor and Special Applications

Outdoor areas require coatings with stronger resistance to weather conditions and UV exposure. Polyaspartic and other high-performance materials are often considered for environments requiring additional protection.

Future Trends in Coating Materials

The development of coating materials continues to focus on higher durability, improved efficiency, and better environmental performance. Advanced materials and optimized coating structures are helping industries achieve longer-lasting and more reliable floor systems. Future floor protection technologies are bound to become increasingly impressive: not only will they be more durable and faster to apply, but they will also be “tailor-made” to meet the specific needs of various venues.

Conclusion: Choosing Better Coating Solutions for Floor Protection

The right coating solutions can significantly improve floor durability, appearance, and resistance against daily challenges. From epoxy primers and middle coatings to high-performance polyaspartic, polyurea, and polyurethane topcoats, different materials provide flexible options for various applications.

Once you understand the coating’s structure and material characteristics, you can select the protective system best suited to your flooring. Explore our coating products and stay updated with advanced surface protection technologies to find solutions that better support your flooring projects.

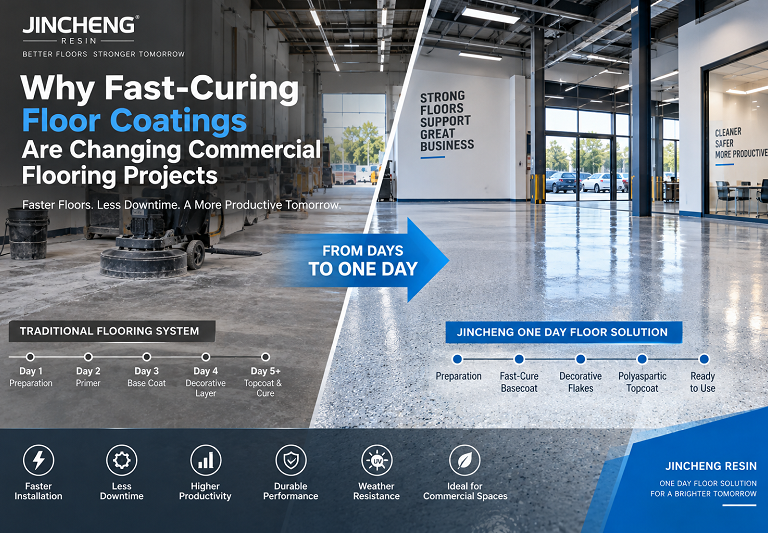
One Day Floor Coating System

One Day, Done Right: The Jincheng One Day Floor Coating System

Most floor coating projects ask you to clear the space, stay off the floor for three to five days, and plan around a week of disruption. For a homeowner, that means the car sits in the driveway for a week. For a commercial facility, it can mean days of lost operations.

The Jincheng One Day Floor Coating System was built around a different premise: a complete, professional-grade multi-layer system — moisture vapor barrier primer, epoxy base with full composite flake broadcast, polyurea topcoat — that goes from bare concrete to full vehicle traffic in 14 to 16 hours. One crew, one day, ready the next morning.

This isn’t a thin-coat shortcut or a single-product application. It’s a three-layer system engineered so each layer cures fast enough to receive the next, and the final topcoat brings the kind of hardness that lets a car roll in before the crew is back for their second coffee.

One Day Floor Coating System

Who This System Is For

Homeowners who want a garage or basement floor that looks and performs like a professional install — without giving up the space for a week. The one-day window means your car is back inside overnight.

Commercial facilities — showrooms, restaurants, warehouses, fitness studios — where floor downtime costs money. A space that shuts down Monday morning and reopens Tuesday is manageable. A space offline for five to seven days is a different conversation.

Contractors and B2B buyers looking for a complete system that differentiates their offering. A one-day floor coating system is a genuine competitive advantage when bidding against installers still quoting five-day projects.


The System: Three Layers, One Day

Layer 1 — Epoxy MVB Moisture Vapor Barrier Primer

Layer 2 — Epoxy Rsein coating Base Coat with Full Composite Flake Broadcast

Layer 3 — Fast-Cure polyaspartic Topcoat

Each layer has a specific job. The primer seals the slab. The base coat creates the decorative surface. The polyurea closes everything with a hard, chemical-resistant finish that cures fast enough to allow vehicle traffic by the following morning.


The Installation Timeline

8:00 AM — Surface Preparation

Every successful floor coating starts here, and this system is no exception. The concrete is mechanically ground using dust-controlled equipment — diamond tooling that opens the concrete’s pore structure to a CSP 2–3 profile and removes any existing sealers, surface contamination, or failed coatings.

This step isn’t negotiable. No primer bonds reliably to a polished or sealed surface. The grinding creates the mechanical profile that the MVB primer penetrates and locks into. Cracks and divots are repaired with epoxy patching compound and allowed to set before any coating goes down.

Dust-controlled grinding also matters practically: it means the space doesn’t require extensive cleaning after prep, and the crew can move directly to priming without waiting for airborne debris to settle.


10:30 AM — Epoxy MVB Moisture Vapor Barrier Primer

The first coat is the one most people never think about — and the one that determines whether the whole system holds long-term.

The Jincheng MVB primer is a two-component, 100% solids, zero-VOC epoxy formulated specifically for high-moisture concrete substrates. It penetrates the mechanically opened pore structure and chemically bonds to the slab, creating a sealed interface that blocks moisture vapor transmission before it can reach the coating layers above.

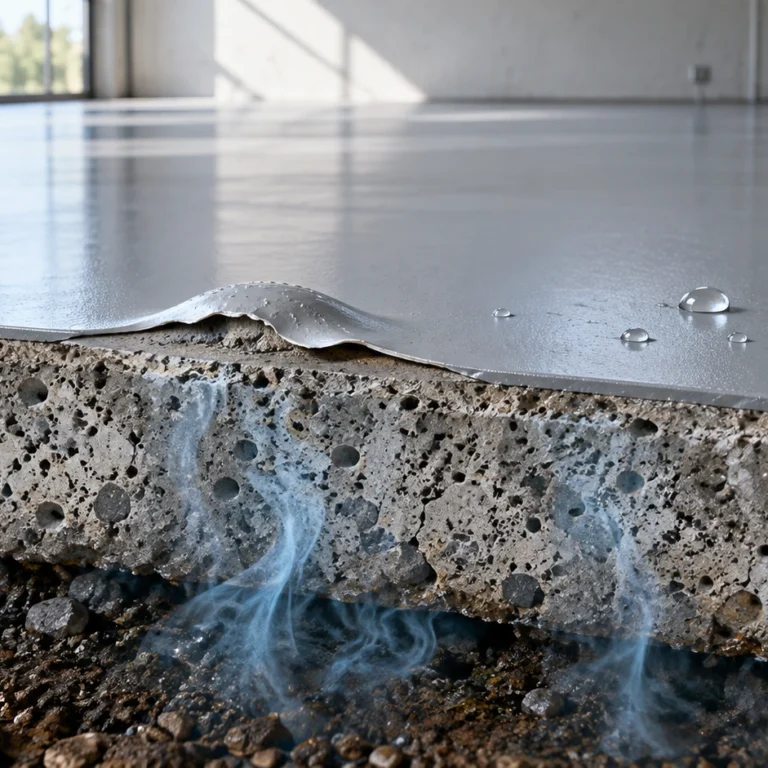
Why this matters: concrete slabs — particularly below-grade garage floors and basements — pull moisture vapor upward from the ground continuously. An impermeable coating applied without a vapor barrier traps that vapor pressure beneath it. Over time, that pressure finds the weakest adhesion point and the coating lifts. This is why most premature floor coating failures originate at the concrete interface, not at the surface.

The MVB primer solves this from the first coat. Key performance characteristics:

  • Two-component, 100% solids epoxy — zero carrier evaporation, minimal VOC load during application
  • Zero-VOC formulation — safe for enclosed spaces including basements and interior commercial floors without requiring additional ventilation beyond normal airflow
  • Low-temperature cure capability — bonds and cures reliably at room temperature and in below-grade environments where ambient conditions run cooler than ground-level spaces
  • Rated to control vapor emission up to 20 lbs/24hr/1,000 sq ft (ASTM F1869) — covers the overwhelming majority of residential and commercial concrete substrates

By 10:30 AM the primer is applied and beginning to develop its bond. The system clock is running.


1:00 PM — Color Epoxy Base Coat + Full Composite Flake Broadcast

With the primer tacked off, the base coat goes down: a 100% solids color epoxy in the specified finish color, applied at the correct coverage rate for the surface area.

Immediately after the base coat is applied — while it’s still fully wet — composite flakes are broadcast by hand until the surface reaches full saturation. This is the “broadcast to rejection” technique: flakes are thrown until the wet epoxy can’t accept any more, creating complete coverage of the base coat color underneath.

The composite flake system adds several layers of performance beyond appearance:

Texture and grip. A fully broadcast flake surface provides measurable slip resistance without added aggregate — the irregular flake surfaces create directional texture in every plane. In wet conditions, this performs significantly better than a smooth topcoat alone.

Visual depth. The multi-layer flake surface reads differently from different angles and under different light conditions. The depth effect comes from the base coat color showing through the flake matrix in specific areas — a characteristic of a properly saturated broadcast that thinner applications can’t replicate.

Concealment. Minor surface variations, patched cracks, and concrete imperfections disappear under a full flake broadcast. The floor reads as uniform and intentional rather than revealing the substrate history underneath it.

Durability buffer. The flake layer adds physical thickness at the mid-coat level, distributing point-load stress from equipment feet and vehicle tires across a larger area of the epoxy matrix rather than concentrating it at the surface.


4:00 PM — Flake Recovery and Surface Prep

Once the base coat has reached initial set — firm enough that the flakes are locked in but still slightly tacky on the surface — the loose overbroadcast is swept and vacuumed from the floor. This is a critical step that affects the finish quality of the topcoat.

Excess unbound flakes sitting on the surface would create an irregular, high-spot texture under the final coat. After collection, the surface is lightly scraped and smoothed to knock down any standing flake edges. What remains is a uniform, fully textured surface with the composite flake locked into the epoxy matrix beneath it, ready to receive the topcoat.


5:30 PM — Polyurea Topcoat

The final layer is where the system’s one-day performance claim is earned.

Standard epoxy topcoats cure slowly — walk-on at 12 to 24 hours, vehicle traffic at 48 to 72 hours minimum. Polyurethane is faster but still requires 24 to 48 hours before full service. Neither is compatible with a genuine one-day system.

Polyurea cures on an entirely different timeline. The Jincheng One Day system uses a fast-cure aliphatic polyurea as the finish coat — a chemistry that reaches full hardness within hours of application rather than days.

What the polyurea topcoat brings to the system:

Hardness above epoxy. Polyurea’s impact and abrasion resistance runs approximately four times that of standard epoxy. Under vehicle tires, loaded equipment, and daily foot traffic, this translates to a surface that holds its appearance significantly longer than an epoxy-topped floor.

Chemical resistance. Automotive fluids, degreasers, disinfectants, hot tire compounds — polyurea’s chemical resistance profile covers the full range of what a working garage or commercial floor encounters.

UV stability. The aliphatic formulation means no yellowing under sustained UV exposure. For spaces with significant natural light — garages with open doors, showrooms with skylights, studios — this is the difference between a floor that looks the same in year five and one that’s visibly aged.

Flexibility. Polyurea’s elongation at break exceeds 300% — the coating moves with the slab through thermal expansion and contraction rather than cracking at stress points. In climates with significant temperature variation or on slabs that experience seasonal ground movement, this resilience directly extends the coating’s service life.

Fast cure to service. Applied by 5:30 PM, the polyurea topcoat is developing hardness through the evening. By the following morning — 14 to 16 hours after topcoat application — the floor is ready for full traffic.


Next Day, 8:00 AM — Delivery

14 to 16 hours after the polyurea goes down, the floor is fully open to pedestrian and vehicle traffic. The project that started with bare concrete yesterday morning is a finished, professional-grade floor system this morning.

For homeowners, this means the garage is functional again before the workday starts. For commercial operators, it means a facility that went offline Monday morning is operational again Tuesday. For contractors, it’s a project timeline that fits within a standard working day with no site babysitting, no extended access requirements, and no explaining to clients why the floor still can’t be touched on day four.


System Performance Summary

PropertyPerformance
Total installation time~9.5 hours (8:00 AM – 5:30 PM)
Return to pedestrian traffic14–16 hours after topcoat
Return to vehicle traffic14–16 hours after topcoat
Full chemical cure24–48 hours
Moisture vapor controlUp to 20 lbs/24hr/1,000 sq ft (MVB primer)
VOC profileZero-VOC (primer + base system)
UV stabilityExcellent — aliphatic polyurea topcoat
Topcoat impact resistance~4x standard epoxy
Expected service life15–20 years (residential/commercial)

Where the Jincheng One Day System Is Specified

Residential garages and basements — the primary residential application. Homeowners get a floor that looks and performs like a commercial install without the week-long disruption.

Commercial showrooms and retail — spaces that need to look sharp and can’t afford extended downtime. The decorative flake system in the base coat and the hard polyurea topcoat make the floor look intentional and hold that appearance under daily traffic.

Restaurants and food service — the zero-VOC primer and base system make enclosed space installation practical, and the polyurea topcoat provides the chemical resistance that food service environments require. (Specific food service applications should confirm NSF-compliant topcoat specifications.)

Industrial and warehouse facilities — the polyurea topcoat’s impact resistance and chemical resistance profile matches heavy-use industrial requirements. The one-day installation window makes scheduled maintenance recoating operationally viable.

Fitness facilities — hard surface, easy to clean, no odor retention in the final topcoat, and fast enough installation to reopen before the next morning’s classes.


Frequently Asked Questions

Can the system be installed in cold or below-grade environments? Yes. The MVB primer is specifically engineered to cure at room temperature and low ambient temperatures — a practical advantage in basements and below-grade commercial spaces where standard epoxy primers often require controlled temperature conditions.

What if my floor has significant moisture issues? The MVB primer handles vapor emission up to 20 lbs/24hr/1,000 sq ft. Active water intrusion through cracks or wall interfaces needs to be addressed structurally before any coating system is applied — the primer manages vapor transmission, not standing water entry.

Is the system suitable for outdoor surfaces? The aliphatic polyurea topcoat is UV-stable and suited for outdoor use. Full outdoor exposure specifications should be confirmed with the jinchengresin technical team based on the specific application.

What maintenance does the system require? Routine cleaning with pH-neutral cleaners. The polyurea topcoat is non-porous and doesn’t require sealing. Depending on traffic levels, a topcoat refresh every 8–12 years extends the system’s service life at a fraction of a full reinstallation cost.


Talk to the Jincheng Team

The Jincheng One Day Floor Coating System is available for residential projects, commercial installations, and OEM/private label supply. Contact the jinchengresin team for technical specifications, coverage rates, product data sheets, and contractor pricing.

Metallic Garage Floor Coating

Metallic Garage Floor Coatings: Are They the Future of Flooring Solutions?

In recent years, metallic garage floor coatings have rapidly gained popularity in the residential, commercial, and industrial flooring markets, thanks to their stunning visual appeal and exceptional durability. Many individuals are now considering metallic garage floor coating to enhance the beauty and protection of their garages or high-traffic floors. The standards for flooring solutions are becoming more stringent, and in this regard, metallic epoxy garage floor coatings not only fulfill aesthetic requirements but also act as protective elements.

Metallic Garage Floor Coating

Layered Structure of Metallic Epoxy Garage Floor Coating

Nowadays, metallic garage floor coatings consist of a multi-layer structure that provides improved adhesion, durability, and finish. Unlike one-layer paints, layers system makes it possible to combine several materials into a single structure that would be more efficient than any of them on its own.

Structure of standard layers of metallic epoxy garage floor coating:

  • Base layer (primer layer of epoxy nature) for providing adhesion and sealing
  • Decorative or functional middle layer which can include metallic pigments, flakes, or aggregate mixture
  • Top protective layer which consists of epoxy, polyurethane, or polyurea systems

In case of more complicated metallic epoxy garage floor coatings, polyurea-based topcoats (especially polyaspartic systems) are frequently employed due to their superior abrasion resistance and UV stability, even though they cost more.

Modern Design Trends for Metallic Epoxy Garage Flooring

The design trend of metallic epoxy garage floor coating is highly influenced by design trends in modern architecture and interiors. People no longer opt for simple concrete floors but go for something more appealing through metallic designs. Main design trends of metallic epoxy garage floor coating:

Main design trends of metallic garage floor coating:

  • Marble-like fluid metallic patterns
  • High-gloss reflective surfaces
  • Custom color blending systems
  • Seamless decorative flooring finishes

These characteristics make the metallic epoxy garage floor coating extremely popular not only for garage floors but also for showrooms, commercial buildings, and even interior decoration.

Metallic Garage Floor Coating vs Traditional Epoxy Systems

Comparing metallic epoxy garage floor coating to conventional epoxy flooring systems, the difference between them is noticeable mostly in terms of appearance and coating layer construction.

Benefits of metallic epoxy garage floor coating:

  • More decorative and visually dynamic finish
  • Customizable color and texture effects
  • Strong base protection when properly layered
  • Suitable for high-end interior design applications

Conventional epoxy floor systems tend to be more straightforward and may involve a single coating system. Metallic epoxy garage floor coating, on the other hand, involves the application of a more complex system that entails primer, mid-coat, and protective topcoat layers.

Metallic Epoxy Garage Floor Coating Application Areas

The metallic garage floor coating system is extensively used in areas requiring a combination of durability and aesthetic qualities. Thanks to its exceptional versatility, this product is perfectly suited to meet the requirements of a wide range of projects.

Residential metallic epoxy garage floor coating applications

For residential garage floors, metallic epoxy garage floor coating helps create an elegant and smooth appearance.

Commercial metallic epoxy garage floor coating applications

For commercial locations like exhibition halls and stores, metallic epoxy garage floor coating serves to improve aesthetics while providing enough strength against heavy loads.

Industrial environments using metallic epoxy garage floor coating

In light industrial areas, metallic epoxy garage floor coating can be combined with epoxy or polyurethane systems for improved wear resistance.

Metallic Epoxy Garage Floor Coating Material System Breakdown

The performance of metallic garage floor coating depends heavily on the materials used in each layer of the system. Different resin types contribute different functions.

Metallic epoxy garage floor coating system consists of:

  • Epoxy resin: can be utilized in primer, middle coat, or complete coating systems
  • Polyaspartic / polyurea topcoats: A high-performance topcoat offering superior abrasion and UV resistance.
  • Polyurethane coatings: typically used as protective top layers in general flooring systems

In cases of less complex metallic epoxy garage floor coatings, one coating layer may be required, but this affects the durability of the coating.

How to Select the Best Metallic Epoxy Garage Floor Coating System

The selection of the best metallic epoxy floor coating system requires consideration of several factors, including structure, among others.

Selection factors for metallic epoxy garage floor coating:

  • Expected traffic load and usage intensity
  • Indoor or outdoor environment conditions
  • Required chemical and abrasion resistance
  • Budget for multi-layer coating systems

For instance, metallic epoxy coatings in garage floors that perform exceptionally well incorporate polyaspartic topcoats in order to increase their durability, while standard coatings depend on epoxy topcoats.

Factors to Consider When Maintaining Metallic Garage Floor Coating

Another highlight of metallic epoxy garage flooring is that, once properly installed, it requires no maintenance and offers complete peace of mind. Nevertheless, maintenance practices will determine its performance in the long run. It will help increase the longevity of the coating and keep it looking beautiful.

Suggestions on how to maintain metallic garage floor coating:

  • Cleaning to prevent dirt accumulation
  • Avoid strong mechanical impact on coated surfaces
  • Please use a mild detergent; do not use harsh chemicals
  • Inspect coating layers periodically for wear

Future Trends in Metallic Garage Floor Coating Systems

The future of metallic epoxy garage floor coating is highly dependent on developments within resin technology and environmentally friendly flooring materials. With the rising demand for aesthetic and sturdy floors, future developments will ensure that there is further improvement in performance. The aforementioned developments imply that metallic garage floor coating will gain popularity in various sectors.

Emerging trends in metallic epoxy garage floor coating:

  • More durable UV-resistant topcoats
  • Faster curing coating systems
  • Eco-friendly resin formulations
  • Enhanced decorative customization techniques

Final Remarks on Metallic Epoxy Garage Floor Coating

As trends in flooring continue to develop, metallic epoxy garage floor coating presents itself as one of the options that provides the best balance of durability and contemporary look. With its multi-coat construction, the system provides flexibility in terms of functionality and design. If you are in need of flooring that can satisfy your needs in terms of decoration and durability, then metallic resin floor coating systems should be considered.

For more metallic garage floor coating solutions, explore our product range to find suitable system options for your project. Contact us for technical support and customized flooring recommendations.

Gym Floor Coating

Best Floor Coating Options for Home Gyms and Commercial Fitness Facilities

Garage floors and gym floors get compared a lot. They shouldn’t be. A gym floor sees things a garage doesn’t — dumbbells dropped from waist height, loaded barbells dragged sideways, sweat pooling in the same spot daily, and cleaning chemicals strong enough to cut through that sweat applied six days a week. Heavy equipment sitting in the same position for years concentrates hundreds of pounds into a footprint the size of a fist.

The coating system that works in a garage isn’t automatically the right answer for a gym. What follows is a practical guide to what actually holds up in fitness environments — and why the zone matters as much as the coating.

Gym Floor Coating

What the Floor Is Actually Dealing With

Four things, specifically.

Impact. Rigid coatings — epoxy, polyaspartic — don’t absorb shock. A 45-pound plate dropped from knee height onto bare epoxy can chip or crack the surface. That single drop isn’t the problem. A thousand of them, over years, in the same area, is. The damage accumulates at stress points: under rack feet, near weight storage edges, wherever the floor takes repeated point-load hits.

Moisture. Sweat pools in cardio zones. Water bottles tip over. Commercial facilities mop daily. The floor needs to be non-porous enough that none of this soaks in — but smooth enough that it becomes a slip hazard when wet if you don’t address the surface texture explicitly.

Chemical exposure. Commercial gym cleaning protocols run harder than most people expect — quaternary ammonium disinfectants, hydrogen peroxide-based products, sometimes diluted bleach. Most floor coating topcoats handle these fine when used occasionally. Daily exposure over years is a different story. Coatings that fail under cleaning chemicals don’t announce it — they just start looking worn, then dull, then soft.

Sustained load and abrasion. Treadmills run in the same spot at constant friction for years. Cable machine feet press into the surface without moving. Users drag plates and dumbbells rather than lifting them properly. The surface needs to resist that kind of localized, repetitive mechanical stress without showing it in year two.


Epoxy vs. Rubber — Why This Is the Wrong Question

This debate comes up in almost every gym floor conversation, and the framing is misleading. Epoxy and rubber solve different problems. They aren’t competing for the same job.

A coated concrete floor — epoxy, polyaspartic, or any coating system — is good at being cleanable, seamless, moisture-resistant, and visually finished. It is not built to absorb the impact of a dropped weight or to cushion the repetitive joint load of plyometric training.

Rubber is good at exactly those things. It’s not good at being seamless, easy to keep bacteria-free, or resistant to long-term moisture beneath it.

The setup that performs best in practice is both: a coated slab underneath, rubber in specific zones where impact and cushioning matter. That’s not a compromise — it’s using each material for what it actually does well. Most professional gym installations work this way by default.


The Coating Options That Hold Up

100% Solids Epoxy floor coating with Anti-Slip Aggregate

The cost-accessible baseline for gym floor coating. Creates a seamless, non-porous surface that handles moisture, resists bacteria buildup, and holds up under fixed equipment — treadmills, cable machines, bikes — without issue under normal operating conditions.

The slip problem is real and needs to be addressed explicitly. Quartz or aluminum oxide broadcast into the topcoat adds measurable grip. This isn’t optional in any zone that sees sweat. Without it, a smooth epoxy floor plus wet feet is a genuine safety problem.

Where the limits show: anywhere weights get set down hard or dragged repeatedly. The rigidity that gives epoxy its compressive strength also means it doesn’t absorb impact. Repeated point-load stress — under rack feet especially — accumulates as chipping over time, not all at once.

Where it belongs: Cardio zones, yoga and stretching studios, functional training areas, locker rooms, storage. Home gyms where the primary activity is cardio or bodyweight training. Cost: $5–$10/sq ft installed | Lifespan: 8–12 years


Polyaspartic Floor Coating

Polyaspartic cures harder than standard epoxy — and that hardness translates to better abrasion and impact resistance, not just a glossier finish. The aliphatic chemistry means it won’t yellow under UV, which matters in studios with significant natural light.

Two things make polyaspartic specifically practical for gym environments:

The odor situation. Rubber flooring holds smells. A non-porous polyaspartic surface doesn’t — cleaning it properly is enough to keep odors from building up. In a commercial facility with hundreds of daily users, this is a real operational difference that rubber-only installations constantly fight.

Return to service. Walk-on in 4–6 hours, full service in 24. A commercial gym shutting down for a week to recoat the floor loses meaningful revenue. Polyaspartic changes what’s practically installable during a short operational window.

The cushioning limitation is the same as epoxy — harder cure doesn’t mean impact absorption. Rubber in lifting zones is still the right call on top of a polyaspartic slab.

Where it belongs: Commercial facilities with tight downtime constraints, spaces with UV exposure, any facility where odor control matters, premium home gym builds. Cost: $8–$14/sq ft installed | Lifespan: 15–20 years


Epoxy Base + Polyurethane or Polyaspartic Topcoat

The system most experienced commercial gym installers actually spec. Epoxy goes down first for thickness, structural build, and adhesion cost-efficiency. Aliphatic polyurethane or polyaspartic goes over it as the wear surface — UV stable, harder, more abrasion-resistant than bare epoxy.

Polyurethane adds something else worth noting: elongation at break of 100–300%, versus near-zero for rigid epoxy. It’s not the same as rubber flexibility — not by a long way — but in zones where equipment gets moved rather than dropped (cable machines, cardio equipment, turf-drag areas), that additional flexibility reduces chipping accumulation over years.

The full commercial system: epoxy base, aliphatic topcoat, anti-slip aggregate throughout. Each layer does something different. The epoxy does the structural work. The topcoat handles the environment. The aggregate handles the safety.

Where it belongs: Complete gym floors where different zones share one coating system; cost-balanced alternative to full polyaspartic. Cost: $7–$12/sq ft installed | Lifespan: 12–15 years


Zone-by-Zone Breakdown

The single biggest planning mistake is treating the whole gym as one surface. Each zone has a different failure mode.

Cardio zone: Fixed equipment, constant friction, daily moisture. Coated slab with anti-slip aggregate handles this without issue. Rubber under individual machines is optional if machines already have rubber feet — useful as additional protection, not strictly required.

Free weight and lifting zone: This is where coating-only approaches hit their limit. Point-load impact from set-downs and drops is what the floor gets, repeatedly, in the same places. The right answer isn’t a tougher coating — it’s 8–12mm rubber over the coated slab at rack positions and lifting platforms. The coating handles the rest of the floor; the rubber handles the abuse.

Studio and group fitness: Bare feet, lateral movement, plyometrics — surfaces that see body-weight impact and directional friction. Anti-slip aggregate is essential. Matte or satin finish works better visually and shows less wear than high-gloss in this zone.

Locker rooms and wet areas: Perpetual moisture, chemical exposure, bare feet. Aluminum oxide aggregate (more aggressive than quartz) with a waterproof coating system. Seamless floor-to-wall transition is important — grout lines and tile seams harbor bacteria in high-moisture environments.

Entry and reception: Tracked-in grit, high visual exposure, the first impression of the facility. Decorative flake or metallic system with a hard polyaspartic topcoat holds up both aesthetically and physically.


System Comparison

SystemImpact ResistanceAnti-Slip (with aggregate)Odor ResistanceMaintenanceCost/sq ft
100% solids epoxyModerateGoodGoodLow$5–$10
PolyasparticGoodExcellentExcellentVery low$8–$14
Epoxy + polyurethane topcoatModerate–GoodGoodGoodLow$7–$12
Rubber (mat/roll)ExcellentExcellentPoorMedium$2–$8
Hybrid (coating + rubber zones)ExcellentExcellentGoodLow–MediumVaries

Four Things to Nail Down for a Commercial Install

Anti-slip numbers. OSHA wet floor COF ≥ 0.6 applies to commercial fitness environments. Ask for test data on the specified system with the aggregate broadcast included — not a general product claim.

Disinfectant compatibility. Confirm that the topcoat chemistry holds up to the specific cleaning products used in the facility. Quat-based and peroxide-based disinfectants are not the same thing, and not all topcoats handle both equally over daily long-term exposure.

Downtime budget. If the facility can’t shut down for more than 24–48 hours, polyaspartic is essentially the only viable recoat option. Factor this into the system selection, not just the cost comparison.

Warranty scope. Standard installation warranties sometimes carve out high-impact environments. Confirm the warranty specifically covers gym use before signing.


The Short Version

A coated concrete floor is the right base for almost every gym environment — clean, seamless, non-porous, and far more maintainable than bare concrete or rubber-only setups. Where it needs help is in zones where weights actually hit the floor, and the answer there isn’t a different coating. It’s rubber in those specific spots on top of the coating.

Home gym: 100% solids epoxy with anti-slip aggregate gets you 80% of the way there. Upgrade to polyaspartic if the build warrants it.

Commercial facility: polyaspartic or epoxy-polyurethane hybrid throughout, rubber in all lifting zones, 24-hour return-to-service capability, and aggregate in every zone that sees sweat.

Low Voc Floor Coating (2)

Eco-Friendly and Low-VOC Floor Coating Options for 2026

For most of the industry’s history, performance was the only number that mattered — hardness, chemical resistance, cure time. Environmental impact was an afterthought. If a product worked well, the fumes were just part of the deal.

That’s no longer true, and the shift happened faster than most people expected. Water-based epoxy formulations now account for over 30% of new installations across North America. Regulatory pressure out of California is tightening and spreading. Commercial facility owners are building low-VOC compliance into procurement contracts as a standard clause, not an exception. And the products have caught up — the performance argument for choosing solvent-based over low-VOC is thinner in 2026 than it’s ever been.

This guide covers what VOCs actually are, which systems are genuinely low-emission, what the certifications tell you, and how to specify a floor that’s clean from primer through topcoat.

Low Voc Floor Coating (2)

VOCs: What They Are and Why They Matter

VOC stands for volatile organic compound — carbon-containing chemicals that evaporate at room temperature. In traditional floor coatings, VOCs are present as carrier solvents: they reduce viscosity to make the coating applicable, then off-gas into the air during and after cure.

The health side of that equation is well documented. Sustained exposure at elevated concentrations causes headaches, respiratory irritation, and nausea — particularly in enclosed, poorly ventilated spaces. Some VOC compounds are classified as hazardous air pollutants (HAPs) at higher concentrations. At the environmental level, VOCs contribute to ground-level ozone formation, which is why state and federal regulators have been steadily tightening limits for the past decade.

For floor coating work specifically, the exposure window is the installation itself and the days immediately after. A solvent-based epoxy poured into a garage or basement in July can render the space uncomfortable — and genuinely problematic for anyone sensitive — for 48–72 hours of off-gassing. Low-VOC systems cut that window down to hours.


How VOC Limits Are Measured and Who Regulates Them

VOC content is reported in grams per liter (g/L), excluding water and exempt compounds. Quick reference:

CategoryVOC Content
Zero-VOC< 5 g/L
Low-VOC5 – 50 g/L
Standard solvent-based epoxy150 – 400+ g/L
California SCAQMD limit (architectural)100 g/L

A few frameworks worth knowing going into any commercial or compliance-sensitive project:

CARB (California Air Resources Board) sets the strictest state-level limits in the US. The practical significance: most major manufacturers now formulate to CARB compliance regardless of the end destination, because commercial buyers have adopted it as a de facto national benchmark.

EPA National Emission Standards govern HAPs in industrial coating applications at the facility level. Many facility managers require HAP compliance in contractor specs — it shows up in service agreements more often than people expect.

LEED v4 Low-Emitting Materials credit is the green building standard most directly relevant to floor coatings. Specifying LEED v4 compliant systems is now routine in healthcare, education, and government renovation projects.

GreenGuard Gold (UL) tests for actual air emissions rather than just chemical composition — stricter than measuring g/L alone. Schools and pediatric facilities frequently require it because it evaluates what’s actually in the air at occupancy, not what’s listed on the product data sheet.


Which Systems Are Actually Low-VOC

100% Solids Epoxy

Here’s the part that trips people up: 100% solids epoxy is low-VOC not because solvents were removed during formulation — it’s because there were never any solvents to begin with. Every component in the can is reactive. Everything in the mix becomes part of the cured coating. Nothing needs to evaporate.

Standard solvent-based epoxy uses petroleum-derived carriers to reduce viscosity. Water-based epoxy uses water. 100% solids uses neither — it’s a fully reactive chemistry that crosslinks without a carrier. That’s why the off-gassing profile is so low compared to what most people expect from an industrial-grade coating.

For enclosed spaces — garages, basements, commercial interiors — this matters practically. Most 100% solids floors are ready for light use within 24–48 hours with no residual odor. Industrial-grade hardness and chemical resistance, zero compromise from the low-VOC formulation.

VOC content: < 50 g/L typical; many formulations test below 5 g/L


Water-Based Epoxy

Water-based systems swap petroleum carrier solvents for water, which drops VOC content sharply — typically 20–50 g/L versus 150–300+ g/L for solvent-based alternatives. The trade is real, though: thinner build per coat, lower final hardness, shorter service life under heavy traffic than 100% solids.

Where water-based makes sense: occupied buildings with limited ventilation, projects that need same-day return to service, residential jobs where light-duty durability is sufficient. Where it doesn’t: industrial environments, heavy vehicle traffic, any application where a premium system is being specified.

VOC content: 20–50 g/L


Low-VOC Polyaspartic

Polyaspartic is aliphatic — UV-stable by chemistry — and most current formulations are available in low- or zero-VOC versions. The full performance package (UV stability, fast cure, hard topcoat, long service life) comes without the odor and emissions of solvent-based systems.

Cure speed is a secondary eco advantage that’s easy to miss: faster cure means less time with a wet coating in an occupied or partially occupied space. Less exposure window, less total off-gassing per project.

VOC content: Most formulations < 50 g/L; zero-VOC options available


Waterborne Aliphatic Polyurethane

Zero-VOC two-component waterborne aliphatic polyurethane topcoats exist and perform at the level of their solvent-based equivalents. Non-yellowing, non-chalking, UV-stable — the same properties that make aliphatic polyurethane the professional topcoat standard, reformulated for a zero-VOC application.

This matters at the system level: 100% solids epoxy base coat plus a zero-VOC waterborne aliphatic polyurethane topcoat is a complete, performance-grade floor system that meets the most stringent commercial VOC specifications from primer to finish.

VOC content: Zero-VOC formulations available (< 5 g/L)


Bio-Based Chemistry

The leading edge of the eco-friendly coatings market has moved past reducing VOCs to replacing the base chemistry entirely. Some manufacturers now offer systems built on sustainable gypsum and castor oil rather than petroleum-derived epoxy resins — free of VOCs, HAPs, and BPA, with residential lifetime warranties.

Still a small segment. Gaining traction on LEED projects, green procurement requirements, and with facility managers whose occupant health obligations go beyond VOC compliance. Worth knowing about for sensitive-use environments.


Spotlight: Jinchengresin Moisture Vapor Barrier Primer

The primer coat is the most overlooked source of VOC exposure in a floor coating project. It goes down first, in a space that’s usually the hardest to ventilate — below-grade, enclosed, often with limited airflow. Standard epoxy primers can carry meaningful VOC loads, and most people never think to check.

Jinchengresin’s Moisture Vapor Barrier Primer is a two-component, 100% solids, zero-VOC epoxy system. Zero contribution to VOC load at any phase of the project. It also cures at room temperature and low temperatures — an operational advantage in basements and below-grade applications where ambient conditions regularly fall below the floor temperature threshold most standard epoxy primers require.

For any project where the full coating stack needs to hold a low-VOC specification — commercial certifications, food service, healthcare, or a basement where ventilation is genuinely limited — a zero-VOC primer means the environmental profile is clean from coat one.


Four Things to Get Right When Specifying Low-VOC Systems

Verify the g/L number, not the marketing claim. “Eco-friendly,” “green,” “sustainable” — none of these terms have regulatory definitions. The number that matters is the g/L VOC content measured against a recognized standard (ASTM D2369, EPA Method 24, or equivalent). It’s in the Safety Data Sheet. Ask for it.

Know the difference between VOC content and VOC emissions. A product with low stated VOC content can still emit compounds during cure that degrade air quality. GreenGuard Gold tests what’s actually in the air at occupancy — not just what’s in the can. That distinction matters for schools, clinics, and anywhere children are present.

Specify every layer, not just the topcoat. A zero-VOC topcoat over a high-VOC primer is not a low-VOC system. The primer, base coat, any broadcast material, and the topcoat all contribute to the project’s total VOC load. If compliance matters, every component needs to meet the spec.

Match the certification to the requirement. CARB is not LEED v4. GreenGuard Gold is not GreenGuard. EPA federal standards are more permissive than California standards. Confirm the specific product meets the specific certification required — not just the category.


Quick Reference by Application

ApplicationRecommended SystemKey Consideration
Residential garage100% solids epoxy + waterborne polyurethaneEnclosed; odor during install matters
Basement / below-grade100% solids epoxy + zero-VOC MVB primerLimited ventilation = zero-VOC priority
Commercial kitchenWater-based or 100% solids + low-VOC polyurethaneNSF/ANSI 51 compliance also required
School / healthcareGreenGuard Gold certified systemEmissions test, not just VOC content
LEED projectLEED v4 Low-Emitting Materials compliantDocument every layer of the coating stack
Outdoor / UV-exposedLow-VOC polyasparticUV stability + low VOC in one system

The Short Version

The performance argument for solvent-based floor coatings is mostly gone. In 2026, the best-performing system for most applications — 100% solids epoxy base with a waterborne aliphatic polyurethane or polyaspartic topcoat — is also among the lowest-VOC systems available.

The real question isn’t whether low-VOC floors are durable enough. They are. The question is whether the system specified is genuinely low-emission at every layer — or whether “eco-friendly” is just being applied to the coat that shows.

Indoor Epoxy Floor Paint

Why Choose a 3-Layer Indoor Epoxy Floor Paint System?

Selecting the right indoor epoxy floor paint involves much more than picking a visual color or buying a single bucket of resin. In the case of industrial facilities, commercial buildings, and heavy logistics centers, the longevity of the floors is determined by an architectural process. Even though a one-layer coating process may look more appealing to thrifty managers, it usually does not withstand the heavy use made by foot traffic and vehicles. That is why global purchasers of flooring solutions are turning towards high-quality multi-layered resin systems.

Understanding the Layers of Indoor Epoxy Floor Paint

In order to obtain an industrial-quality finish, industry experts rely on a structured method that consists of three separate stages: the primer coat, the build coat, and the hard-top coat. Each of these layers serves a particular function in protecting the concrete surface from chemical leaks, physical damage, and abrasions.

1. The Important Function of Moisture Vapor Barrier (MVB) and Primer Coats

Before applying any decorative indoor epoxy floor paint, a professional installer evaluates the base concrete. A good primer is essential because it must be capable of adhering very well to the surface to prevent moisture vapor from coming up through the surface and causing the floor layers to separate from each other. Primers may either be epoxy resins or moisture-vapor-barrier epoxy primers that are capable of penetrating deep into the concrete capillaries and stopping any moisture from coming up through the ground.

2. Intermediate Mid-Coats for Thickness and Aesthetics

The intermediate layer is where the structural thickness and main aesthetic appeal of the indoor epoxy floor paint system are established. Depending on the project requirements, this middle coat can incorporate various advanced materials:

  • Metallic Systems: Utilizing metallic pigments mixed within clear epoxy resins to create strong, multi-dimensional, marble-like visual effects.
  • Flake Systems: Broadcasting vinyl chips over a colored epoxy base coat to provide texture, slip resistance, and high visual contrast.
  • Colored Sand Systems: Mixing quartz aggregate with high-grade polymers for maximum compressive strength in heavy-manufacturing zones.

3. High-Performance Top Coats for Long-Term Protection

The final layer seals the entire matrix. While traditional indoor epoxy floor paint can extend to the top coat, modern technical specifications often demand specialized polymers like polyaspartic polyurea or polyurethane. Polyaspartic coatings stand out as the high-end category of top coats; they are scratch-resistant, have excellent heavyweight-bearing ability, and are fully UV-stable to prevent any form of ambering. Polyurethane coatings are equally preferred for one-coat application as well as flex-top coatings because of their excellent chemical resistance.

Single-Coat Paint vs. Multi-Layer Systems

Feature / MetricSingle-Coat ApplicationThree-Layer Structural System
Material CompositionSingle layer of standard epoxy or polyurethaneMVB Primer + Decorative Mid-Coat + Polyaspartic Top Coat
Moisture ResistanceExtremely low; high risk of bubblingExcellent; MVB actively blocks vapor pressure
Load-Bearing CapacityLight foot traffic onlyHeavy vehicular traffic, forklifts, and machinery
UV DiscolorationTends to turn yellow over timeHigh UV resistance (when polyaspartic is used)
Lifespan6 to 12 months under commercial use5 to 10+ years with proper maintenance

Why Polyaspartic Overcomes Standard Floor Wear

When looking at the final sealing layer over your indoor epoxy floor paint, evaluating polyaspartic polyurea chemistry is essential. This premium coating cures rapidly, allowing commercial facilities to resume operations in a fraction of the time required by standard resins.

Enhanced Abrasion Resistance for B2B Facilities

In busy environments, floors face constant frictional wear from pallets and heavy machinery. Polyaspartic top coats deliver up to three times the abrasion resistance of standard indoor epoxy floor paint formulations. This dense molecular cross-linking ensures that undercoat designs—whether they are intricate metallic marbling or dense decorative flakes—remain shielded from continuous scratching.

Superior Chemical and UV Stability

Commercial storage spaces frequently handle oils, solvents, and cleaning detergents. Standard indoor epoxy floor paint can degrade or stain when exposed to harsh industrial chemicals. By including a polyaspartic or high-grade polyurethane seal, one forms a barrier that is completely resistant to chemical stains due to chemicals. Also, unlike standard epoxy, which tends to yellow under sun exposure through big windows, polyaspartic retains its clarity forever.

Choosing the Best System For Industrial Environments

Every commercial project requires a distinct material formulation balance. Traditional warehousing applications may benefit from a proven system that consists of a classic color system of flake or sand with a combination of epoxy primer, thick epoxy intermediate coating, and resilient polyurethane topcoat.

Where more advanced showroom or commercial applications are concerned, a metallic intermediate coat together with a crystal-clear polyaspartic topcoat can give unparalleled aesthetic value. If a project suffers from severe underground dampness, deploying a dedicated MVB primer before applying the main indoor epoxy floor paint layers is a non-negotiable step to prevent future layout failures.

Indoor Epoxy Floor Paint2

Connect with Flooring Formulation Experts

Do you want to elevate the performance of your next commercial project using commercial-quality flooring resins? Learn about our extensive selection of top epoxy primers, metallic mid-coats, and incredibly durable polyaspartic top coats. Speak with our technical sales department to get custom formulas, bulk purchase opportunities, and consultation for your next flooring project.

Floor Coating (2)

Anti-Slip Floor Coatings: A Guide to Keeping Your Workplace Safe

Slip, trip, and fall accidents are a nightmare for facility managers. Year after year, they top the charts as leading causes of workplace injuries worldwide. For businesses, these aren’t just statistics—they translate directly into lost productivity, skyrocketing workers’ comp claims, and messy legal battles that can ruin a company’s reputation overnight.

Most managers look out for obvious hazards like tangled cords or messy walkways. But the real culprit is often right under your feet: the floor itself. Perfectly polished concrete, sleek tiles, or standard epoxy resin can transform into an ice rink the second water, grease, dust, or industrial chemicals spill onto them.

That is where professional-grade anti-slip floor coating come in. This guide breaks down how non-slip flooring works, why your facility needs it, and how to choose the right system to keep your team safe and your business OSHA-compliant.

Floor Coating (2)

The Science Behind Anti-Slip Floor Coatings

A high-quality anti-slip floor coating is far more than just a thick coat of heavy-duty paint. It is an engineered surface treatment designed to maximize traction where it matters most.

The system works by blending a durable polymer base—usually epoxy, polyurethane, or polyaspartic resin—与 coarse aggregates. These aggregates, which can range from quartz sand and aluminum oxide to fine glass beads, give the cured floor a textured, sandpaper-like profile. This texture cuts right through the surface tension of liquid spills, allowing boot soles to grip the actual floor rather than hydroplaning over a slick film.

Decoding the Slip Resistance Metric (DCOF)

In commercial and industrial settings, we don’t guess if a floor is safe; we measure it using the Coefficient of Friction (COF).

  • Static COF (SCOF): The force needed to start a slip.
  • Dynamic COF (DCOF): The friction keeping you upright while your foot is already in motion.

To comply with modern ANSI and OSHA safety standards, commercial floors that are regularly exposed to moisture or contaminants should hit a DCOF rating of 0.42 or higher. Industrial non-slip coatings are formulated specifically to meet or beat this safety baseline.

Why Your Facility Needs Slip-Resistant Coatings

Skipping out on slip-resistant flooring is a gamble that rarely pays off. Investing in a proper non-slip surface offers immediate practical returns:

1. A Drop in Workplace Injuries

The absolute main goal here is keeping people safe. By adding reliable traction to high-risk zones, you protect your crew, your clients, and any vendors walking through your facility.

2. Bulletproof Regulatory Compliance

Regulatory bodies like OSHA and the ADA don’t treat floor safety as an option. They require businesses to maintain safe walking and working surfaces. If an accident happens and your floors are found wanting, you face massive fines.

3. Reduced Liability and Insurance Costs

A single slip-and-fall lawsuit can easily drain tens of thousands of dollars in legal fees and settlements. Installing an anti-slip coating gives you concrete proof that your business took proactive steps to prevent hazards, shielding you from major liability.

4. Hardcore Floor Durability

These systems pull double duty. Beyond saving your ankles, resins like epoxy and polyurethane act as a shield for the concrete beneath. They protect your substrate from chemical spills, impact damage, and the constant grinding of heavy forklift traffic.

High-Risk Zones Across Industries

Every workplace needs safe floors, but some environments are inherently messier and more hazardous than others.

Industry SectorHigh-Risk ZonesTypical Contaminants
Manufacturing & IndustrialAssembly lines, loading bays, machining zonesHydraulic oils, coolants, metal dust
Food & Beverage ProcessingCommercial kitchens, walk-in freezers, washdown areasCooking grease, water, animal fats, harsh sanitizers
Warehousing & LogisticsMain thoroughfares, packing stations, external rampsFine dust, forklift tire residue, tracked-in rain
Healthcare & HospitalityMain entryways, public restrooms, laundry roomsWater, liquid soap, slick cleaning chemicals

Choosing Your Material: Epoxy vs. Urethane vs. Polyaspartic

The right coating depends on your daily operations, what chemicals you spill, and how much downtime your business can tolerate during installation.

1. Epoxy Anti-Slip Systems

Epoxy is the classic choice for heavy industry. It bonds incredibly well to concrete and handles heavy weight and impacts without cracking.

  • Best for: Warehouses, automotive shops, and manufacturing plants.
  • The Perks: Highly customizable texture options and very budget-friendly for large areas.

2. Polyurethane (Urethane) Coatings

Urethane is more flexible than epoxy, which means it handles thermal shock (quick shifts from hot to cold) beautifully. It also won’t yellow or degrade when exposed to direct sunlight.

  • Best for: Outdoor loading docks, aircraft hangars, and industrial freezers.
  • The Perks: Exceptional UV stability and premium chemical resistance.

3. Polyaspartic and Polyurea Systems

If you can’t afford to shut down your business for days to let a floor dry, polyaspartic is your answer. It cures fast enough to handle full traffic within 24 hours.

  • Best for: 24/7 retail centers, busy hospitals, and main entrance corridors.
  • The Perks: Insanely fast cure times and can be applied in extreme temperatures.

Finding the Right Grit Level

Your floor’s texture needs to match the danger level of the room. If it’s too smooth, you still have a slip hazard. If it’s too rough, the floor turns into a giant piece of Velcro that destroys mops and traps dirt forever.

  • Fine Texture: Perfect for spots that get occasional moisture, like office restrooms or retail lobbies. It gives a slight grip but is still easy to clean with a standard mop.
  • Medium Texture: The sweet spot for general warehousing, busy assembly lines, and corridors that handle a mix of foot and forklift traffic.
  • Coarse Texture: Saved for the messiest spots—like food processing washdown areas, chemical containment zones, or steep outdoor ramps that get hit with rain and ice.

How Professionals Apply Non-Slip Coatings

A non-slip floor fails quickly if the installation crew cuts corners. Proper application follows a strict technical workflow:

[Mechanical Prep: Diamond Grinding] 
                  │
                  ▼
         [Penetrating Primer]
                  │
                  ▼
 [Base Coat + Sand/Quartz Aggregate Broadcast]
                  │
                  ▼
         [Durable Lock/Top Coat]

Step 1: Mechanical Surface Prep

You cannot skip this. The concrete must be clean, dry, and stripped of old paint or oils. Crews use diamond grinders or shot-blasters to open up the concrete pores, creating a profile that looks like fine sandpaper so the resin can grab hold.

Step 2: Priming

A dedicated primer is rolled out to seal the concrete slab. This stops air bubbles from rising up into the wet resin (outgassing) and guarantees a flawless bond.

Step 3: Base Coat & Aggregate Broadcast

The main resin layer is applied. While it’s still wet, workers broadcast the anti-slip aggregate (usually quartz or aluminum oxide) across the floor. Usually, they throw it “to refusal”—meaning they coat the floor until the wet resin can’t hold any more sand—ensuring a perfectly even texture.

Step 4: The Seal Coat

Once the base cures, the loose sand is swept and vacuumed away. Finally, a topcoat is rolled over the top. This layer locks the aggregate pieces permanently into place so they don’t chip out over time under heavy traffic.

Maintenance: How to Clean a Textured Floor

A common complaint is that anti-slip floors are tough to clean. It’s true that dirt likes to hide in the valleys of a textured floor, but you can keep them looking fresh with the right strategy.

Quick Cleaning Tip: Keep traditional string mops away from coarse non-slip floors. The grit will shred the mop strings, leaving your new floor covered in fuzzy lint.

  • Use Auto-Scrubbers: For large commercial spaces, a cylindrical brush auto-scrubber is a lifesaver. The spinning bristles reach deep into the textured valleys to lift out stubborn grease.
  • High-Pressure Washdowns: In commercial kitchens with floor drains, scrub the floor with a deck brush and a heavy-duty degreaser, then rinse it clean with a low-pressure hose.
  • Never Use Floor Wax: Applying standard floor waxes or polishes to a non-slip coating will fill in the textured profile, smoothing out the surface and completely ruining its slip resistance

Summary: Fix Your Floors Before Someone Falls

When it comes to workplace safety, being reactive is expensive. Waiting for an employee or a customer to get hurt before you fix a slick floor leads to lawsuits, fines, and down-time. Upgrading to a professionally installed, aggregate-infused anti-slip floor coating is a smart, permanent fix that lets your team work confidently and protects your bottom line.

Epoxy Floor Coating (2)

Can You Put Epoxy Floor Coating Over Painted Concrete Floors?

Technically yes, but it depends entirely on the condition of that paint. This is the question that comes up constantly from homeowners staring at a garage floor someone painted years ago, wondering if they can skip the demolition and just coat over it.

The honest answer sits in a gray area, and most articles online either oversimplify it into a flat yes or a flat no. Neither is accurate. Whether an epoxy floor coating will bond successfully over existing paint comes down to a handful of testable conditions — and skipping the testing is how most of these projects fail.

Epoxy Floor Coating (2)

Why This Question Is More Complicated Than It Sounds

Epoxy adheres best when it bonds directly to porous, prepared concrete. That’s the baseline assumption behind every epoxy floor coating product on the market — the chemistry is engineered to grip into a mechanically opened concrete surface.

Paint changes that equation entirely. When you coat over old paint, the success of the new epoxy relies completely on the bond strength of the existing paint layer to the concrete underneath. The epoxy isn’t bonding to concrete anymore — it’s bonding to paint, which is in turn bonding to concrete. You’ve added a link to the chain, and that link can be weaker than either end.

If that paint layer is compromised in any way — flaking, chalking, soft spots, poor original adhesion — the new epoxy has nothing reliable to hold onto. It might look fine for a few weeks. Then it starts coming up in sheets, often taking the old paint with it.


Step One: Test the Existing Paint Before You Do Anything Else

This isn’t optional, and it isn’t a five-minute formality. The test result determines your entire project path.

The tape test. Cut a small “X” into the paint with a utility knife. Press a strip of strong duct tape firmly over the cut, then rip it off quickly in one motion. Check what came up. If more than about 10% of the paint lifted with the tape, the existing coating is failing and needs to come off completely before any epoxy floor coating goes down.

Visual inspection. Walk the entire floor, not just one spot. Look for peeling edges, chalking (a powdery residue that rubs off on your hand), bubbling, or soft areas that give when pressed. Any of these signs across meaningful sections of the floor point toward full removal rather than coating over.

The water test. A few drops sprinkled on the surface tell you something useful: if the water beads up, the paint is likely oil-based; if it soaks in, it’s probably water-based or latex. This matters because the two paint types behave very differently under epoxy.

A small test patch. Before committing to the whole floor, mix a small batch of epoxy and apply it to an inconspicuous section. Let it cure fully per the product’s schedule, then check for adhesion issues, lifting, or soft spots. This is the closest thing to a guarantee you’ll get before the real project starts.


What the Paint Type Actually Means for Your Project

Not all paint behaves the same way under a new coating, and this is where a lot of DIY projects go sideways.

Oil-based or alkyd paint generally provides a better foundation than latex — it’s a harder, denser film with less porosity issue, and when it’s fully cured and properly profiled, it gives the new epoxy something more stable to key into.

Latex or water-based paint poses more of a challenge for epoxy adhesion. These paints are more flexible and less dense, which means the mechanical bond an epoxy needs to form is harder to achieve without aggressive surface prep. It’s not impossible — just less forgiving of shortcuts.

Multiple layers or unknown coatings are where caution is warranted. If you don’t know how many coats are on the floor, what products were used, or how old the bottom layer is, you’re working blind. Heavily weathered, many-coats-thick paint jobs are a strong signal to strip everything back to bare concrete rather than gamble on layering a new system on top.

Previous two-component epoxy paint is a specific exception worth flagging: don’t apply a new coating directly over an existing epoxy paint system without proper mechanical profiling first. Epoxy doesn’t absorb new epoxy the way concrete absorbs primer — without sanding or grinding to open the surface, the new layer just sits on top rather than bonding into it.


Surface Preparation: The Step That Actually Determines Success

Once you know the paint passes the tests, the real work starts — and it’s more labor-intensive than coating bare concrete, not less.

Clean everything first. Sweep and vacuum to remove loose debris, then degrease any oily or greasy areas — garages in particular tend to have automotive fluid stains that need targeted attention. A power washer handles heavily soiled sections effectively. Skipping this step means trapping contaminants under the new coating, which shows up later as adhesion failure.

Create a mechanical profile. This is the part that actually matters most. Light sanding works for small areas or thin paint layers; mechanical grinding with diamond tooling is the more reliable approach for full-floor projects. The goal is roughening the painted surface enough that the new epoxy floor coating has something to physically grip, not just sit on. Acid etching is generally not recommended over painted surfaces — it’s designed to work on bare concrete and doesn’t perform the same function on paint.

Consider a bonding primer. If the adhesion test showed marginal results, or if you’re working with oil-based paint, a primer specifically designed to bridge old coatings to new epoxy can meaningfully improve the odds. Manufacturers typically specify which primers are compatible with their epoxy systems — check the product data sheet rather than guessing.

Don’t skip moisture considerations. If the slab has any history of moisture issues, painting over it doesn’t solve that — it often masks it. Moisture vapor pushing up from below the concrete can cause blistering regardless of how well the paint and epoxy are bonded to each other. If you suspect moisture intrusion, that needs to be tested and addressed before any coating goes on, painted surface or not.


When You Should Just Strip the Paint and Start Fresh

There are situations where trying to save time by coating over paint actually costs more time in the long run.

The paint fails the tape test. If more than 10% lifts, that’s your answer. Coating over a failing bond just adds weight and stress to a connection that’s already breaking down.

You see active peeling or bubbling anywhere. Even isolated sections are a warning sign — those areas indicate the paint-to-concrete bond is already compromised, and it tends to spread.

You want maximum durability or a warranty. Commercial garages, high-traffic residential spaces, or any project where you’re investing in a premium epoxy floor coating system with a long-term warranty — most manufacturers won’t warranty an install over an unknown or marginal substrate. If durability is the priority, mechanical removal down to bare concrete is the safer investment.

You don’t know the paint’s history. Unknown coatings, unknown age, unknown number of layers — when you genuinely don’t know what you’re dealing with, the safe assumption is removal, not a hopeful coat-over.

Mechanical removal — diamond grinding being the gold standard — strips the old paint completely while simultaneously profiling the bare concrete underneath. You end up with the same clean slate you’d have on a never-painted floor, which is the most reliable foundation any epoxy floor coating can have.


Quick Decision Framework

ConditionRecommended Path
Paint passes tape test, no visible damage, oil-basedLight grinding + prime + coat
Paint passes tape test, latex/water-basedAggressive sanding/grinding + prime + coat
Paint fails tape test or shows peelingFull mechanical removal first
Multiple unknown layers, heavily weatheredFull mechanical removal first
Previous 2-part epoxy paint underneathGrind to profile before recoating
Any sign of moisture issuesTest and resolve moisture before either path
Commercial use or warranty requiredFull removal — don’t risk an unverified substrate

What Happens If You Skip the Testing and Just Coat Over It

This is worth spelling out plainly, because it’s the most common version of this project going wrong.

Someone sees old paint that “looks fine,” skips the tape test, does a quick clean and maybe a light sand, and applies a fresh epoxy floor coating directly over it. For a few weeks, it looks great. Then foot traffic, hot tires, or just time start finding the weak points. The new epoxy peels — but it peels along with the old paint underneath it, in sheets, because the failure point was never the new coating. It was the paint-to-concrete bond that was already failing before anyone touched it.

At that point, you’re not just redoing the epoxy. You’re removing two failed coating layers instead of one, which costs more in labor and material than if you’d ground the floor down to bare concrete from the start.


The Bottom Line

You can apply epoxy over painted concrete — but only when the existing paint passes a real adhesion test, the surface gets properly profiled rather than just cleaned, and the paint type and history are actually known rather than assumed. When any of those conditions aren’t met, mechanical removal back to bare concrete isn’t the more cautious option — it’s the only option that reliably works.

A few hours spent testing and preparing properly is the difference between a floor that lasts 10-plus years and one that needs to be redone twice.

Industrial Epoxy Floor Coating

Industrial Epoxy Floor Coating: A Complete Guide to Systems and Application

When upgrading a commercial or industrial space, few investments offer the return of a high-performance floor. An industrial epoxy floor coating provides a seamless, durable, and chemical-resistant surface that withstands heavy machinery, forklift traffic, and harsh environmental conditions. However, understanding the chemistry and application process is vital for success. This guide explores the multi-layer systems, material differences, and application standards required for a professional finish.

Understanding the Multi-Layer System of Industrial Epoxy Floor Coating

A common misconception is that flooring is a single layer of paint. In reality, a robust industrial epoxy floor coating is a composite system, typically consisting of three distinct layers: the primer, the intermediate coat, and the topcoat. Each layer serves a specific structural or protective function, working together to create a unified shield.

Industrial Epoxy Floor Coating

The Primer (Base Coat): The Foundation of Adhesion
The foundation of any flooring system is adhesion. The primer penetrates the concrete substrate to create a strong mechanical bond. Epoxy is the standard material for this layer due to its exceptional penetrating properties and adhesion strength. Without a high-quality primer, even the most expensive topcoats will fail.

However, not all primers are created equal. Depending on the site conditions, you may need specific solutions:

  • Standard Epoxy Primers: Ideal for dry, stable concrete substrates where maximum penetration is required to lock the system into the pores of the slab.
  • Moisture Vapor Barrier (MVB) Primers: In environments where moisture is a concern—such as ground-level slabs or older buildings—a standard primer may not suffice. Moisture vapor transmission is a “silent killer” that causes blistering and delamination. An MVB primer is a specialized, two-component, 100% solids epoxy designed specifically to stop moisture migration, ensuring the longevity of your industrial epoxy floor coating installation before the main body is applied.

The Intermediate Coat (Body Coat): Building Strength and Style
This layer builds thickness and structural integrity. For an industrial epoxy floor coating, this is often where functional additives are introduced to customize performance and aesthetics. Depending on the facility’s needs, different materials can be used in this stage:

  • Colored Sand Systems: By mixing colored quartz sand into the epoxy resin, you create a textured, highly durable surface. This is excellent for areas requiring high traction, such as ramps or wet processing areas, adding both slip resistance and visual appeal.
  • Vinyl Flake Systems: Vinyl flakes are broadcast onto the intermediate coat. They add a decorative element but also significantly increase the thickness of the film build. This “chip” system helps hide subfloor imperfections and adds durability to the industrial epoxy floor coating.
  • Metallic and Marble Effects: For showrooms or high-end commercial spaces, metallic powders or marble-effect pigments can be mixed with clear epoxy. This creates a swirling, three-dimensional look that transforms a utilitarian floor into a design feature, proving that an industrial epoxy floor coating can be both tough and beautiful.

The Topcoat (Wear Layer): The Ultimate Shield
The topcoat determines the floor’s resistance to UV rays, abrasion, and chemicals. While basic epoxy can be used as a topcoat, advanced chemistries like Polyurethane and Polyaspartic are often preferred for their superior performance characteristics.

Our Epoxy Floor Coating Collection

We provide one-stop industrial epoxy flooring solutions, meeting your requirements for both aesthetics and functionality. From heavy-duty moisture protection to high-end decorative finishes, our product line ensures durability and style for any project.

1. MVB Epoxy Primer

The foundation of a long-lasting floor. Our MVB epoxy primer is a two-component, 100% solids product designed primarily to prevent moisture vapor from rising through the concrete. It creates a superior mechanical bond, preventing blistering and delamination, ensuring your topcoat stays intact for years.

2. Flake Epoxy Floor Coating

A perfect blend of safety and style. This system incorporates colored vinyl flakes broadcast into an epoxy base. It creates a textured, anti-slip surface that is ideal for hiding subfloor imperfections. Commonly used in garages, showrooms, and commercial plazas for its durability and attractive “terrazzo-like” finish.

3. Colored Sand Epoxy Floor Coating

Built for heavy traffic and outdoor durability. This solvent-free, self-leveling system mixes epoxy resin with colored quartz sand. It offers exceptional compressive strength and wear resistance. It is the go-to choice for walkways, patios, and industrial areas requiring a skid-resistant, seamless surface.

4. Metallic Epoxy Floor Coating

Luxury for your floor. When we mix clear epoxy with pearlescent mica powder, the resulting coating creates a highly vivid, three-dimensional marble effect. It is completely UV-resistant and delivers a seamless, high-gloss finish. Whether applied in residences, lobbies, or retail showrooms, it transforms the space into a work of art.

5. Marble Epoxy Floor Coating

It offers the realistic look of natural stone while requiring absolutely no maintenance. This self-leveling coating mimics the elegant veining of marble. It provides a hard, scratch-resistant surface that is easy to clean and maintain, offering a sophisticated aesthetic for offices and high-end commercial interiors.

Why Choose Jincheng?

Whether you need the moisture protection of our MVB Primer or the decorative flair of our Metallic and Marble systems, Jincheng provides the complete package.

  • Versatility: Solutions for industrial warehouses, commercial spaces, and residential homes.
  • Performance: High resistance to chemicals, abrasion, and heavy loads.
  • Aesthetics: A wide variety of colors and finishes to match your design vision.

Application Best Practices for Industrial Epoxy Floor Coating

To ensure the success of an industrial epoxy floor coating, preparation is 90% of the work. Even the best materials will fail if applied incorrectly.

  • Surface Preparation: The concrete must be profiled, usually via diamond grinding or shot blasting, to open the pores for the primer. This ensures the industrial epoxy floors bond mechanically rather than just sitting on the surface.
  • Environmental factors: The temperature and humidity of the construction environment play a crucial role during the curing process. Polyaspartics are more forgiving in colder temperatures, while standard epoxies require moderate heat to cure correctly.
  • Mixing Ratios: Epoxy systems are chemical reactions. Deviating from the specified mix ratio (e.g., 2:1 by volume or weight) will result in a floor that never fully cures or remains tacky. Precision is key to a durable industrial epoxy floor coating.

Conclusion

Whether you are outfitting a heavy manufacturing plant or a commercial showroom, the right flooring system is an investment in safety and efficiency. By understanding the distinction between the primer (like MVB), the body coat (using flakes or colored sand), and advanced topcoats like Polyaspartic, you can specify a system that meets your exact needs. An industrial epoxy floor coating is not just paint; it is a complex, engineered shield designed to protect your assets for years to come.

Need expert guidance on selecting the right system for your facility? Contact us today to discuss your project and find the perfect flooring solution.

Epoxy Floor Coating

Can You Use Epoxy Floor Coating Outdoors? What Works and What Doesn’t

The short answer is: it depends entirely on what you mean by “epoxy” and what kind of outdoor exposure the surface gets.

Standard aromatic epoxy — the most common type, the one in most garage floor kits — does not work outdoors. Not for long, anyway. Epoxy floor coating lacks the durability needed to withstand UV exposure, temperature swings, moisture, and outdoor traffic, which causes it to yellow, crack, peel, and degrade rapidly. The chemistry behind that failure is specific and predictable, and it’s not a quality issue — it’s a fundamental limitation of how aromatic epoxy responds to sunlight.

But “epoxy” as a category is broader than one product type. There are scenarios where epoxy-based systems work outdoors, and there are alternatives built specifically for surfaces that live outside. Understanding the difference is what determines whether your patio, pool deck, or driveway is still looking good in five years.

Epoxy Floor Coating

Why Standard Epoxy Fails Outdoors

Standard epoxy resin yellows when exposed to sunlight over time and eventually develops a chalky appearance as UV radiation breaks down the epoxy molecules. This is a fundamental chemistry limitation, not a quality problem. Even the highest-grade epoxy will yellow under direct UV exposure.

The specific issue is aromatic chemistry. Most epoxy resins are aromatic — meaning they contain benzene ring structures in the polymer chain that are inherently unstable under UV radiation. When sunlight hits an aromatic epoxy, photons break those bonds, and the byproducts are yellow and brown chromophores. The floor doesn’t just look bad — the coating itself is structurally degrading.

But UV is only one part of the outdoor problem. Temperature fluctuations cause standard epoxy to crack or delaminate. Moisture exposure from rain, humidity, and other forms of moisture can compromise epoxy adhesion, leading to peeling or bubbling.

Here’s how each failure mode plays out in practice:

UV degradation: Yellowing starts within months on a south-facing surface. Most epoxies only survive 3–5 years outdoors before moisture causes them to peel away. In climates with intense sun, that timeline shortens further.

Thermal cycling: Outdoor concrete moves — expanding in heat, contracting in cold. In cold climates, freeze-thaw cycles can be especially damaging. Rigid epoxy doesn’t move with it. Over time, the stress concentrates at the coating-concrete interface and the coating cracks or delaminates at those stress points.

Moisture: If not applied correctly, moisture can get trapped under the epoxy, leading to bubbling or peeling of the floor coating. Outdoor slabs are exposed to rain, ground moisture, and freeze-thaw pressure from below — all of which push against a non-permeable coating from the underside.

Slip risk: When wet, epoxy surfaces can become very slick. This is a real risk for areas with heavy foot traffic. A high-gloss epoxy on a rain-exposed patio or pool deck creates a safety issue that aggregate additives can partially address, but don’t fully eliminate.


Where Epoxy Can Still Work Outdoors (With Conditions)

Don’t use epoxy on outdoor surfaces with direct UV exposure, concrete with active moisture intrusion, structurally damaged slabs that haven’t been repaired, surfaces requiring same-day return to service, or sealed concrete that hasn’t been ground first.

That list of exclusions is long — but it also implies that epoxy can work outdoors when those conditions aren’t present.

Covered or shaded outdoor surfaces are the most viable case. A covered patio, a carport, a covered loading dock, or any surface that’s protected from direct sun and rain significantly extends epoxy’s useful life. If UV is the primary failure mechanism and UV is largely absent, the chemistry problem goes away. Many covered outdoor spaces with epoxy floors perform similarly to indoor garages.

Epoxy as a base coat with UV-stable topcoat is the more sophisticated answer. Polyaspartics and advanced polyurethane coatings provide exceptional color retention and gloss longevity. These systems can be layered over epoxy primers for combined structural and UV performance. An epoxy base coat provides thickness, adhesion, and structural build — a polyaspartic or aliphatic polyurethane topcoat provides the UV barrier. This is how many professional outdoor floor systems are actually built: the epoxy never sees the sun because something better is sitting on top of it.

Topcoat technology provides a protective shield that enhances UV stability in epoxy. The base coat does the structural work. The topcoat handles the environment.


What Actually Works Outdoors

Polyaspartic Floor Coating

Polyaspartic coatings offer everything homeowners need outdoors: incredible UV stability (no yellowing in sunlight), installation in just one day, and remarkable flexibility that handles temperature swings.

The key differences from standard epoxy:

Aliphatic chemistry: Polyaspartic is aliphatic — the polymer backbone doesn’t contain the UV-sensitive benzene rings that make aromatic epoxy yellow. Polyaspartic coatings are 100% UV stable and will never yellow, fade, or suffer from hot tire pickup.

Flexibility: The flexibility of polyaspartic coatings allows them to expand and contract with temperature changes, preventing the cracking and delamination that plague rigid epoxy systems. This is directly relevant to outdoor concrete, which moves significantly more than indoor slabs due to temperature and moisture variation.

Moisture resistance: Unlike standard epoxy, polyaspartic bonds hold up under the moisture vapor transmission that outdoor slabs experience. The coating doesn’t trap moisture the same way.

Slip resistance: Polyaspartic systems can incorporate aggregate — quartz, aluminum oxide, anti-slip broadcast — more effectively than many epoxy systems, and the aggregate stays locked in a harder final surface.

Polyaspartic coatings typically last 15–20 years with basic maintenance on outdoor surfaces — roughly triple the outdoor lifespan of standard epoxy.


Aliphatic Polyurethane

Aliphatic polyurethane shares the UV-stable chemistry of polyaspartic and is most commonly used as a topcoat over an epoxy or polyurea base coat. This unique non-yellowing coating remains non-chalking and has superior UV resistance. It offers performance characteristics typical of high-quality, solvent-based, aliphatic urethane coatings but provides excellent durability and UV stability.

As a standalone outdoor system, aliphatic polyurethane delivers:

  • UV stability equivalent to polyaspartic
  • Better abrasion resistance than standard epoxy
  • Flexibility that accommodates thermal movement
  • Chemical resistance to oils, fuel, and cleaning agents

It’s particularly worth considering for surfaces that see vehicle traffic — driveways, parking areas, vehicle access ramps — where the combination of UV exposure and mechanical wear pushes standard epoxy toward failure quickly.


Polyurea

Polyurea offers good chemical resistance, decent UV stability, and some flexibility for temperature changes. With a faster cure time and a 10–15 year lifespan, it’s better than epoxy for outdoor use.

Polyurea cures faster than almost anything else — walk-on time in hours rather than days. In outdoor applications where weather windows are tight (rain in the forecast, temperature dropping in the afternoon), that cure speed is operationally significant. The flexibility is also genuine: polyurea’s elongation at break exceeds 300%, far better than epoxy’s near-zero flexibility, which matters in outdoor slabs experiencing freeze-thaw cycling.

The limitation is cost — polyurea runs higher per square foot than polyaspartic in most markets.


Epoxy + Polyaspartic Hybrid

The professional standard for outdoor floors that need both the structural build of epoxy and the outdoor performance of polyaspartic. Epoxy base coat for thickness and adhesion; polyaspartic topcoat as the UV barrier and wear surface.

For fully outdoor surfaces in direct sun all day, choose a polyaspartic system or polyurea system. For partial exposure UV exposure, these same systems still apply.

The hybrid gives you more flexibility in budget — epoxy base at lower material cost, polyaspartic only where the performance is actually needed (the topcoat layer that sees the weather). Most pool decks, patios, and outdoor commercial surfaces installed by experienced contractors use this approach.


Outdoor Application by Surface Type

SurfaceRecommended SystemStandard Epoxy?
Covered patio (no direct sun)Epoxy or epoxy + polyurethane topcoatUsable with UV topcoat
Open patio (direct sun)Polyaspartic or epoxy + polyaspartic topcoatNot recommended
Pool deckPolyaspartic with anti-slip aggregateNot recommended
DrivewayPolyaspartic or aliphatic polyurethaneNot recommended
CarportEpoxy + UV-stable topcoatAcceptable with topcoat
Commercial outdoor walkwayPolyurea or polyasparticNot recommended

Surface Preparation for Outdoor Floors

The prep requirements outdoors are more demanding than indoors, not less — and this is where many outdoor projects fail regardless of the coating chemistry chosen.

Diamond grinding is mandatory. Epoxy will not bond to concrete that is sealed, contaminated with oil or grease, actively wet, or smooth without mechanical profile. Outdoor slabs frequently have sealers applied at some point. Those have to come off completely before any coating system will bond.

Moisture testing matters more outside. Outdoor slabs are exposed to ground moisture from below and rain from above. Test moisture vapor emission before coating. A moisture vapor barrier primer on slabs with elevated readings is essential — the coating doesn’t fail from the top down; it fails from the bottom up when vapor pressure builds behind a sealed surface.

Crack repair before coating. Outdoor concrete cracks. Thermal cycling, tree root pressure, settling — outdoor slabs move more than indoor ones. Active cracks must be filled with a flexible repair compound, not rigid epoxy filler, because the crack will keep moving with the seasons.

Slope and drainage. Outdoor surfaces need adequate slope to drain — typically 1:50 to 1:100 toward a drainage point. Standing water on an outdoor floor coating accelerates wear and creates slip risk. If the existing slab doesn’t drain properly, this has to be addressed before coating.


The Common Mistakes

Applying standard garage epoxy to an open patio. The most frequent error. The same product that works in a covered garage fails within 12–18 months on a south-facing patio. Putting epoxy outdoors is like sending a snowman to the beach.

Skipping the UV topcoat to save money. An epoxy base coat without a UV-stable topcoat on any sun-exposed surface is a short-term solution. The topcoat is the least expensive part of the system and the most important for outdoor longevity.

Not accounting for freeze-thaw in cold climates. A coating applied in late fall, before the first freeze, to a slab that still has elevated moisture content is likely to fail at the first thaw. Coat in spring or summer when slab moisture is lowest and cure temperatures are stable.

Using acid etch as the only prep method. Outdoor slabs often have sealers, efflorescence, or contamination that acid etching doesn’t fully address. Diamond grinding is the reliable baseline for outdoor surfaces.


The Short Version

Standard aromatic epoxy outdoors: works for months, fails within years. UV kills it first, then moisture and thermal cycling finish the job.

What works:

  • Covered surfaces with UV topcoat: epoxy base + aliphatic polyurethane or polyaspartic topcoat
  • Open sun exposure: polyaspartic or epoxy + polyaspartic topcoat
  • High-traffic outdoor surfaces: polyurea or polyaspartic with anti-slip aggregate
  • Anywhere cold with freeze-thaw cycles: flexible polyaspartic or polyurea — not rigid epoxy

The chemistry exists to do outdoor floors correctly. It just isn’t the cheapest option at the hardware store.