



Here’s something most contractors won’t tell you upfront: the floors that fail in three or four years usually had nothing wrong with the product. The coating was fine. What went wrong happened before the first drop of epoxy hit the concrete — or in the cleaning routine that followed.
Get those parts right, and a residential epoxy floor coating has every reason to stay intact for 15 to 20 years. Some push longer. The gap between a floor that makes it and one that starts peeling by year five is almost never about which brand was used. It comes down to five things, and most of them are cheaper and simpler to get right than people assume.
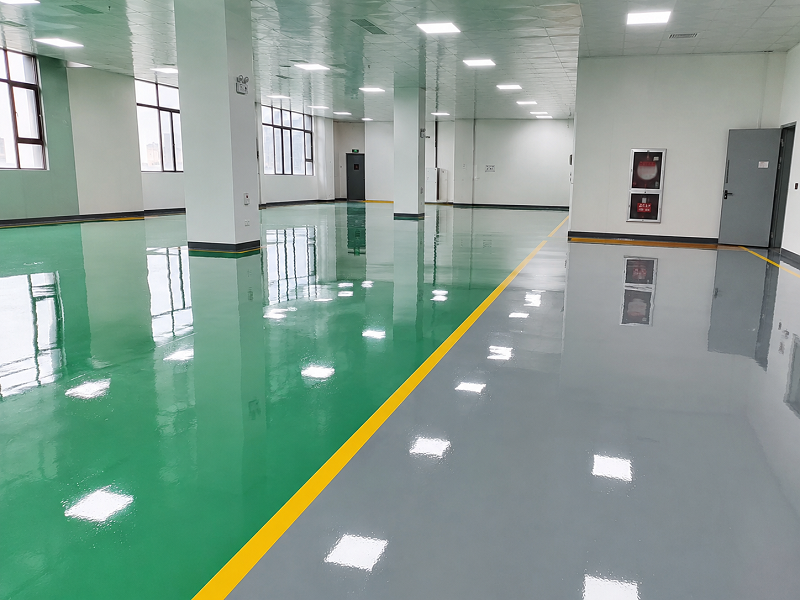
Tip 1: Surface Prep Is the Whole Game — Everything Else Is Secondary
Seriously, if you skim the rest of this article, don’t skim this part.
Epoxy needs something to grab onto. It doesn’t stick to a polished or sealed surface — it bonds into the pore structure of concrete that’s been mechanically opened. When surface prep gets rushed or skipped, the coating is essentially floating on top of the slab. It might look fine for a year. Then a corner lifts, and the peeling starts.
What “done correctly” actually means:
Diamond grinding is what professional installers use — a walk-behind grinder with diamond segments that opens the concrete to a CSP 2–3 surface profile. That’s the texture most epoxy floor coating systems are engineered to bond with. Acid etching gets used as a budget alternative, but it’s unreliable on slabs that have any sealer residue, and it can’t flatten high spots or address surface variation the way grinding can.
Two prep steps that routinely get left out — and cause problems later:
Moisture testing. Slabs wick moisture vapor up from the soil below. Apply epoxy over a slab with excessive vapor transmission and you’re going to see bubbling, blistering, or full delamination down the line. A calcium chloride test or an RH probe tells you what you’re working with. If the reading is high, a vapor-blocking primer goes down before anything else. Yes, it adds cost. No, there’s no good workaround.
Crack repair. Hairline cracks can usually be coated over. Anything wider gets filled with an epoxy repair compound first — let it cure fully, then coat. A standard epoxy floor coating bridges minor surface flaws; it doesn’t hold together across a crack that’s still moving.
If the prep is right, everything after it has a real shot at lasting. If it’s not, you’re building on a bad foundation and the clock starts ticking.
Tip 2: A Primer Coat Isn’t Optional — It’s What Holds the Rest Together
Walk through enough failed DIY epoxy installs and you’ll find the same thing missing in a lot of them: primer.
Concrete doesn’t absorb evenly. Some sections pull in resin fast, others barely absorb at all — and when you skip primer and go straight to the base coat, those inconsistencies translate directly into weak adhesion zones, pin-holes from off-gassing, and thin spots that wear through first. It’s not immediately obvious, but by year three it usually is.
Primer closes the surface down so the base coat lands consistently across the whole slab. It also deepens the molecular bond between the concrete and the coating system. On slabs that have minor moisture readings — not high enough to need a full mitigation system, but not zero either — a solid primer coat provides a meaningful layer of protection between the concrete and the epoxy above it.
For polyaspartic floor coating systems, primer matters even more. Polyaspartic applies thin and cures fast — there’s a narrow window to work with. On bare, unprimed concrete, a thin fast-curing coating simply doesn’t have enough time to wet out and bond properly in every section. Primer is what makes that window work.
One practical check if you’re hiring out: ask your contractor directly whether primer is in the quote. It sometimes gets cut to keep numbers competitive. That’s a shortcut with a long tail.
Tip 3: Matching the Topcoat to Your Conditions Is What Separates Good Installs from Great Ones
The base coat gives the system its body. The topcoat is what actually interfaces with daily life — tires grinding in and out, tools hitting the floor, oil dripping from the undercarriage, sunlight streaming through an open door. Pick the wrong one and the system underperforms regardless of how solid the base is.
Why standard epoxy topcoats cause problems in sunny garages. The most widely used epoxy formulations are aromatic — and aromatic chemistry breaks down under UV. It’s not a manufacturing defect; it’s how the chemistry behaves. Give it two or three years of real sun exposure and the floor goes amber. The structure is still intact, but the look is shot.
Where polyaspartic changes the equation. A polyaspartic floor coating used as the finish layer doesn’t have that problem. Polyaspartic is aliphatic — UV stability is built into the molecular structure, not added after the fact. Color holds. Gloss holds. It also cures harder than standard epoxy topcoats, which is relevant in garages where tire temperatures run high coming off summer roads.
Aliphatic polyurethane covers similar ground — same UV story, slightly different working characteristics. Most professional systems that are built to last use one or the other as the final coat over an epoxy base.
The practical call: a covered, enclosed garage with no meaningful sun exposure can use a quality epoxy topcoat and be just fine. If the door stays open most of the day, or any part of the floor catches direct light, go with polyaspartic floor coating or aliphatic polyurethane. It’s not a massive cost difference, and it’s the thing that keeps the floor looking the way it did on day one five years later.
Tip 4: Your Cleaning Products Are Probably Working Against You
An epoxy floor coating handles oil, fuel, most automotive fluids, and the general punishment of a working garage without complaint. The topcoat is tough, but it has specific weaknesses — and a lot of common cleaning products land right on them.
Avoid these:
- Bleach and bleach-based cleaners — sodium hypochlorite doesn’t just clean the surface, it slowly etches it. You won’t notice at first. Over a year or two of regular mopping, the finish goes dull and micro-abrasions start collecting grime
- Ammonia-based products — similar degradation pattern, particularly on polyurethane topcoats
- Concentrated citrus degreasers — useful at high dilution for serious grease, but straight or lightly diluted citrus-based solvents soften standard epoxy topcoats over time
- Anything abrasive — steel wool, scrubbing powder, rough pads. Stubborn stain or not, this is the fast track to a scratched finish
What actually works well:
pH-neutral cleaner in warm water is the everyday standard — Simple Green at the recommended dilution is probably the most commonly cited product in the flooring trade for this. For grease and oil, a degreaser marked safe for sealed or coated concrete, applied and rinsed off quickly rather than left to soak, cleans without compromising the topcoat. Microfiber mop over string mop — less residue, no abrasion.
Last thing on cleaning: don’t leave standing water on the floor. A spill that dries in five minutes is nothing. A puddle that sits near an edge or seam for a few hours, repeatedly, eventually finds its way under the coating. Clean it up when it happens.
Tip 5: Schedule a Topcoat Refresh Before You Actually Need One
This is the one that slides under the radar for most homeowners — and it’s the difference between a 15-year floor and a 7-year floor that costs twice as much to fix.
Epoxy floor coating systems wear from the top down. The topcoat gradually loses gloss, collects fine scratches, and becomes slightly more porous over time. Most people don’t act until the floor looks noticeably rough. By that point, the topcoat isn’t just worn — it’s compromised enough that a simple recoat won’t cut it. You’re looking at grinding back and starting over, which costs significantly more than a maintenance refresh would have.
The move is to catch it before that happens.
Watch for these signs that a refresh is due:
- The floor looks dull even right after cleaning
- Scratches are visible when light hits the surface at a low angle
- Water no longer beads or sheets across the surface — it just soaks in
- Small areas look noticeably more porous or matte than the rest of the floor
When you see those signals, a topcoat refresh is still a simple job: scuff the surface lightly, clean it thoroughly, roll on a fresh topcoat. No grinding equipment, no base coat work, no major disruption. A two-car garage typically takes a professional one day. Under normal residential conditions, most epoxy floor coating systems need this every 5 to 8 years.
Polyaspartic floor coating systems run longer between refreshes — closer to 8 to 10 years in a residential setting, because the topcoat holds up better to UV and abrasion. But the same rule applies. Wait too long and the refresh window closes. Get to it while the base coat is still in good shape, and the whole system keeps going.
The Short Version
These aren’t complicated. None of them require special tools or unusual knowledge.
- Grind the concrete properly, test moisture, fill cracks — all of this before any coating goes down
- Lay a primer coat — don’t skip it to save time or money
- Match your topcoat to your conditions — sun exposure means polyaspartic floor coating or aliphatic polyurethane, not standard epoxy
- Clean with pH-neutral products, wipe up spills before they sit
- Refresh the topcoat on a schedule — before it fails, not after
Do those five things and 15 years isn’t a stretch goal. It’s just what happens.