



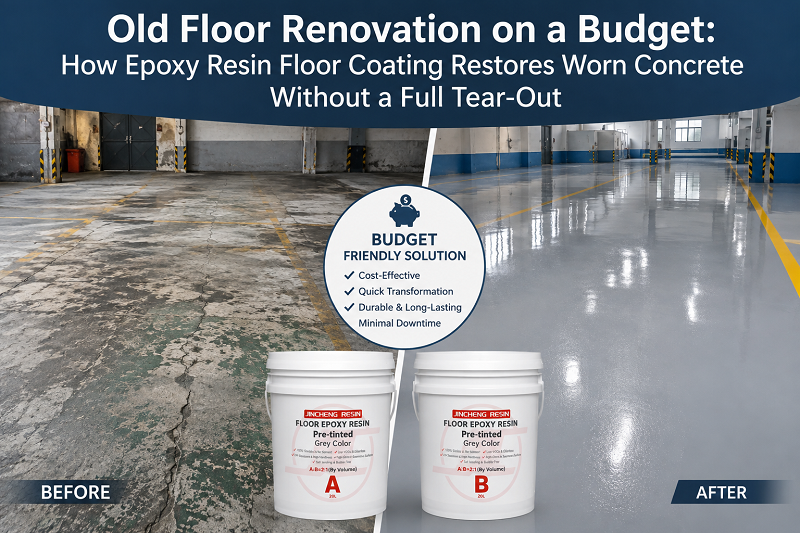
A cracked or stained concrete floor doesn’t automatically mean demolition. In most commercial and industrial buildings, the slab underneath is still sound — what’s failed is the surface, not the structure. That distinction matters financially. A full tear-out and repour can run several times the cost of resurfacing, and it typically pulls a facility offline for weeks rather than days.
Epoxy resin floor coating is what makes the alternative possible. Over a properly repaired substrate, it can take a floor that looks like it’s due for replacement and give it another 10-15 years of service life, at a fraction of what a repour would cost.
Deciding Whether Renovation Is Even an Option
Some floors just aren’t good renovation candidates. Before quoting a resurfacing job, a few things need checking first.
Structural condition comes first. Surface issues — spalling, hairline cracks, wear from traffic, chemical staining — are fixable with the right prep and coating. Structural problems are a different matter. Slab heaving, cracks running the full depth of the concrete, real settlement — none of that gets solved by a coating system. And if cracks are still actively moving rather than static, renovation buys time at best, not a permanent fix.
Moisture is probably the biggest reason renovation jobs fail down the line. A slab shedding too much water vapor will cause almost any coating to blister or delaminate within months, regardless of whether it’s epoxy or polyurethane. Testing for this — a calcium chloride test, or relative humidity probes following ASTM F2170 — shouldn’t be treated as optional, particularly on slabs older than 10-15 years or in buildings that were never built with a vapor barrier underneath.
Then there’s contamination. Oil and chemical penetration into old concrete shows up constantly in manufacturing plants and automotive shops. It has to be mechanically removed through grinding or shot blasting, not just cleaned off the surface, because whatever’s left behind under a new epoxy resin floor coating is one of the more common reasons adhesion fails later.
Pass those three checks and renovation is almost always the more sensible route economically.
What a Real Assessment Actually Looks Like
A useful renovation quote doesn’t come from walking the floor and eyeballing it. At a minimum, someone needs to look at:
Surface profile, measured on the ICRI 1-9 scale (CSP for short). This determines what prep method will work and how thick the coating needs to be to actually bond. Most epoxy resin floor coating systems want a CSP of 3-5, which comes from diamond grinding or shot blasting. Acid etching doesn’t reliably get you there, and it’s rarely enough for floors that see real commercial traffic.
Cracks need sorting too — shrinkage cracks are cosmetic and can be routed and filled, while anything structural needs an engineer’s eyes on it before coating work even starts.
Moisture testing, as mentioned above, tells you whether a standard system will hold up or whether the job needs a moisture-tolerant primer or a full vapor barrier underneath.
And if there’s an existing coating already on the floor, its condition matters a great deal. A coating that’s failing or delaminating has to come off entirely. Coating over it just moves the failure point — the new epoxy resin floor coating will let go at the same bond line the old one did.
The Order of Operations Before Anything Gets Coated
Most renovation projects that come back as warranty claims trace back to a skipped step here. The sequence that actually holds up over time:
Mechanical prep goes first — diamond grinding for lighter wear, shot blasting where there’s heavier contamination or an old coating to remove. This single step probably accounts for most of the long-term adhesion performance, more than anything applied afterward.
Cracks and joints get repaired next. Structural cracks that need a little give get a semi-rigid epoxy filler; static cracks that aren’t moving can take a rigid epoxy paste. Control joints are a separate matter — they get routed and filled with something flexible, usually a polyurethane or epoxy sealant, never rigid material, or they’ll simply crack open again the first time temperatures swing.
Spalled areas and small holes get patched with epoxy mortar (epoxy resin blended with graded sand) to bring the surface back to something flat and sound.
Where testing showed elevated moisture, a two-component epoxy vapor barrier primer goes down before anything else. This is a distinct step from the topcoat, and skipping it is probably the single most common reason coatings blister within their first year.
Only then does priming happen — a penetrating epoxy primer that seals the repaired substrate and gives whatever topcoat system follows something uniform to bond to.
The floor isn’t ready for actual resurfacing until all of that is done.
The Systems That Do the Actual Restoration Work
Once the substrate’s prepped and repaired, the coating system handles the visible and functional restoration. Which system depends heavily on the floor’s condition and how much traffic it sees.
For floors with moderate unevenness or minor pitting, self-leveling epoxy flows out to a flat, seamless finish somewhere around 1.5-3mm thick — enough to bridge small imperfections without a full resurfacing screed underneath it.
More heavily damaged floors — real spalling, exposed aggregate, deep pitting — usually need an epoxy mortar screed first. Trowel-applied, typically epoxy resin mixed with graded sand at 3-6mm, this rebuilds the surface profile before any topcoat goes on. It’s a resurfacing step in its own right, not just a coating.
Where the damage is more cosmetic than structural and a flat coating wouldn’t hide it well, broadcast or flake systems add texture and depth that camouflage minor substrate irregularities while also improving slip resistance.
The final layer is the high-build protective topcoat — usually UV-stable if the floor gets any light exposure at all — and this is what actually absorbs the wear going forward. This is generally where the decision comes down to a standard epoxy topcoat (cheaper, fine for interior spaces with minimal UV) versus an epoxy-polyurethane hybrid, which holds up better against UV and flexes more in higher-traffic or semi-outdoor areas.
What Renovation Actually Costs Against Full Replacement
The exact numbers shift by region and floor size, but the pattern shows up consistently project after project.
Demolition and repour usually runs 3-5x the per-square-meter cost of resurfacing, before even counting disposal fees for the old concrete or the 28 days of cure time a new slab needs before it can handle traffic again.
Renovation with epoxy resin floor coating — substrate repair plus the coating system — gets a floor to light traffic in 24-72 hours and full service traffic within about a week.
For a mid-size warehouse or manufacturing floor, that gap isn’t small. It’s often the line between a project that gets signed off this quarter versus one that gets bumped to next year’s budget cycle. Renovation also sidesteps the secondary costs that come with demolition — dust, noise, disposal, and the disruption to whatever’s operating next door.
Where This Approach Pays Off Most
Warehouses and distribution centers with worn traffic lanes but otherwise sound slabs are probably the most common — and most cost-effective — renovation candidates out there.
Manufacturing floors with chemical staining but no real structural issues benefit too. Mechanical prep paired with a chemical-resistant epoxy topcoat solves the appearance problem and the performance problem in one pass.
Retail and showroom floors with an outdated or damaged decorative finish are another good fit, especially when a full closure for demolition isn’t realistic.
Parking structures and loading docks with surface wear and some minor spalling also do well with a resurfacing system and a UV-stable topcoat, which brings back both function and appearance.
Where Renovation Projects Go Wrong
The same handful of mistakes keep showing up, and they almost always trace back to a shortcut somewhere in the prep work.
Skipping moisture testing on older slabs, or ones with no known vapor barrier, is probably the leading cause of blistering and delamination down the line.
Coating directly over contamination instead of mechanically removing it is another one. Grease and oil trapped under a new epoxy resin floor coating tend to work their way back to the surface eventually, and adhesion goes with them.
Filling active cracks with something rigid instead of a flexible sealant just guarantees the crack reopens — usually within a single seasonal temperature swing.
And applying coating outside the right temperature and humidity range causes more premature failures than people expect. Most epoxy systems have a fairly specific window for substrate temperature and humidity where they’ll actually cure properly. Ignoring what the data sheet says here is avoidable, and it happens constantly anyway.
Choosing a Supplier for Renovation Work
Renovation puts more demands on a coating system than a new-slab install does — it has to bond to an imperfect, already-used substrate, often on a tighter timeline than anyone would like. That makes the choice of product and technical support more important here, not less.
Jincheng Resin formulates a full lineup of epoxy resin floor coating systems built for renovation work — moisture vapor barrier primers, epoxy mortar resurfacers, self-leveling systems, and UV-stable topcoats — with OEM and private-label options available for distributors supplying renovation contractors. If you’ve got a renovation project coming up, reach out to our team for technical data sheets, application guidance, or sample quantities.