



Project Overview
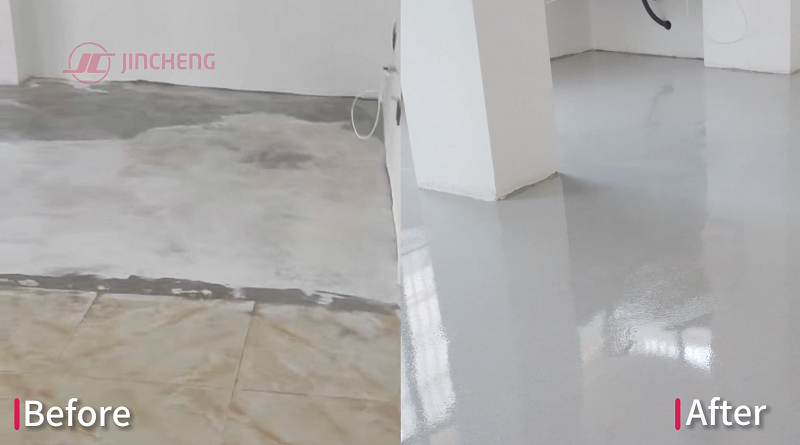
This is a residential apartment project — an interior floor renovation of roughly 110㎡, finished in a warm grey colored sand epoxy floor coating. The concrete substrate was mostly flat, with a few high spots here and there. No visible cracking. Not a perfect substrate, but not a structural mess either — a mid-difficulty job that’s common in real residential renovations.
Jobs like this don’t fail on the topcoat. They fail on substrate prep and primer selection. A light color like warm grey shows every mistake underneath it — skip a step in surface prep, ignore moisture content, and blistering or delamination shows up within months.
Here’s the full process, start to finish.
Step 1: Surface Grinding
First step on-site: full mechanical grinding across all 110㎡. The goal is to open the concrete’s capillary structure and strip laitance, oil residue, and any leftover coating from the surface — while also grinding down the high spots to bring the whole floor closer to level.
Grinding isn’t a formality. Skip proper grinding depth and primer adhesion drops fast — the entire coating system built on top of it becomes unstable. High-spot areas got extra passes until they sat flush with the surrounding floor, so coating thickness stayed consistent later on.
Step 2: Dust Removal
Industrial vacuum equipment cleared the entire floor immediately after grinding — dust from the grinding pass, plus debris caught in edges and corners. Incomplete dust removal leaves a fine layer sitting between the substrate and the primer. It acts like a separation film. Adhesion tests can look fine on paper; on-site, the coating still hollows out and delaminates once it dries.
Step 3: Moisture Testing and Zoned Primer Application
This is the step that actually decides whether the floor holds up long-term. After dust removal, moisture content was tested across the full floor area. The results weren’t uniform — some sections read noticeably damper than others.
This is a very common situation in residential buildings — particularly near bathrooms, exterior walls, or slabs that haven’t fully cured yet.
Based on the readings, the floor was split into two zones:
- Damp areas: sealed with an MVB (Moisture Vapor Barrier) primer. This type of primer is built for substrates that read high on moisture content and can’t be dried out further within the project timeline. It forms an effective vapor barrier even on a still-damp substrate, blocking moisture from pushing up through the epoxy layers and causing blistering or delamination later.
- Normal, dry areas: sealed with a standard epoxy resin primer, keeping chemical adhesion and system consistency across the rest of the floor.
This zoned approach beats a one-primer-fits-all method every time. A lot of failed jobs come down to exactly this shortcut — applying the same primer across the whole floor without checking moisture zone by zone. Blistering shows up three to five months later, and the rework costs far more than the extra prep step would have.
Step 4: Primer Application
Primer was mixed on-site at an A:B ratio of 8:1, using a mechanical mixer at 300–400 RPM. Component A was mixed on its own first, then all of Component B was added, and the mix ran for at least 3 minutes until fully uniform. Under-mixing here directly affects cure quality and final hardness.
Primer application followed the zoning from Step 3: damp areas got the MVB primer first, followed by an epoxy resin primer once the MVB layer was surface-dry; the rest of the floor went straight to epoxy resin primer. The primer’s job is to penetrate and seal the substrate, giving the mid-coat and topcoat something solid to bond to — get this layer right, and everything applied on top of it has a reliable foundation.
Step 5: Mid-Coat and Colored Sand Broadcast
Once the primer was surface-dry, a mid-coat scrape leveled out any remaining minor high-low variation, giving the colored sand broadcast a consistent base. After the mid-coat reached partial cure, warm grey colored sand was broadcast evenly across the floor, with density and thickness kept consistent throughout — this step is what determines whether the finished colored sand epoxy floor coating comes out with even color and texture, or with visible patchiness and banding.
Step 6: Topcoat Application
After the broadcast layer cured and loose sand was cleared away, the epoxy topcoat went on. Total system thickness was held at 1.2–1.3mm, with material consumption at 1.8–2.0 kg/m². The topcoat both seals and protects the colored sand layer and is the layer that determines the floor’s final wear resistance and hardness.
Step 7: Curing
Curing time followed the manufacturer’s cure schedule based on on-site temperature:
| Temperature | Foot Traffic Ready | Full Cure |
|---|---|---|
| 10°C | ~48 hours | 10 days |
| 20°C | ~24 hours | 7 days |
| 30°C | ~12 hours | 5 days |
Residential jobs generally don’t carry the 24-hour turnaround pressure of an industrial facility, so curing followed the temperature schedule without shortcuts — landing the coating at its designed Shore hardness of ≥80 (7 days / 25°C / 50% RH).
Material Technical Data
Core specifications for the epoxy resin system used on this colored sand epoxy floor coating project:
| Category | Item | Spec |
|---|---|---|
| Product | Composition | Resin Component A, Hardener Component B |
| Packaging | Component A | 16kg/pail |
| Component B | 2kg/pail | |
| Storage | Conditions | Store sealed, 5–30°C, dry and shaded; 24-month shelf life from date of manufacture |
| Technical | Chemical Composition | Epoxy resin, reactive diluent, amine hardener |
| Density | Component A ~1.8kg/L; Component B ~1.0kg/L; mixed ~1.7kg/L | |
| Solid Content | ≥95% | |
| Mechanical | Compressive Strength | Resin ≥70MPa |
| Adhesion | ≥1.5MPa (concrete substrate failure) | |
| Shore Hardness | ≥80 (7 days / 25°C / 50% RH) | |
| Heat Resistance | Stable in continuous use up to 50°C | |
| Application | Mix Ratio | A:B = 8:1 |
| Mixing Tool | Mechanical mixer, 300–400 RPM | |
| Mixing Time | ≥3 minutes, until fully uniform |
Warranty
This project carries a 1-year material warranty.
Takeaway
The part of this job worth remembering isn’t the warm grey finish — it’s the moisture-zoned primer step. At 110㎡, this looked like a routine residential floor. But treating damp and dry zones the same way, with the same primer, is exactly the shortcut that causes the most callbacks in this trade. Splitting the floor between MVB primer and standard epoxy resin primer added one extra testing and decision step — but for a colored sand epoxy floor coating that’s meant to last, it’s the step that actually protects the investment.