



Most epoxy floor coating failures aren’t a resin problem. They’re a process problem. The chemistry is forgiving within a narrow window — get the substrate, the mix ratio, the temperature, and the moisture level right, and epoxy holds up for a decade or more. Miss on one of those and you’re looking at peeling, bubbling, or a floor that never fully cures.
That distinction matters more to distributors and installers than it does to someone coating their own garage. A batch that fails on a commercial job isn’t a quick touch-up — it’s a callback, a warranty claim, and a client second-guessing the whole product line. What follows are the eight epoxy floor coating failures that come up most often in the field, why they actually happen, and what stops them.
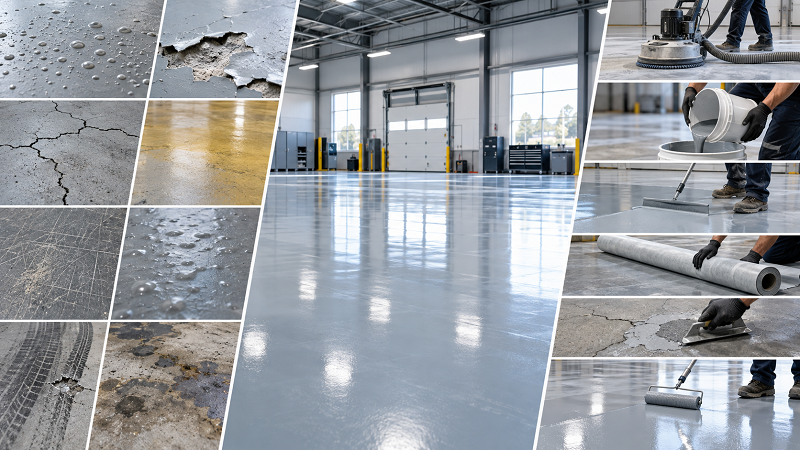
1. Delamination and Peeling
The coating separates from the concrete in sheets or large flakes, sometimes within weeks of the job finishing. Doorways, spots under heavy equipment, and high-traffic lanes tend to go first.
This one is almost always a surface prep failure, not a coating failure. Concrete carries a thin layer of laitance, dust, or old sealer on top, and epoxy ends up bonding to that layer instead of the slab itself. Traffic or moisture stresses the bond eventually, and the whole system lifts free. Skipping mechanical profiling — grinding or shot-blasting to at least an ICRI CSP 3 profile — is probably the single biggest cause of delamination on commercial epoxy floor coating jobs.
There’s no topical fix once it happens. The failed section has to be ground out entirely, re-profiled, and recoated. Prevention is where the real work is: diamond-grind or shot-blast every substrate before application, run a water-drop absorption test for contaminants (it takes two minutes), and never coat over an existing sealer without confirming the two are compatible first.
2. Bubbling and Pinholing
Small bubbles or pinhole-sized craters show up in the cured epoxy floor coating film — sometimes right away, sometimes hours later as the coating keeps curing.
Two different mechanisms cause this, and they look identical on the floor. Outgassing is the more common culprit: porous concrete releases trapped air as the slab warms up during application, and that air pushes straight up through the wet film. New slabs under 30 days old are especially prone to it, and so is any floor coated while the ambient temperature is climbing through the day. The second cause is simpler — over-application or over-rolling that whips air directly into the mixed material.
For outgassing, apply during falling or steady temperatures instead of a warming afternoon, and put down a scratch coat or a more penetrating primer on porous slabs before the build coat goes on. For air worked into the mix, spike-roll the wet film while it’s still within open time, and stay off areas that have already started to set. On slabs you already know are porous, a lower-viscosity penetrating primer heads off most of this before it starts.
3. Amine Blush (Cloudy, Tacky, or Waxy Surface)
A greasy or waxy film shows up on the cured surface — cloudy in some cases, with a faint amber tint in others — and it won’t sand off clean, which means the next coat can’t bond to it properly.
Amine-cured epoxies react with moisture and CO₂ in the air while they cure. In cold, humid, or poorly ventilated conditions, the curing agent migrates up to the surface and reacts with atmospheric moisture before it’s had a chance to fully bond into the resin. That’s why blush turns up so disproportionately on early-morning jobs and cold-season installs.
It’s water-soluble, so wash it off with water and an abrasive pad before recoating — a solvent wipe alone tends to just smear it around instead. For anything scheduled during cold or humid weather, switching to a polyamide-cured system, or a blush-resistant amine formulation, solves the problem at the source. Keep the site above 50°F (10°C) with decent airflow while it cures, too.
4. Yellowing
Clear or light-colored epoxy floor coating drifts toward amber or yellow over a matter of weeks or months — most noticeably near windows, under skylights, or anywhere sunlight hits directly.
Standard epoxy resins contain aromatic rings that absorb UV energy and break down chemically as a result. That’s baked into the chemistry itself, not a defect in one particular batch. It’s a UV-stability problem rather than a durability one — the coating can look badly yellowed and still be structurally sound underneath.
Once it sets in, there’s no fixing it short of a full recoat. The actual solution is choosing chemistry that fits the light exposure from the start: for any floor with sustained UV — garages with big windows, retail showrooms, covered outdoor space — a polyaspartic or aliphatic polyurethane topcoat over the epoxy base holds color where epoxy alone won’t. Save plain epoxy topcoats for interior floors that see minimal sun.
5. Hot Tire Pickup (Lifting Under Tires)
In garages and shops, the coating lifts, wrinkles, or tears in small patches right where a vehicle has been sitting, and warm weather makes it worse.
Hot tires transfer heat and residual solvent-like compounds straight into the coating. If the epoxy hasn’t fully cross-linked yet — or it’s a softer, lower-solids formulation to begin with — the tire’s grip combined with that heat can physically peel the film off the substrate. Coatings that go back into vehicle traffic before they’ve hit a full cure are the most vulnerable to this by far.
Hold vehicles off the floor for the full cure window, which often runs 5-7 days for standard epoxy even if it feels dry within 24 hours. For garages or any floor that sees regular vehicle traffic, spec a high-solids epoxy base under a flexible, hot-tire-rated polyaspartic or polyurea topcoat rather than relying on a standard epoxy topcoat alone.
6. Fish Eyes and Cratering
Small circular craters or dimples turn up in the wet or cured film, usually with a slightly raised edge — the coating pulled away from that one spot instead of leveling out flat.
Contamination on the substrate is the cause almost every time: oil, silicone-based cleaners, wax, even fingerprint oils left over from earlier work. Any of these creates a low-surface-tension spot the epoxy physically can’t wet out, so it just flows around the contaminant instead of over it.
Solvent-wipe and degrease the whole substrate before coating — not just the spots that look dirty. Silicone contamination in particular can drift in from unrelated work nearby (spray lubricants, mold-release agents) and it’s often invisible until the coating goes on. If fish eyes show up mid-application, a fisheye additive can help that batch flow out, but treat it as a patch, not a substitute for a clean substrate.
7. Cracking
Fine cracks appear in the cured epoxy floor coating, usually tracking directly over cracks or control joints in the concrete slab beneath it.
Cured epoxy is rigid — it has next to no ability to flex or bridge movement in the slab. When the concrete shifts, contracts, or already had an untreated crack, that movement transfers straight into the coating and it cracks right along with the substrate underneath.
Rout and fill existing cracks with a semi-rigid or flexible epoxy or polyurea filler before coating, and respect control joints instead of coating over them. On slabs with a history of movement — new construction, unstable subgrade, floors that go through heavy thermal cycling — a more flexible system like polyaspartic tolerates minor movement noticeably better than a rigid standard epoxy does.
8. Chalking (Outdoor and UV-Exposed Floors)
A dusty, powdery residue builds up on the surface after months of UV exposure, and the color fades or dulls visibly along with it.
Think of this as the long-term sequel to yellowing — sustained UV eventually breaks the resin’s surface layer down into a fine, loose powder. It shows up constantly on epoxy used outdoors or under unprotected skylights, and it accelerates the coating’s overall wear because the chalked layer stops protecting whatever’s underneath it.
Chalking is usually a sign that epoxy was the wrong topcoat for that exposure level from day one. For anything exterior or heavily UV-exposed — walkways, covered patios, EV charging areas — an aliphatic polyurethane or polyaspartic topcoat keeps its color and gloss for years in conditions where epoxy chalks out inside a single summer.
Most of This Comes Down to Substrate and Sourcing
Step back and a pattern shows up fast: six of these eight epoxy floor coating failures trace back to surface prep or the wrong chemistry for the exposure conditions, not a flaw in the resin itself. Moisture testing, mechanical profiling, and matching the topcoat to UV and traffic levels prevent more warranty claims than any single product upgrade ever will.
The other variable is the resin system itself. Batch-to-batch consistency, solids content, and cure chemistry all shape how forgiving a coating is when field conditions aren’t perfect — which is exactly where the supplier matters as much as the installer does. For distributors and OEM partners sourcing epoxy floor coating, polyaspartic, and polyurethane systems built to hold up across these failure points, Jincheng Resin manufactures private-label and bulk floor coating systems made for exactly this kind of field condition.