



A freshly coated epoxy floor can look smooth, glossy and finished while still being too soft to take another layer. Come back a day later and it feels rock hard, yet now it needs sanding before anything will stick to it. Most recoating problems start in that gap between how a floor looks and what it is ready for.
The epoxy floor coating recoat window is the stretch of time in which the next approved coating can go on under specified conditions. Go too early and you tear up a layer that hasn’t set. Go too late without the right prep and the new coat may never bond properly. The timing comes from the product’s technical data sheet (TDS), read alongside the actual temperature and condition of the floor.
Below, we cover how to read that window, how to plan a multilayer job around it, and what to do when a delay pushes you past the limit.
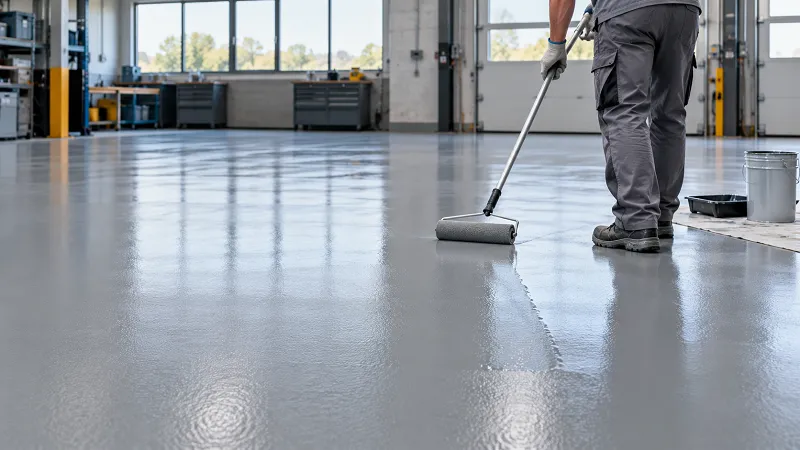
1. What Is an Epoxy Floor Recoat Window?
Every recoat window has two edges. The minimum is how long the previous layer must cure before it can be overcoated. The maximum is the longest you can wait and still apply the specified next layer without extra preparation, unless the system instructions say otherwise.
Inside the window, the earlier layer can still interact chemically with the new one. That chance fades as curing advances. Once the maximum interval has passed, manufacturers commonly require mechanical abrasion to give the surface something to grip. How all this plays out depends on the resin, the hardener and the coating that follows.
Timing alone doesn’t make a dirty floor acceptable, though. Dust, condensation, oil and surface deposits can wreck adhesion even when the clock says you’re well inside the window. Elapsed time is one check; surface condition is a separate one.
2. Recoat Time Is Not Pot Life or Full Cure
People mix these up constantly. Pot life is how long mixed resin stays usable under stated test conditions, which tells you how big a batch to mix and how fast to spread it. It says nothing about when the finished coat can take another layer.
Tack-free time describes the surface only. A coating can be tack-free and still lack the strength to carry workers, rollers or the next coat. Light foot traffic time is another milestone, and it doesn’t authorize recoating either.
Full cure is when the coating reaches its specified properties under the stated conditions. It can take far longer than the minimum recoat interval. Waiting for full cure between every layer stretches the project for no reason, and it can push the floor past its no-abrasion window.
Write these milestones down separately on the job sheet. “Dry overnight” is far too vague to run an epoxy floor coating installation on.
3. How Long Should You Wait Between Epoxy Coats?
There’s no universal number. Hardeners differ, application thicknesses differ, temperature requirements differ — and two products from the same manufacturer can follow completely different schedules.
For a Jincheng epoxy floor coating, take the waiting time from the TDS of the specific product and the specific coating going on next. Check both the minimum and maximum intervals at the real substrate temperature. Don’t assume that Jincheng primers, intermediate coats and topcoats share one schedule, and never borrow another manufacturer’s timing as a stand-in. If your project temperature falls outside the available data, confirm the schedule with Jincheng before you start.
Read the table row that matches your exact pairing. Some data sheets treat a second coat of the same epoxy differently from a different epoxy or a polyurethane, and a primer-to-body-coat interval can differ from a body-coat-to-topcoat one.
Also check the regional version and revision date of the TDS, since formulations and approved systems can vary between markets. If a supplier only gives you a room-temperature figure, ask for guidance at your actual substrate temperature before scheduling the crew.
4. Why Jobsite Conditions Change the Schedule
Temperature drives epoxy cure more than anything else. Cold slows the reaction, heat speeds it up. But the maximum recoat interval still has to come from the product instructions. Skip rules of thumb like “double the time for every ten degrees” — they’re not a substitute for the data sheet.
Measure the floor itself, not just the air. A heated warehouse can have warm air sitting over a cold slab, and door openings, shaded bays and perimeter zones can cure at different rates within one project. Log ambient temperature, substrate temperature, relative humidity and dew point wherever the manufacturer asks for them.
Moisture is its own risk. A surface that looked dry at application can pick up condensation overnight. Hold the specified dew-point margin through the curing period, not only while you’re rolling the coat.
Film thickness, mixing quality and material conditioning all affect readiness too, and unevenly thick patches won’t behave like the rest of the floor. One thing never to try: extra hardener to speed things along. A wrong ratio leaves defective material that no later coat can repair.
5. How to Decide Whether the Floor Is Ready
Start from the recorded application time and the measured temperatures, and compare them with the TDS interval that applies. Then walk the whole area. Don’t judge from one convenient spot by the door.
You’re looking for soft patches, unusually tacky zones, standing moisture, contamination and any change in surface appearance. Where the manufacturer specifies a readiness check, use it. A quick touch with a finger can’t confirm the coating has cured properly through its full thickness.
If the floor is still soft after the expected minimum interval, find out why before going further. Cold can explain slow cure, but so can poor mixing or a wrong ratio, and the symptoms look alike. Ask the supplier whether more curing time is reasonable or whether the material has to come out.
Confirm, too, that the next coat actually belongs in the system. Epoxy-over-epoxy timing tells you nothing about compatibility with a polyaspartic floor coating; that transition has its own approved preparation and application requirements.
6. What Happens If You Recoat Too Early?
An undercured layer drags under the roller, transfers to boots and takes tool marks. Put another coat over it and you can end up with uneven texture, disturbed pigment, or weak spots hidden under a perfectly nice-looking finish.
With coatings that contain water or solvent, overcoating early can also trap those components before they’ve had time to escape. The damage depends on the formulation — which is exactly why the minimum interval shouldn’t be shortened just because the surface looks dry.
Suppose you’ve already started and the first layer begins lifting or smearing. Stop. Assess the affected area before carrying on, because pushing across the floor only spreads the problem. Record the conditions and get a repair procedure that deals with the disturbed layer before any more material goes down.
7. What If You Miss the Maximum Recoat Window?
Missing the window doesn’t automatically mean stripping to bare concrete. A sound, properly cured coating can often be prepared for another layer. What that preparation involves depends on the existing coating, the next product and the manufacturer’s system instructions.
Begin by assessing the layer you have. Peeling, blistering, widespread softness or weak adhesion all point to unsound material that needs investigating and removing. Sanding the surface of a weak layer won’t make the system reliable.
Next, clean before you abrade. Sand over oil and you simply spread it around. If amine blush is present, follow the supplier’s washing procedure. WEST SYSTEM explains that this wax-like deposit is water soluble and should come off with water and an abrasive pad; solvent alone isn’t the prescribed method. That guidance supports the cleaning principle, though it isn’t a floor-specific sanding specification. [2]
Once the surface is clean and sufficiently cured, abrade it to the profile the next product requires. Sikafloor-219 UTE, for instance, calls for sanding away the gloss after its recoat interval has passed. [1] Choose equipment and abrasives to suit the floor system — no single sandpaper grit works for every coating.
Corners, edges and column bases deserve extra attention. A big machine often leaves them glossy while the middle of the floor looks uniformly dull. At the same time, don’t grind through a decorative layer unnecessarily, and don’t treat visible scratches as proof of adequate preparation.
Remove the dust thoroughly and finish the specified cleaning sequence. Use a solvent wipe only where the manufacturer requires or permits that solvent and method, and let any washing water or approved solvent leave the surface before recoating.
Some systems want an extra primer or tie coat; others allow direct recoating after prep. Get that instruction from the manufacturer instead of adding a generic bonding primer. When adhesion or compatibility is in doubt, prepare a representative test area and assess it by the agreed method after the required cure.
8. Can You Apply Polyaspartic over Cured Epoxy?
Yes, a compatible polyaspartic topcoat can go over an approved epoxy base. But its fast cure won’t rescue an epoxy layer that is undercured, contaminated or poorly bonded.
Confirm the exact combination with the supplier: epoxy cure condition, overcoat interval, abrasion requirements and any primer. A recoat table written for epoxy over epoxy shouldn’t be carried over to polyaspartic without that confirmation.
On decorative floors, judge the look as well. Preparation scratches, exposed flakes or uneven texture can stay visible under a clear finish, so the trial area should prove both adhesion and appearance before the main application starts.
9. How Contractors Can Avoid Missing the Window
Plan around each coat transition individually. List the primer, body coat, broadcast layer if there is one, and topcoat. For every transition, note the minimum and maximum interval under the expected conditions, along with the prep needed if something slips.
Big floors should be split into identifiable zones, each with its own recorded coating time. A floor that takes several hours to finish doesn’t have a single coating age. Sequence the next pass so the newest zone has reached its minimum while the oldest is still inside its maximum — or line up the approved preparation for when that’s impossible.
Leave room for inspection, cleaning, material conditioning, mixing and equipment setup, and get materials and crew in position before the window opens. If your plan starts at the maximum limit, one failed machine or one unexpected surface defect leaves you with no margin at all.
Keep other trades, dust, water and stray foot traffic off curing floors. At handover, hold on to the product batch numbers, temperature records, application times and any approved repair instructions. Records like these make later troubleshooting far more useful than anyone’s memory.
10. Frequently Asked Questions
Can I apply a second coat the next day?
Possibly — if the TDS interval and the real surface condition allow it. “Next day” can mean very different elapsed times, so log hours rather than calendar dates.
Do I always need to sand between epoxy coats?
Not necessarily. Some systems accept another approved coat inside the stated window without abrasion, though cleaning or defect correction may still be needed. Once the maximum interval has passed, follow the specified preparation.
Will another coat fix sticky epoxy?
Don’t count on it. Work out whether the cause is slow cure, bad mixing, contamination or something else. The layer underneath has to be sound before anything goes on top.
What if the application time is unknown?
Don’t assume you’re still inside the window. Identify the existing coating and ask for a preparation procedure that covers a cured surface of uncertain age. If you can’t establish its condition or identity, it needs further assessment.
Conclusion
A reliable epoxy floor comes from planning timing and surface preparation together. Apply the next approved coat after the minimum interval and before the maximum, under the specified conditions. If the window has already closed, prepare the sound coating using the approved procedure before you carry on.