



A freshly coated floor can look perfect and still be hanging on by a thread. Gloss, color, a smooth finish: they tell you how the floor looks. They say nothing about whether it’s actually stuck to the concrete.
That gap matters most right before handover. Once racking goes in, or a production line, a delaminated floor stops being a repair job and becomes a shutdown.
Adhesion testing is how you find out. But a strength number alone won’t do it. The method, the coating age, where you test, and how the sample breaks all change what the result means. Here’s how to plan the testing, run it, and write it up so the record holds up for epoxy and polyaspartic floors alike.
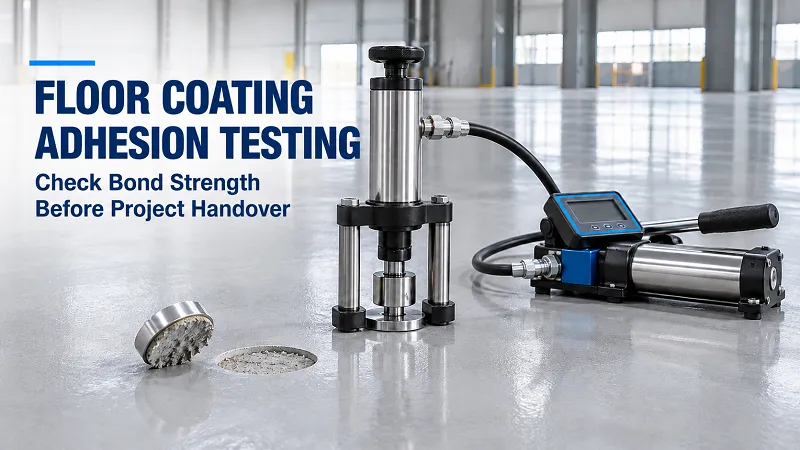
What Adhesion Testing Actually Measures
Adhesion is the bond between two different materials: primer to concrete, or topcoat to the layer below. Cohesion is a material’s own internal strength.
The difference matters because a pull-off test loads the whole stack at once: concrete, coating layers, test adhesive, dolly. Under tension, it separates at the weakest point, and that isn’t always the coating–concrete interface.
So every result answers two questions. How much stress did the spot take? And where did it let go? Report one without the other and the contractor and the owner can read the same number two different ways.
Agree on Acceptance Criteria Before the Job Starts
Don’t wait until the floor is down to argue about what counts as a pass.
The spec or inspection plan should name the test method, the required cure time, how test locations are chosen, the acceptance criteria, and the repair procedure for test spots. It should also say who witnesses the tests and who signs off.
No single bond-strength number approves every system. Sika’s flooring surface preparation guide, for example, sets a minimum pull-off strength of 1.5 MPa (about 218 psi) for the concrete substrate. That’s a substrate requirement. Copying it over as the pass mark for a finished coating is a mistake.
Use the figures that belong to your system and your contract. And decide up front whether acceptance rests on each individual reading, on the average, on the failure mode, or on some mix. Otherwise a healthy average can hide one bad spot.
Pick the Right Inspection Method
Visual inspection comes first. Walk the whole floor and look for blisters, peeling, lifted edges, cracks, soft patches, and separation around drains and repairs. Mark what you find on a floor plan. Take photos both close up and wide enough to show where the spot is. A good-looking surface proves nothing about bond, but a bad-looking one tells you where to dig.
Tape and cut tests score adhesion by cutting through the coating, pressing tape on, and pulling it off. ASTM D3359 was written for fairly ductile coatings on metal. It gives a rating, not a strength value, and it isn’t very sensitive to differences in adhesion. Before using it on a concrete floor, you need a reason to believe it fits. And a tape rating can’t be converted to MPa or swapped in for a specified pull-off test.
Pull-off testing is the usual choice for coatings on concrete, and ASTM D7234 covers it. A loading fixture, the dolly, is glued to the coating and pulled straight up with a tester. The test is destructive, so the plan has to include repairing every spot you test.
Make Sure the Coating Is Ready
Test too early and you get misleading numbers and arguments nobody needed.
A floor can handle light foot traffic long before it’s ready for an adhesion test. A polyaspartic that’s walkable the same day hasn’t earned an adhesion test the same day. ASTM D7234 calls for testing after adequate cure, with the manufacturer setting the minimum time. Cold or humid site conditions can stretch that period.
Before you book the inspection, pull together the application date for each layer, product names and batch numbers, mixing and application records, site conditions, and the manufacturer’s testing guidance. On a multilayer system, think about the whole build. A hard topcoat doesn’t prove the layers under it have finished curing.
Choose Test Locations That Mean Something
One reading can’t speak for a whole warehouse or garage.
Spread tests across different installation zones, concrete conditions, repair areas, and work shifts. Add spots near entrances, drains, construction joints, and anywhere contamination has been a problem before.
Keep two kinds of results separate in the report. Tests taken at visibly damaged areas answer “what went wrong here?” Tests taken across sound-looking floor answer “is this floor good?” Mixing them muddies both.
How many tests? Whatever the contract and inspection plan say. Don’t pass off a rule like “one test per X square feet” as a universal requirement. And because testing damages the surface, clear locations with the owner and leave time for repair and recure before handover.
Running the Pull-Off Test
What follows is a walkthrough, not a substitute for the standard or the instrument manual. Those govern the details.
Equipment. Use a tester with current calibration paperwork. Record the instrument, the dolly diameter, and the units. Switching instruments or fixtures midway can make results hard to compare.
Surface and dolly prep. Both bonding surfaces need preparing as instructed, and the dolly has to be clean. Sloppy prep can make the glue joint fail before the floor is tested at all.
Gluing the dolly. Pick an adhesive that suits both the test and the coating, follow its mixing and cure instructions, and write down what you used. On textured finishes, watch for uneven contact or trapped gaps under the dolly.
Isolating the test area. Cut or score around the dolly if the method calls for it. Note whether you did and how. Don’t improvise the cutting depth, and don’t compare tests prepared differently without saying so.
Pulling. Align the tester properly and load at the specified rate. Record the peak stress, then photograph both fracture surfaces. Every photo should tie back to its location and reading.
Reading the Failure Mode
“Adhesion failure” is too vague to be useful. A good report says what separated from what.
| Where it broke | What it tells you |
|---|---|
| Inside the concrete | Concrete strength capped the reading |
| Concrete to primer | Check the substrate–coating interface |
| Between coating layers | Check the intercoat bond |
| Inside one coating layer | That layer’s own strength capped the reading |
| In or at the test adhesive | The test setup may have capped the reading |
| Several of the above | Report the mixed pattern as it is |
All of this follows from one idea: a pull-off test finds the weakest plane in the assembly you loaded.
Concrete failure. If concrete comes away stuck to the coating, the bond held and the substrate gave out first. That’s often a good sign for the interface. It isn’t an automatic pass, though. Weak concrete can let go below your required value.
Interface or intercoat failure. A break between concrete and primer sends you back to substrate prep, contamination, moisture records, and primer application. A break between layers points to recoat timing, surface cleanliness, prep, or system compatibility. Where it broke guides the investigation. It doesn’t name the cause on its own.
Test adhesive failure. If the glue joint or dolly goes first, don’t report that number as the strength of the coating–concrete bond. Follow the standard’s reporting and retest rules.
Judging Results Against the Spec
Record stress in the agreed units. For quick conversion, 1 MPa is roughly 145 psi.
Say a project requires every valid reading to reach 1.5 MPa. Three tests come back at 2.0, 1.8, and 0.9 MPa. The average is about 1.57 MPa, which looks fine. But the 0.9 location still fails an individual-reading requirement, and the average doesn’t cancel it.
That’s why the acceptance rule has to be spelled out in advance. Another project might use different thresholds, or add failure-mode conditions on top.
One more caution: a good adhesion result doesn’t vouch for everything else. It says nothing by itself about waterproofing, chemical resistance, wear, or how the floor will cope with moisture later.
When a Reading Comes Back Low
Don’t jump to repair. Check the test first.
Look at coating age, adhesive cure, instrument settings, alignment, prep, and the fracture photos. Retest if the agreed procedure allows it, and keep the original result in the record.
If the problem is real, investigate the affected zone. Manufacturers keep repeating the same foundation for resin floors: sound, clean concrete with weak material removed. Then go through the installation records for incomplete prep, contamination, missed recoat windows, mixing errors, or bad application conditions.
On an epoxy floor coating with a polyaspartic topcoat, find out which interface actually failed. More topcoat won’t fix a weak bond under the primer.
Match the repair to how far the problem extends and what caused it. Remove unsound material, fix the underlying issue, reinstall the specified system, and give it the full cure time before retesting.
What the Handover Record Should Contain
Someone who wasn’t on site should be able to find and understand every test. That means:
- Project name, date, inspector, and witnesses
- Coating system and application dates
- Test standard and agreed acceptance criteria
- Instrument ID and calibration details
- Dolly size, adhesive, and isolation method
- Site conditions and coating age
- Location map and individual readings
- Failure descriptions and photos
- Repairs, retests, and approval decisions
Log the repair of each destructive test spot too, and confirm those patches have cured enough for the floor’s intended service. A solid package ties the numbers to the actual floor, the acceptance terms, and any corrective work done.
FAQ
Can adhesion be checked without damaging the floor?
Visual inspection can turn up defects without harming anything. Pull-off testing damages the test spot, and it has to be repaired.
Is a concrete failure always acceptable?
No. It tells you where the break happened. The reading still has to meet the acceptance criteria.
Can a polyaspartic floor be tested the next day?
Only if the manufacturer’s testing guidance and the real site conditions support it. Walk-on time and test readiness are two separate decisions.
Does a passing test guarantee the floor won’t peel?
No. It’s evidence from specific spots under specific test conditions. Representative sampling, clean installation records, and suitable service conditions still count.
Conclusion
Adhesion testing gives contractors and owners a far better basis for handover than looks alone. The strongest evidence comes from four things together: representative locations, a suitable method, enough cure time, and a careful read of the fracture surfaces.
On epoxy and polyaspartic projects, settle the acceptance requirements early and keep every result traceable. If a weak spot turns up, find the cause, repair it properly, and document the outcome before the floor goes into service.