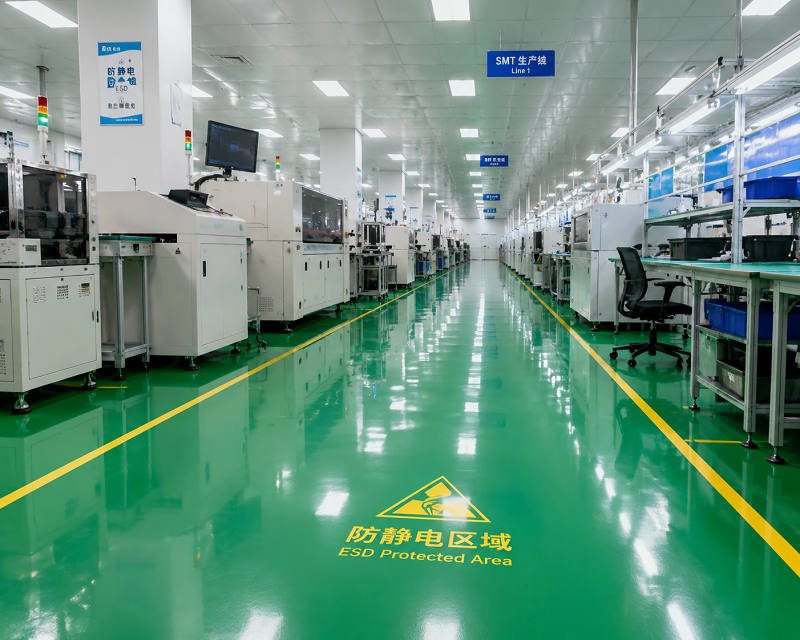
In the world of electronics manufacturing, micro-precision dictates failure or success. As microchips and semiconductors shrink in size while ramping up in speed, they become incredibly fragile. Enter Electrostatic Discharge (ESD)—the invisible gremlin of the cleanroom that can ruin a production batch without warning.
To safeguard these hyper-sensitive components, standard factory floor coating simply won’t cut it. Your floor is literally the foundation of your static control strategy. Here is a deep dive into why ESD floor coatings are essential, and which specific systems fit the bill for tech manufacturing.
1. What’s the Big Deal with ESD?
Simply put, ESD is that sudden, unwanted spike of electricity jumping between two objects. Think about walking across a standard vinyl floor; that friction generates thousands of volts of static charge via triboelectric charging.
While you won’t even feel a static shock unless it tops 3,000 volts, advanced electronics are a different story. A tiny zap of 10 to 100 volts can instantly fry a micro-component or degrade its internal circuitry.
The True Cost of Static Failures
Static damage hits manufacturing margins in two ways:
Immediate Failures: The component dies on the line. It hurts your yield, but at least your quality control team catches it before shipping.
Latent Defects (The Silent Killer): The component takes partial damage but manages to pass factory testing. Months later, it fails unexpectedly in the hands of your customer. This triggers expensive warranty claims and tanks your brand reputation.
Because of this, managing static isn’t a safety checkbox—it’s a bottom-line financial strategy.
2. How ESD Flooring Protects the Plant
Relying solely on wrist straps and anti-static smocks is a trap. Operators move around, and the moment they unclip from a workstation, your protection drops.
An ESD floor coating acts as a reliable, passive grounding net that works 24/7 by doing two things simultaneously:
Stopping Charge Before It Starts: It prevents static buildup when shoes, carts, or heavy automated guided vehicles (AGVs) roll across the room.
Draining Existing Volts: If a worker walks into the zone carrying a charge, the floor safely bleeds that voltage into the ground in milliseconds.
To meet strict global baselines like ANSI/ESD S20.20, a facility’s floor system must keep electrical resistance tightly regulated—usually well below $1.0 \times 10^9$ ohms.
3. Top Flooring Systems Designed for Tech Manufacturing
You can’t just slap a basic coat of gray paint on the concrete and call it a day. Tech plants need flooring that merges static dissipation with cleanroom-grade durability.
Here are the top three industry-proven options:
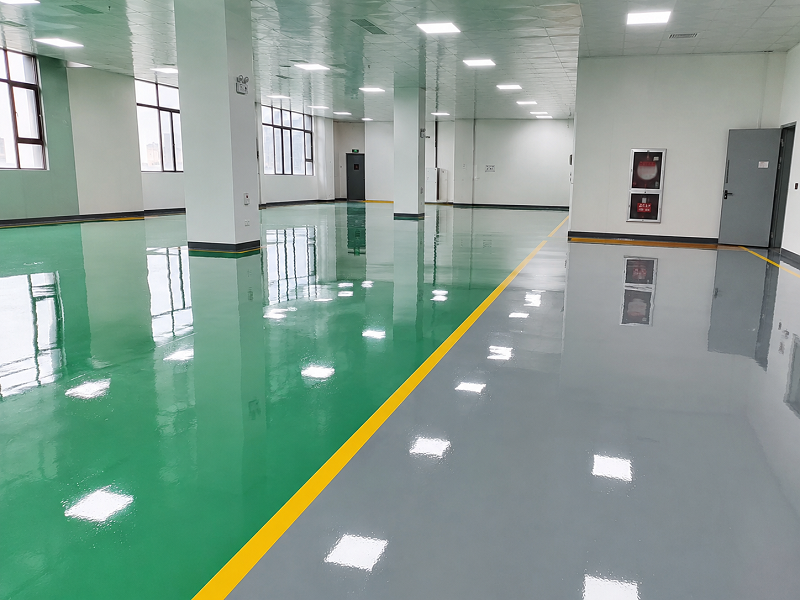
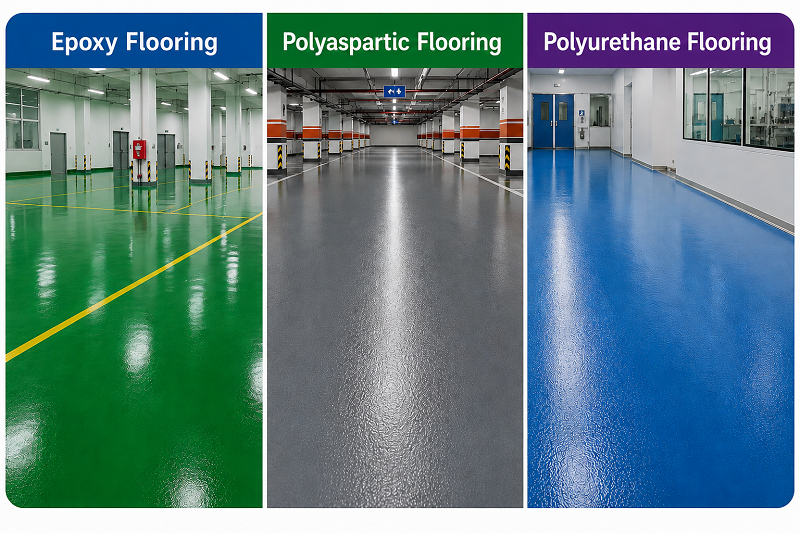
A. ESD Epoxy Coatings (The Go-To Choice)
This seamless resin system mixes conductive elements—like carbon fibers—directly into the epoxy fluid, which cures over the concrete base.
Why it works: It creates a completely seamless barrier. No grout lines mean no places for dust, moisture, or micro-contaminants to hide, making it a perfect fit for ISO-rated cleanrooms. Plus, it stands up to harsh chemicals, fluxes, and heavy wheeled traffic.
Electrical Range: Available in Dissipative ($1.0 \times 10^6$ to $1.0 \times 10^9 \text{ ohms}$) or Conductive ($2.5 \times 10^4$ to $1.0 \times 10^6 \text{ ohms}$) variants.
B. Polyaspartic & Polyurethane ESD Systems (Speed & Toughness)
These are advanced elastomeric coatings frequently deployed as high-performance topcoats or heavy-duty mortars.
Why it works: Polyurethane has superior flex and handles vibration or thermal shocks better than rigid epoxy. Meanwhile, polyaspartics offer ultra-fast cure times (hours instead of days), meaning you can overhaul a factory floor over a standard weekend without bleeding money on downtime.
C. ESD Vinyl Tiles or Sheets (Resilient Flooring)
While resin fluids dominate new builds, interlocking ESD vinyl tile is a popular retrofitting choice for server hubs and light assembly lines.
Why it works: It provides great underfoot comfort for workers standing all day.
The Catch: Vinyl floors have seams. Over time, those joints can collect debris or peel up, potentially compromising your cleanroom integrity.
4. Quick Comparison: Resin vs. Tiles
Metric
ESD Epoxy
ESD Polyurethane / Polyaspartic
ESD Vinyl
Cleanroom Fit
Seamless/Excellent
Seamless/Excellent
Moderate (Seams)
Turnaround Time
5-7days
12-24 hours (Ultra-Fast)
Fast (Glue dependent)
Heavy Traffic
Great
Exceptional
Moderate (Scuffs easily)
UV Stability
Tends to yellow
Highly stable
Highly stable
5. Execution Matters: The Anatomy of an ESD Floor
An ESD coating fails if the prep work is sloppy. A functional system requires a meticulous multi-tier buildup:
Shot-Blasting: Open up the concrete pores mechanically and check for vapor transmission.
Primer: Seal the porous slab completely.
Copper Grid: Layout conductive copper tapes hooked directly into the facility’s main electrical ground.
Conductive Primer: Apply a carbon-loaded layer to spread electrical conductivity laterally across the floor plate.
ESD Topcoat: Put down the final wear layer that delivers your desired look while maintaining the vertical paths needed to guide static down to the copper grid.
6. Final Thoughts
In high-stakes electronics manufacturing, maximizing your pass rate is everything. Static electricity is a persistent hazard that you cannot afford to leave to chance.
Opting for a professional ESD resin floor coating is an investment that pays for itself by lowering defect rates, satisfying strict compliance audits, and protecting your brand’s hard-earned market reputation.
For decades, solvent-borne floor finishes held an uncontested grip on commercial and industrial construction. Contractors valued them for a simple reason: the chemistry worked. Deep gloss, punishing chemical resistance, long pot life — these systems delivered on every front. The compromise was invisible, at least initially. That compromise was VOCs.
The physics are straightforward. Solvent-borne epoxy floor coating keeps its polymer chains fluid by suspending them in volatile chemical carriers. When the material cures and those chains lock together, the carriers have nowhere to go but up — into the breathing zones of installation crews, into HVAC returns, into the surrounding neighborhood via exhaust fans.
What That Actually Costs Facilities
The liability isn’t abstract. Installation workers report headaches and dizziness within hours of starting a job; neurologists have documented more serious long-term damage from repeated solvent exposure over a career. Step outside the building, and the problem compounds: those evaporated compounds react with sunlight and nitrogen oxides at street level, feeding the photochemical chain reaction behind urban smog.
For facility managers, the most immediate pain is operational. A solvent-laden application in a food processing wing or an active hospital ward isn’t just uncomfortable — it’s a shutdown event. The odor alone disqualifies the space from use while curing runs its course. Depending on the square footage and ventilation, that interruption can stretch from days into weeks, with revenue losses that dwarf the original flooring budget.
The Pivot to Waterborne Chemistry
This is precisely where waterborne epoxy floor coating entered the conversation — and where early skepticism gave way to a more honest technical assessment. Earlier water-dispersed formulations did underperform. Contractors who tried them in the 1990s and early 2000s encountered slower build, sensitivity to humidity during cure, and adhesion that fell short of solvent benchmarks. Those critiques were fair at the time.
The formulations in use today are a different product category in the same name. Advances in dispersion particle size, crosslinker efficiency, and co-solvent reduction have closed the performance gap to the point where “waterborne vs. solvent-borne” is no longer a straightforward trade-off question. For a growing range of industrial applications — healthcare flooring, logistics facilities, food-grade environments — waterborne systems have become the baseline specification, not the alternative one.
With modern watchdogs like the EPA and Europe’s REACH rolling out ultra-strict caps on chemical emissions, relying on old-school solvent systems is quickly becoming a major legal and financial liability.
The Breakthrough of Water-Dispersible Chemistry
This is where advanced waterborne epoxy floor coating changes the game. Instead of gambling with toxic chemical thinners, these modern systems use everyday water to suspend the resin particles and curing agents. Once applied to the subfloor, the water safely evaporates into the room as basic vapor, leaving behind a tightly locked, incredibly rugged polymer shield.
Admittedly, early versions of water-based coatings struggled with a bit of a reputation issue. Installers complained about water spots, weak chemical resistance, and thin, brittle coats. However, recent breakthroughs in polymer synthesis have completely rewritten that old narrative.
Today’s industrial-tier epoxy floor coating setups utilize cutting-edge emulsifiers that allow them to match—and frequently beat—the wear-and-tear resistance of older, solvent-heavy options.
Proven Perks: Why Operations are Shifting to Waterborne Systems
This industry-wide migration toward water-based tech isn’t just about dodging fines; it is fueled by genuine practical, financial, and safety advantages on the job site.
1. Odorless Classrooms and Clean Workspaces
The most immediate benefit of picking a waterborne epoxy floor coating is its clean, near-zero VOC footprint. Because the formula relies on water, there is no choking chemical smell during or after the roll-out. This makes it a perfect fit for “live environments”—buildings that need to keep running during a remodel. Supermarkets, schools, and medical labs can upgrade their floors without sending everyone home or risking stock contamination.
2. Moisture Vapor Management
Traditional solvent-based options or 100% solids formulas share a common weakness: subfloor moisture pressure. When water vapor rises naturally through a concrete slab, it gets trapped under an airtight solvent layer, leading to ugly bubbles, blisters, and total adhesion failure.
Waterborne epoxy floor coating solves this with a micro-porous, “breathable” structure. It allows tiny amounts of underlying moisture to pass straight through the cured film without breaking the bond with the concrete, radically lowering the risk of floor failure on damp slabs.
3. Rapid Bonding to Green Concrete
Because these systems are formulated with water, they are inherently compatible with damp or recently poured concrete. Traditional options demand a bone-dry substrate, which often stalls tight construction timelines. Waterborne choices bypass this delay, letting crews get to work much faster.
4. Zero-Fuss Cleanup
Cleaning up after a solvent job requires aggressive wash-liquids like xylene or acetone, introducing more fire hazards and toxic waste to the site. A waterborne epoxy floor coating, on the other hand, cleans up easily with regular soap and water before it hardens. This slashes hazardous waste disposal fees and makes the job site fundamentally safer.
Debunking the “Eco-Friendly Means Weak” Myth
A common misconception among old-school contractors is that green alternatives lack real-world muscle. While that might have held true twenty years ago, modern chemical engineering has thoroughly disproven it.
Current industrial-grade waterborne epoxy floor coating solutions consistently deliver:
Rugged Abrasion Defenses: Built to withstand constant foot traffic, heavy forklift wheels, and dragging pallets.
Chemical Immunity: Easily resists spills from mild acids, harsh industrial detergents, and automotive fluids.
Tailored Aesthetics: Available in everything from muted satin to high-gloss finishes, with full support for decorative color flakes or anti-slip aggregates.
While ultra-thick 100% solids formulas still hold the crown for extreme-impact heavy manufacturing zones, waterborne options have effectively captured the commercial, institutional, and standard industrial markets.
The Real Numbers: Shifting the Cost Conversation
Smart procurement managers know that looking only at the price tag per gallon is a mistake. The true cost of a flooring project must factor in labor, downtime, and long-term compliance.
Operational Factor
Solvent-Based Epoxies
Waterborne Epoxy Floor Coating
Upfront Material Cost
Moderate
Highly Competitive
Business Interruption
Severe (Requires empty building)
Minimal (Allows for localized, live application)
Air Handling Needs
High (Requires heavy-duty isolation)
Standard, passive ventilation
Cleanup Liabilities
High (Hazmat disposal fees for solvents)
Negligible (Simple water cleanup)
Future Proofing
Low (Risk of violating future emissions caps)
Absolute (Well within green building codes)
When you tally up the savings from avoided shutdowns, the lack of specialized ventilation gear, and lower workplace liability risks, waterborne epoxy floor coating options prove to be the smarter financial investment over the life of the building.
Final Thoughts: Leading the Green Transition
The VOC dilemma is no longer an issue the construction world can put on the back burner. As green initiatives like LEED certification move from niche design choices to mandatory building baselines, eco-conscious materials are the new standard.
Choosing a waterborne epoxy floor coating bridges the gap between environmental care and heavy-duty durability. By swapping out toxic solvents for water, it eliminates health risks without forcing project managers to lower their standards for style or strength. The future of commercial design belongs to clean engineering—and waterborne epoxies are paving the way.
You just had your garage floor coated. The crew packed up, everything looks great, and now you’re staring at the door wondering when you can actually use the space again.
This is where most people either get impatient and damage the floor, or wait far longer than they need to because nobody gave them a clear answer. Epoxy cure time gets complicated fast — manufacturers list numbers that assume ideal conditions, contractors give estimates that vary by system, and the difference between “dry” and “cured” is something most people don’t realize matters until something goes wrong.
Here’s a clear breakdown of what each cure stage actually means, what the real numbers look like for different systems, and which factors can push those timelines in either direction.
Dry vs. Cured: Why These Are Two Different Things
The most important thing to understand before anything else: a floor that looks dry is not necessarily a floor that’s cured.
Drying is a surface event — the top layer firms up, stops being tacky, and feels solid underfoot. Curing is a chemical event — the epoxy resin and hardener are completing their crosslinking reaction throughout the full depth of the coating. That reaction continues long after the surface feels hard.
Drying and curing are different processes — the floor can be dry to walk on but not yet cured for cars.
Walk on a floor before it’s ready and you risk scuff marks, surface impressions, and bond disruption. Park a car on it before full cure and you’re risking tire pickup, surface distortion, and permanent marks. The stakes are different at each stage — which is why understanding the stages matters.
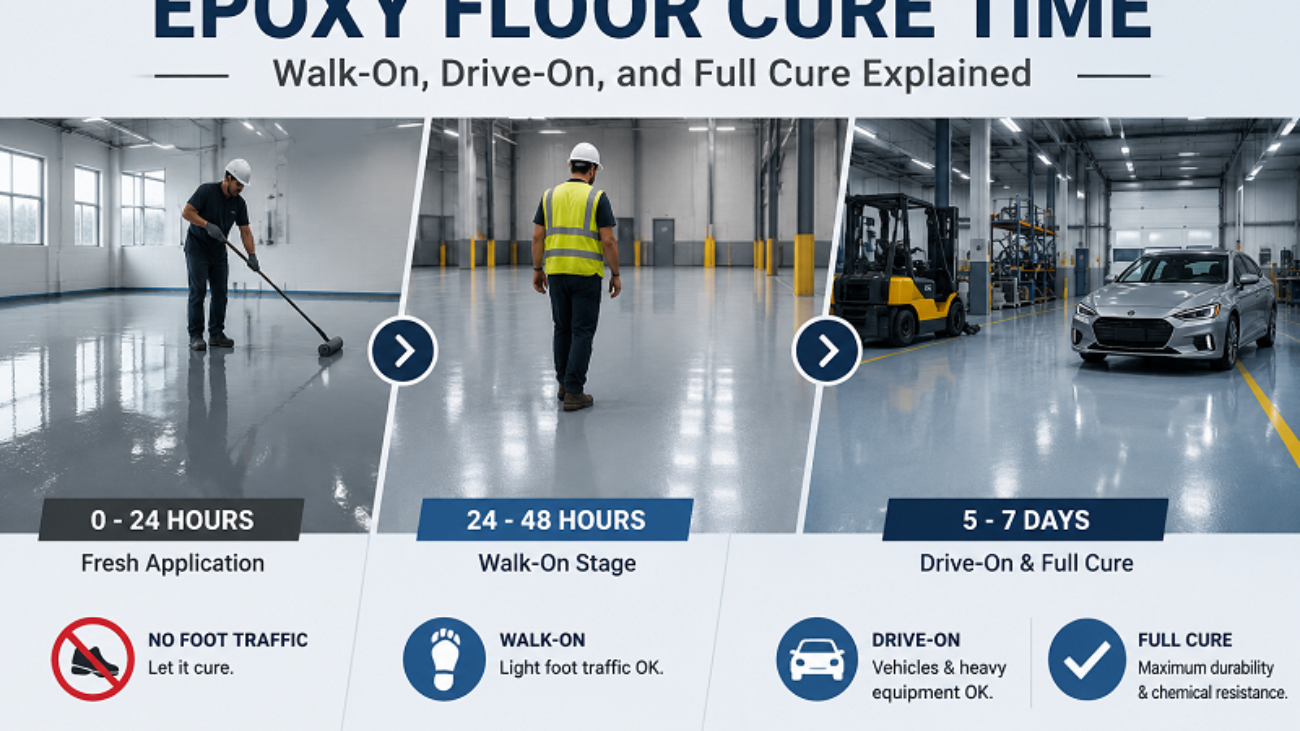
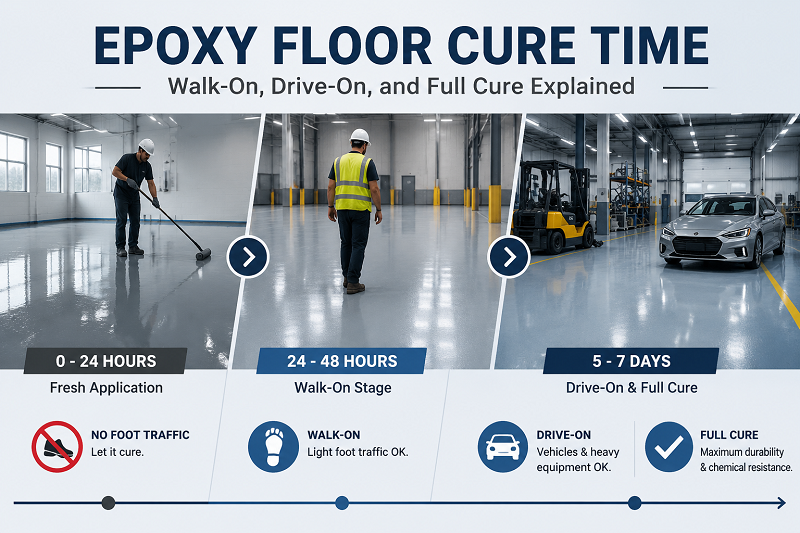
Stage 1: Surface Dry (Tack-Free) The top layer is no longer sticky. You can walk across it to check, but that’s about it. No foot traffic, no objects placed on the surface. This typically happens 8–14 hours after application under normal conditions.
Stage 2: Walk-On Ready Light foot traffic is safe — socks or soft-soled shoes, no dragging, no heavy items. This is the stage where you can start moving back lightweight items. If using 100% solids epoxy, your floor will be cured and walkable in about 12–18 hours.
Stage 3: Return to Service (Drive-On Ready) This is when furniture, shelving, and vehicle traffic become safe. You can return to full heavy traffic after about 36–72 hours. The coating has enough hardness to handle the weight and movement without permanent marking — but the chemical cure is still ongoing underneath.
Stage 4: Full Chemical Cure Maximum hardness, full chemical resistance, complete crosslinking. Between days 5 and 7, most garage epoxy floors reach full cure under normal conditions. The coating has developed maximum hardness and resistance to hot tire transfer, chemicals, and vehicle weight.
Cure Time by System Type
Not all floor coatings follow the same timeline. The system you have — or are choosing — significantly affects how long each stage takes.
Standard 100% Solids Epoxy
The most widely installed garage floor coating. Cure timeline under ideal conditions (70–75°F, 50% humidity):
Stage
Timeframe
Surface dry (tack-free)
8–14 hours
Walk-on (light foot traffic)
12–24 hours
Return to service (light vehicles)
48–72 hours
Full chemical cure
5–7 days
Water-Based Epoxy
Water-based systems are thinner, lower in solids content, and generally cure faster to the touch — but they also build less thickness per coat and reach lower final hardness than 100% solids systems.
Stage
Timeframe
Surface dry
4–8 hours
Walk-on
8–16 hours
Return to service
24–48 hours
Full cure
3–5 days
Polyaspartic Floor Coating
Unlike traditional epoxy that can keep you waiting for days, polyaspartic coatings offer lightning-fast cure times that get you back to using your space in hours, not days.
Stage
Timeframe
Surface dry
1–2 hours
Walk-on
4–6 hours
Return to service
12–24 hours
Full cure
24 hours
Most polyaspartics are walkable after 6 hours and can be returned to normal service after 24 hours. This is the primary reason polyaspartic is the dominant choice for commercial projects and any situation where floor downtime is genuinely costly.
Polyurethane Floor Coating
Cure speed sits between epoxy and polyaspartic — a well-rounded middle ground for topcoat applications. Aliphatic polyurethane typically reaches surface dry at 4–8 hours, return to service at 24–48 hours, and full cure at 3–5 days.
Stage
Timeframe
Surface dry
4–8 hours
Walk-on
8–16 hours
Return to service
24–48 hours
Full cure
3–5 days
Polyurethane is most commonly applied as a topcoat over an epoxy base — in that case, the full system’s cure timeline follows the epoxy base coat schedule. As a standalone system, it cures slightly faster than 100% solids epoxy but slower than polyaspartic. Specific timelines vary by product — always check the technical data sheet.
What Moves the Timeline
The numbers above assume ideal conditions. In the real world, several variables push these timelines longer — or occasionally shorter.
Temperature: The Biggest Variable
The general rule: the cooler the floor, the longer the dry times. The warmer the floor, the shorter. Do not apply any epoxy below the recommended temperature range (typically 55°F floor temperature). Too cold a floor can stop the curing process entirely, and warming the room afterward may not restart it — meaning the floor stays tacky permanently and must be ground off.
As a working rule: every 10°F drop in temperature roughly doubles the cure time. A floor that cures in 24 hours at 75°F might take 48+ hours at 55°F — and potentially fail to cure properly below that.
Floor Temperature
Effect on Cure Time
Below 50°F (10°C)
Risk of cure failure — avoid application
50–60°F (10–15°C)
Significantly extended — add 50–100% to standard times
65–75°F (18–24°C)
Ideal range — published times apply
Above 85°F (29°C)
Faster surface dry, but risk of trapped bubbles and exothermic heat
Practical tip: The floor temperature matters more than the air temperature. A garage slab in early spring can be significantly colder than the air feels. Use an infrared thermometer on the concrete itself before starting.
Humidity
High humidity (over 90%) can interfere with the curing process, resulting in a tacky finish. Moderate humidity (40–70%) is fine. Problems arise at extremes — very high humidity introduces moisture contamination into the curing layer, while very dry conditions can affect certain water-based formulations.
Coating Thickness
Applying too thickly traps heat and extends cure time. Thick applications also increase the risk of surface wrinkling and solvent entrapment. Stick to the manufacturer’s specified coverage rates. Multiple thinner coats cure more reliably than one heavy application.
Ventilation
Closing the garage too tightly can slow curing, especially in cooler weather. Airflow helps the curing process along. Running a fan to move air across the surface without creating dust is a simple way to support consistent cure, particularly in the first 12–24 hours.
Concrete Moisture Content
A slab with elevated moisture vapor levels doesn’t just affect adhesion — it can slow curing by introducing moisture into the system from below. If the floor has moisture issues, a vapor barrier primer addresses this before any topcoat goes down.
Common Mistakes That Damage Floors During the Cure Window
Parking too soon Parking a car before full cure risks tire marks or surface distortion. Cooler temperatures can extend cure time beyond seven days, so always factor in ambient conditions when planning vehicle return.
Using the wrong footwear Walking on a partially cured floor in shoes with hard soles, narrow heels, or grip treads can leave permanent impressions. Soft-soled shoes or socks only during the walk-on phase.
Dragging objects across the surface Even after return-to-service, dragging furniture, tool chests, or shelving across the floor before full cure can scuff or score the surface. Lift, don’t drag, until day 7.
Washing the floor before full cure Never add water, cleaning agents, or heavy objects before the recommended cure time — even if the area looks dry. Water introduced before full chemical cure can cloud the finish and weaken the topcoat’s final hardness. Wait for full cure before the first wet clean.
Applying heat to speed up the process Space heaters aimed at a freshly coated floor create uneven temperature gradients that cause bubbling, crazing, and uneven gloss. If the space needs to be warmer, heat the room before application — not after.
A Practical Timeline for a Standard Garage Floor Project
This covers a standard 100% solids epoxy system installed in a two-car garage under normal conditions (68–75°F, 50% humidity):
Timeline
What’s Safe
Day 1 (installation day)
Stay completely off the floor
Day 2 (12–24 hours)
Light foot traffic in soft-soled shoes only
Day 3 (48–72 hours)
Lightweight items can be returned; still no vehicles
Day 4–5
Standard foot traffic; avoid dragging or heavy items
Day 7
Full cure — vehicle parking, furniture, first wet clean all safe
If you’re working with a polyaspartic system, compress this entire timeline to roughly 24 hours. Walk-on happens same day, vehicle parking within 24 hours, full cure within 24–48 hours.
What Happens If You Use the Floor Too Early?
It depends on how early and what the contact is.
Light foot traffic at 10 hours on a floor that’s ready at 12 hours: probably no visible damage, minor risk. Parking a car at 24 hours on a floor that needs 72 before vehicle traffic: tire pickup, pressure marks, and potentially permanent surface distortion.
Rushing this stage can result in tire marks, delamination, or a reduced lifespan of the coating.
If damage does occur during the cure window, address it quickly. Minor scuff marks on a partially cured floor can sometimes be lightly sanded and recoated before full cure completes — once the system has fully hardened, repairs become more involved.
The Short Version
Walk-on: 12–24 hours for standard 100% solids epoxy; 4–6 hours for polyaspartic
Drive-on: 48–72 hours for epoxy; 12–24 hours for polyaspartic
Full cure: 5–7 days for epoxy; 24 hours for polyaspartic
Temperature is the most significant variable — below 55°F, cure quality is at risk
“Dry” and “cured” are not the same thing; the floor can look done before it is done
When in doubt, wait the extra day — a week of patience is cheaper than a full recoat
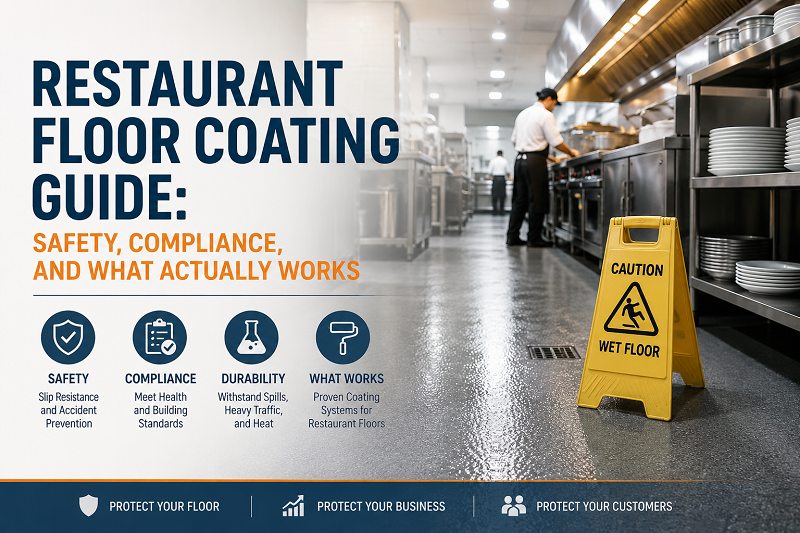
A restaurant floor takes more abuse than most owners stop to think about. Grease, boiling water, industrial cleaners, hundreds of customers a day, delivery dollies scraping across the surface — no single floor coating handles all of that the same way. More to the point, a restaurant floor isn’t just a durability question. It’s a food safety issue, a staff safety issue, and a compliance issue that comes into play every time an inspector walks through the door.
Pick the wrong system and you’re dealing with peeling, bacterial growth in cracks, and potentially a written violation notice. This guide covers what regulators actually require, which coating systems perform in commercial kitchen environments, and the installation details that make or break long-term compliance.
What the Regulations Actually Require — By Market
Regulatory frameworks differ across markets, but the underlying demands are consistent: seamless, non-porous, chemically resistant, slip-resistant, cleanable, and physically maintained. Here’s what that looks like in practice across four major markets.
United States: FDA Food Code + OSHA
The two governing frameworks for US restaurant floors are the FDA Food Code and OSHA workplace safety standards.
Under the FDA Food Code, food preparation area floors must be constructed of smooth, durable, easily cleanable materials and kept in good repair. Section 6-201.14 explicitly prohibits carpet in food preparation and warewashing areas — no exceptions. Section 6-501.11 requires floors to remain free of cracks, chips, and gaps. A compliant material in poor physical condition is still a violation.
One thing worth knowing: the FDA and USDA don’t “approve” specific floor coating brands. Compliance is evaluated based on how the floor performs in your facility, not what the product label says.
NSF/ANSI 51 certification is the most important third-party verification standard for food contact environments in the US — it provides independent confirmation that a floor coating product meets FDA requirements.
United Kingdom: Food Safety Act + HACCP + BRC Standards
UK food service floors fall under the Food Safety Act framework and must comply with HACCP (Hazard Analysis and Critical Control Points) principles.
The Health and Safety Executive (HSE) publishes specific slip resistance guidance for workplace floors. The BRC Global Standard for Food Safety, Section 4.4, sets out detailed requirements for floor maintenance condition, cleanability, and process suitability in food facilities — BRC certification has become the effective industry standard across UK food production and foodservice supply chains.
Key HACCP compliance requirements for floors: easy to clean and disinfect, installation of coving at floor-wall junctions to eliminate right-angle harbourage points, and structural integrity maintained across the full operational life of the facility.
European Union: Regulation EC 852/2004
The EU’s core food hygiene regulation — European Parliament Regulation EC 852/2004 — requires floor surfaces in food handling areas to be easy to clean and, where necessary, disinfect. Materials must be impervious, non-absorbent, washable, and non-toxic.
The EU doesn’t operate an “approved products” mechanism for floor coatings. Instead, floors must satisfy HACCP principles and EFSA (European Food Safety Authority) guidance. Local health authority inspections evaluate actual hygienic performance, not product certifications.
China: GB 14881 General Hygiene Standards for Food Production
In China, food production facilities and restaurants are governed by GB 14881 — General Hygiene Standards for Food Production, alongside local food safety operation guidelines from market supervision authorities.
Core requirements align closely with international standards: floors must use non-toxic, odorless, impermeable, easily cleaned materials and be maintained flat and crack-free. Food processing areas require adequate drainage slope, floor-wall junctions must have coved transitions (curved base treatment), and floor materials must contain no components harmful to human health.
Quick Reference: Compliance Requirements by Market
Whatever market you’re operating in, the baseline is the same: a seamless, sealed floor coating system that resists daily cleaning chemicals, gives bacteria nowhere to hide, and stays in good physical condition when an inspector shows up.
Different Zones, Different Requirements
A restaurant isn’t one space — front of house, kitchen, prep areas, and warewashing zones each put different demands on a floor coating system.
Front of house (dining area): Aesthetics and abrasion resistance are the primary considerations. Slip resistance requirements are moderate. Matte or satin finishes outperform high-gloss here — a mirror-shine floor in a dining room shows every footprint and scuff within a week of opening.
Commercial kitchen and prep areas: The most demanding compliance zone. Seamless and non-porous is the floor — daily hot water pressure washing and concentrated cleaning chemicals are standard. Slip performance directly affects staff safety.
Warewashing area: Constantly wet, high foot traffic, highest chemical concentration in the building. Requires the strongest chemical resistance and slip resistance of any zone.
Cold storage and dry storage: Low temperatures, occasional condensation. The floor coating system needs to stay stable and well-adhered under cold conditions.
Four Floor Coating Systems That Work in Restaurants
The most widely installed floor coating in commercial kitchens, and the cost-performance baseline against which other systems are measured.
100% solids epoxy creates a hard, seamless, non-porous surface that resists most cleaning chemicals and bridges minor surface irregularities. Broadcasted with quartz or aluminum oxide aggregate, slip resistance improves significantly. Color range is wide, which helps with zone marking and kitchen planning.
The real limitations: standard aromatic epoxy has limited hot-water resistance — repeated washdowns above 60°C (140°F) will gradually soften the topcoat. It’s also prone to UV yellowing, which matters in kitchens with skylights or near natural light. In high-frequency hot-wash commercial kitchens, expect a 5–8 year service life before the topcoat needs refreshing.
Best fit: Dining rooms, dry storage, prep areas without heavy thermal cycling Installed cost: $5–$10/sq ft Lifespan: 5–8 years in high-wash kitchens; longer in lower-demand zones
Polyurethane floor coating is the most well-rounded system for restaurant environments — more flexible than epoxy, better abrasion resistance, wider chemical tolerance, and UV-stable in its aliphatic form. Its elongation at break runs 100–300%, meaning it accommodates minor concrete movement without cracking, which matters in kitchens where temperature varies significantly through the day.
Two formulations worth understanding:
Aromatic polyurethane costs less and outperforms standard epoxy on wear resistance. It’s the practical interior choice where UV exposure isn’t a factor. Some color shift occurs under prolonged direct sunlight, though physical properties stay intact.
Aliphatic polyurethane is UV-stable — no yellowing, no chalking under sustained sun exposure. It’s the right call for outdoor dining areas, front-of-house spaces with skylights, and anywhere color consistency matters over time. Taber abrasion test data shows aliphatic polyurethane outperforming standard epoxy topcoats by up to 4x in wear resistance under high-traffic conditions — which is why most professional multi-coat systems use it as the finish layer.
In restaurant environments specifically:
Handles daily cleaning chemicals, sanitizers, and light degreasers without topcoat degradation
Available in matte or satin finishes — front-of-house aesthetics without the maintenance burden of high-gloss
With aluminum oxide or quartz aggregate broadcast, achieves OSHA-compliant wet COF ≥ 0.6
Most commonly specified as the performance topcoat over an epoxy base coat to extend full system lifespan
Cost: $5–$9/sq ft standalone; $3–$6/sq ft as topcoat over epoxy base Best fit: Dining rooms, naturally lit prep spaces, outdoor or semi-open dining areas, performance topcoat over epoxy systems Lifespan: 8–12 years standalone; extends combined epoxy system to 12–15 years
Polyaspartic primary advantage in restaurant applications isn’t its chemical resistance or hardness — it’s the speed. Walk-on time runs 1–4 hours after application, with full return to service within 24 hours. For an operating restaurant with a narrow shutdown window, that changes what’s actually installable.
Its elastomeric nature — elongation at break exceeding 300% — makes it significantly more resistant to cracking under thermal cycling than rigid epoxy. Connecting corridors between hot kitchens and cold storage areas, where temperature differentials are pronounced, are a particularly good application. Its wear resistance meets FDA and USDA standards, and it satisfies UL ANSI-NSF 61 requirements for floor coatings that may contact potable water.
Installed cost: $8–$14/sq ft Best fit: Renovation projects requiring fast return to service, cold storage access corridors, loading and receiving areas
Option 4: Epoxy + Polyurethane Hybrid System
For most mid-to-high-end restaurant operations, this is the most cost-effective floor coating solution: epoxy base coat for thickness, build, and adhesion; aliphatic polyurethane topcoat for UV stability, abrasion resistance, and broader chemical tolerance.
The back-of-house and dining room can share the same base coat system while receiving different topcoats — matte polyurethane with aggregate for the kitchen (slip resistance priority) and satin polyurethane for the dining room (aesthetics priority). One installation project, two performance profiles.
Installed cost: $8–$14/sq ft Lifespan: 10–15 years
Slip Resistance: How to Hit the Numbers
OSHA requires wet environment floors to provide adequate Coefficient of Friction. The working thresholds: dry floor COF ≥ 0.5; wet floor COF ≥ 0.6.
Three ways to achieve this in a floor coating system:
Quartz broadcast (20/40 or 30/60 grit) is the standard in commercial kitchens — good slip resistance, durable, manageable cleaning difficulty. Most commonly specified for general kitchen floors.
Aluminum oxide aggregate provides stronger grip than quartz, better suited to heavy grease zones like fry stations. Harder to clean thoroughly, so the tradeoff is deliberate — use it where slip risk is highest and build in cleaning protocols accordingly.
Surface embossing or patterned texture suits front-of-house areas where aesthetics and slip resistance need to coexist. Not appropriate for high-frequency wet cleaning zones.
One caveat: coarser isn’t always safer. Overly aggressive textures trap food particles and grease, which creates bacterial harborage — the opposite of the compliance objective. Match aggregate density and grit size to the actual grease load and cleaning frequency of each zone.
Four Installation Details That Get Overlooked
Cove base at floor-wall junctions The floor-wall transition is where bacteria and debris accumulate fastest — and where inspectors look first. A compliant commercial kitchen floor coating installation extends the coating up the wall at least 4 inches (10 cm) with a curved coved profile, eliminating the right-angle corner that’s impossible to clean properly.
Drain slope Commercial kitchen floors need adequate slope toward drains — typically 1:50 to 1:100 — to ensure washdown water clears completely. Confirm existing slope before installation; correcting it during the coating project is straightforward, but discovering standing water after the floor is down is not.
Drain edge and pipe penetration sealing Every floor drain perimeter and pipe penetration through the slab needs specific treatment to ensure the floor coating seals those transitions. Water infiltrating at those points compromises the bond over time.
Phased installation scheduling Most restaurant shutdowns are short. Specifying polyurea for its fast return-to-service, or phasing the installation zone by zone so part of the operation can keep running, is how experienced flooring contractors minimize the business impact of a recoat or new installation.
Maintenance: Staying Compliant Between Inspections
FDA Food Code Section 6-501.11 requires floors to remain free of cracks, chips, and gaps. A floor that was compliant on install day and is now deteriorating is still a violation.
Day-to-day maintenance:
Use pH-neutral or mildly alkaline cleaners for routine cleaning — concentrated acids degrade most floor coating topcoats over time
Address minor chips or point damage promptly; small damage becomes a compliance issue when it spreads
Inspect the floor condition annually, ideally before your scheduled health inspection cycle
Five Questions to Ask Before Hiring a Contractor
Do your products carry NSF/ANSI 51 certification or equivalent food safety documentation? Written documentation only — verbal assurances don’t hold up in an inspection
Does your installation scope include cove base at floor-wall transitions? Non-negotiable for commercial kitchen compliance
What’s the COF rating of your topcoat system? Ask for test data confirming wet COF ≥ 0.6
Do you have experience with food service facilities specifically? Residential and general commercial floor coating experience doesn’t transfer to food safety compliance knowledge
What’s your projected return-to-service timeline? This determines which system is actually viable for your shutdown window
The Bottom Line
Matching the right floor coating system to each zone — slip-resistant and seamless in the kitchen, durable and maintainable in the dining room — is what makes a restaurant floor work both operationally and from a compliance standpoint. Get the system right, find a contractor who understands foodservice facility requirements, and don’t skip the coving and aggregate details. A well-installed floor holds up for 10 or more years and gives you nothing to worry about when the health inspector walks in.
High-gloss floors had a good run. For the better part of two decades, a mirror-shine finish was the shorthand for luxury — the look that showed up in every renovation show, every real estate listing photo, every showroom. If the floor reflected light, it meant quality.
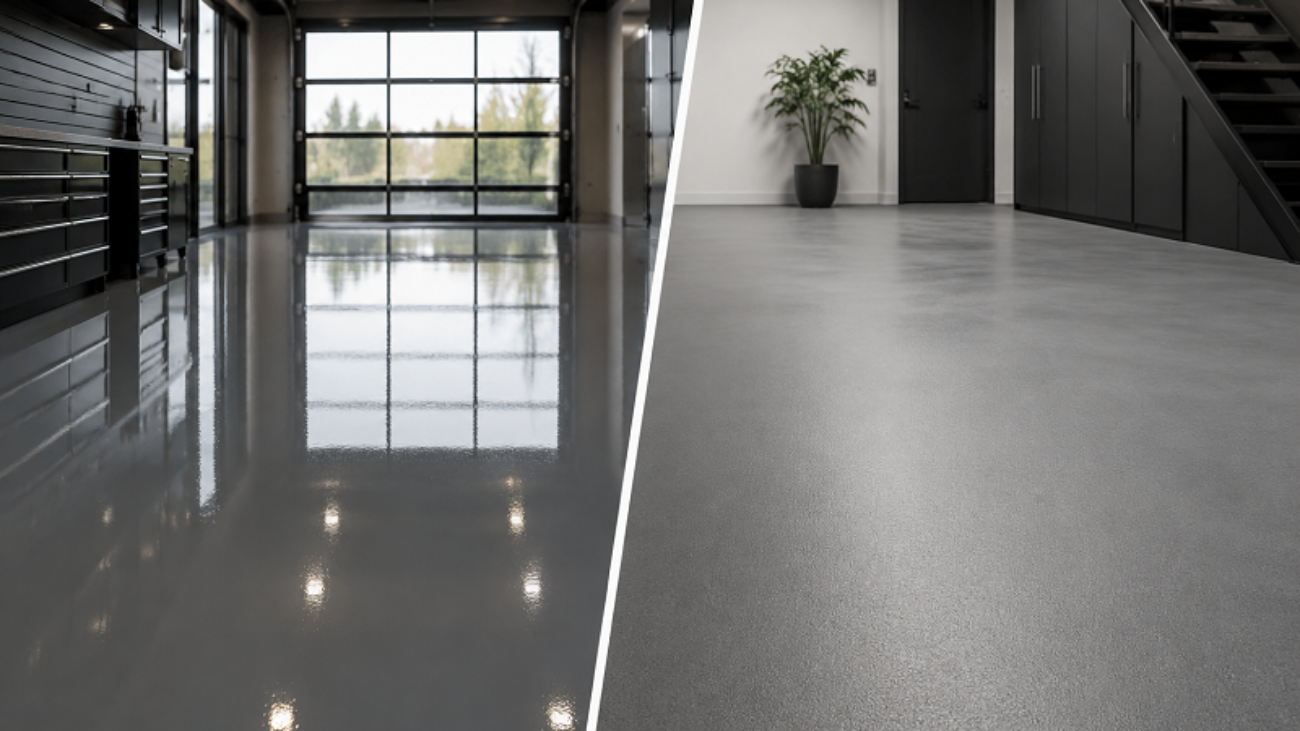
That calculus has shifted. Across residential, commercial, and industrial applications, matte and low-sheen floor coating are displacing high-gloss as the default. Not because gloss stopped being achievable, but because the reasons people wanted it have changed — and the practical downsides that were always there are harder to ignore now.
This isn’t just an aesthetic preference. The move to matte is being driven by real performance differences, changing design values, and a growing recognition that a floor coating that photographs well in a showroom and a floor that holds up to how people actually live are two different things.
The Problem With High-Gloss That Nobody Talks About
Walk into any space with a high-gloss floor coating and give it a week of real use. The first thing you’ll notice is that the floor starts telling on itself.
Every footprint shows. Every scuff catches the light. Pet paw prints, dust, water spots from a glass left on the counter — all of it becomes visible in a way that it isn’t on a matte or satin surface. As one designer put it bluntly: “Gloss shows every scuff, every water spot, every dog paw.” What looked like a luxury surface in an empty room becomes a maintenance project the moment people start using it.
The reflection itself is part of the problem. High-gloss floor coatings bounce light aggressively — which creates visual noise, particularly in open-plan spaces where the floor is a significant percentage of total surface area. Designer Shelley McIlroy describes it this way: “High-gloss floors can feel overly reflective and commercial. Matte finishes create a quieter architectural foundation. They absorb light, making a space feel grounded and layered rather than overly polished.”
For a long time, that visual intensity read as aspirational. The same reflective gloss that conveyed luxury has started feeling loud — spaces that exhale rather than compete for attention are now what people are after. The aesthetic pendulum has swung, and it’s pulled the market with it.
What’s Actually Driving the Shift in 2026
1. Maintenance Reality
This is the most underrated factor in the gloss-to-matte transition, and for everyday homeowners it might be the most important one.
Matte floors absorb light instead of bouncing it around, so everyday wear — footprints, dust, minor scuffs — simply isn’t as visible. They age more gracefully than glossy surfaces, which show wear conspicuously.
For a floor coating in a garage, basement, or commercial space, this matters practically. A high-gloss epoxy or polyurethane finish in a working environment shows tire marks, oil drips, and foot traffic patterns clearly. A matte floor coating in the same space hides the same level of use — the floor looks cleaner for longer between cleanings, and minor surface wear doesn’t register visually until it’s actually significant.
Matte finishes hide scratches and imperfections better than glossy floors, making them much easier to maintain in busy households and high-traffic spaces.
2. Design Has Moved Toward Texture Over Shine
Home design has been steadily shifting toward finishes that feel grounded, relaxed, and authentic. High-gloss surfaces once dominated, but they’re now being replaced with floors that reflect less light and show more of a material’s natural character.
This shift is visible across every flooring category — hardwood, concrete, tile, and coated surfaces alike. A matte finish lets the material itself be the star. You can see the texture, the grain patterns, and the natural variations in color without a glossy coating reflecting light everywhere.
For floor coatings specifically — epoxy, polyurethane, polyaspartic — matte and satin topcoats reveal the underlying color and texture of the coating system rather than turning the floor into a reflective surface. Metallic floor coatings in matte finish, in particular, show significantly more depth and complexity than the same coating in high-gloss, where the reflection competes with the design.
3. Anti-Slip Performance
High-gloss floor coatings are inherently more slippery than matte or textured finishes, particularly when wet. This isn’t a minor consideration in garages, commercial kitchens, entryways, or any space that sees moisture.
Matte finishes are kinder underfoot, thanks to their anti-slip texture, making them safer for households with children and in environments where wet surfaces are common.
For commercial and industrial applications, matte or textured floor coatings with quartz or aluminum oxide aggregate added to the topcoat provide measurable slip-resistance improvements over high-gloss alternatives — which matters both for occupant safety and for OSHA compliance.
4. Gloss Amplifies Imperfections
This is the one that catches people off-guard. A high-gloss floor coating does the opposite of what most people expect when it comes to surface flaws.
Matte and patterned finishes hide imperfections better than solid high-gloss colors — the floor stays looking good longer. With a high-gloss topcoat, minor surface irregularities in the concrete beneath — small ridges, roller marks from application, minor variations in the base coat — catch light at different angles and become visible. A matte finish diffuses light uniformly, so small variations in the substrate don’t telegraph through to the surface the same way.
For professional floor coating installers, this is well understood. Matte and satin finishes are more forgiving to apply and more forgiving in how they wear, which is part of why they’ve become the default recommendation for most residential and light commercial applications.
Matte vs. Satin vs. High-Gloss: How They Compare on a Floor Coating
Finish Level
Sheen Level
Hides Wear
Slip Resistance
Maintenance Demand
Best Suited For
High-Gloss
70–100 GU
Poor
Low
High
Showrooms, display spaces, low-traffic areas
Satin
35–60 GU
Good
Medium
Low–Medium
Residential garages, commercial spaces
Matte
10–30 GU
Excellent
High
Low
Industrial, high-traffic, residential living
GU = Gloss Units, measured at 60° angle — the standard measurement for floor coating finish specifications.
Satin occupies the middle ground that many homeowners land on — enough sheen to add some visual interest and make the space feel bright, without the maintenance demand of high-gloss. In 2026, satin finishes remain one of the most popular and versatile options, reflecting just enough light to brighten a room without looking overtly shiny.
Where Matte Floor Coatings Are Showing Up in 2026
Residential Garages
The shift is visible here first. High-gloss epoxy has been around for what seems like forever, but matte and textured finishes are what 2026 is all about for floor coatings. The practical case is straightforward — a garage floor sees tire contact, oil drips, road salt, and foot traffic. Matte floor coatings handle all of that without advertising it.
Commercial and Retail Spaces
Matte finishes don’t create unnecessary glare and reflections — they offer a quiet and restful anchor, allowing other elements in the space to take focus. For retail environments, hospitality spaces, and office interiors, this is increasingly the brief from designers and architects.
Industrial Facilities
The practical argument for matte here is entirely about safety and durability, not aesthetics. Matte and textured floor coatings with broadcast aggregate provide substantially better slip resistance than high-gloss systems, particularly in environments where moisture, oils, or other liquids are regularly present on the floor.
Residential Living Spaces
Basements and garage conversions being finished as living space — home gyms, entertainment rooms, offices — are increasingly using matte polyaspartic or satin polyurethane floor coatings rather than high-gloss epoxy. Matte finishes are ideal for modern, minimalist, and contemporary interiors, and they require less frequent touch-ups compared to shinier finishes.
Does Matte Mean Lower Quality?
This is the question that comes up, and it’s worth answering directly: no.
The finish level of a floor coating — gloss, satin, or matte — is a topcoat characteristic, not a measure of the underlying system’s quality, thickness, or durability. A matte polyaspartic topcoat over a properly installed 100% solids epoxy base is a more durable system than a high-gloss water-based epoxy applied directly to unprepped concrete. The sheen tells you nothing about what’s underneath.
What matte does change is the maintenance profile. A high-gloss finish that shows every mark will look worse than a matte finish over time in any working environment — not because the coating degraded faster, but because the wear is visible sooner. Matte and satin floor coatings age better in daily use, which is why they’re the practical choice for most applications that aren’t specifically trying to create a showroom effect.
What to Specify When Choosing a Matte Floor Coating
If you’re specifying a matte or satin floor coating for a new project:
Request gloss unit (GU) specifications in writing — “matte” means different things to different contractors; a GU rating of 10–25 at 60° is a true matte, while 35–55 GU is satin
Confirm the topcoat chemistry — matte polyaspartic holds its finish level longer than matte water-based epoxy under UV exposure and abrasion
Consider aggregate for high-traffic or wet areas — aluminum oxide or quartz broadcast into the matte topcoat adds measurable slip resistance without changing the finish appearance significantly
Ask for a physical sample — the same GU reading can look quite different under fluorescent light versus natural light; always check in your actual space before committing
The Bottom Line
High-gloss floor coatings aren’t going away entirely — there are spaces where the mirror finish is still exactly right. But the default has shifted. In 2026, matte and satin finishes dominate residential, commercial, and industrial floor coating projects because they perform better in daily use, fit where design has moved, and look better over time in spaces that get actually used.
The floor you have to maintain every day is more valuable than the floor that photographs well on install day.
A forklift running the same route forty times a day puts a different kind of demand on a floor than a car sitting in a garage overnight. Industrial facilities don’t just need a floor coating that looks good — they need one that holds up under concentrated point loads, resists whatever chemicals are present in that specific environment, and can be installed without shutting down production for a week.
Get that decision wrong and you’re not just redoing the floor. You’re managing downtime, potential safety incidents, and a second round of project costs.
This guide lays out the four most widely used industrial floor coating systems side by side — what each one does, what it costs, where it outperforms the alternatives, and where it falls short.
Industrial vs. Residential: Why the Requirements Are Completely Different
It’s worth being direct about this, because people sometimes assume a good garage coating will translate to a warehouse. It usually won’t.
Load capacity. A residential slab is typically rated for 200–300 lbs per square foot. A loaded forklift concentrates 10,000–30,000 lbs across four small contact patches. The localized pressure on those contact points is enormous, and a coating that isn’t built for it will delaminate or crack at those stress concentrations first.
Chemical exposure. Motor oil and gasoline are one thing. Industrial facilities deal with hydraulic fluid, concentrated acids and alkalis, industrial solvents, and process chemicals that vary widely by industry. A floor coating that handles a car garage will not necessarily handle a chemical plant.
Cure time and downtime. A garage can sit idle for three days. A production line that goes down for a day might cost more than the entire flooring project. Cure speed isn’t a convenience factor in industrial settings — it’s often a deciding variable.
Compliance. OSHA has specific slip-resistance requirements for industrial floors. Food processing, pharmaceutical, and other regulated industries require floor coating systems that meet FDA or GMP standards. Not every product qualifies.
The Four Main Industrial Floor Coating Options
Option 1: Standard Industrial Epoxy
Still the most widely installed industrial floor coating by volume, and for good reason — on a straightforward cost-to-performance basis, nothing else competes.
100% solids epoxy builds at 8–15 mils per coat, creating a hard, seamless surface with strong chemical resistance against oils, fuels, and most common industrial solvents. It handles routine forklift traffic and the static load of heavy equipment without issue. For general-purpose warehouses, automotive service facilities, and light manufacturing environments, it covers the brief without requiring the premium budget of more specialized systems.
Best fit: General logistics warehouses, light manufacturing, auto service shops, machine shops — anywhere chemical exposure stays in the mid-range and cure time flexibility exists.
Where it struggles: Two inherent limitations follow standard aromatic epoxy everywhere. First, UV instability — prolonged sun exposure causes yellowing and surface degradation. Not a concern in enclosed facilities, but relevant in open-bay or partially outdoor environments. Second, cold-temperature cure limitations — quality drops noticeably below 50°F (10°C), and some formulations won’t cure reliably below that threshold at all.
Epoxy System Type
Installed Cost (per sq ft)
Standard industrial epoxy
$5 – $8
Quartz anti-slip broadcast system
$6 – $10
Multi-coat heavy-build epoxy
$8 – $12
Durability: 5–10 years under heavy industrial use; 10–15 years in lighter conditions
Option 2: Novolac Epoxy — When Chemical Resistance Is the Priority
Standard epoxy handles common industrial chemicals reasonably well. Novolac epoxy handles the ones that would destroy standard epoxy.
Novolac is formulated with a higher cross-link density than conventional epoxy resin, which is what gives it dramatically better resistance to concentrated acids, strong alkalis, and aggressive solvents. It also handles sustained heat exposure up to 300°F (149°C) — a threshold most other floor coating systems don’t come close to.
The tradeoff is real: Novolac materials cost 30–50% more than standard epoxy, and the installation requires faster, more precise application because the working window is tighter. You need an experienced crew, not a general contractor who installs epoxy occasionally.
Best fit: Chemical manufacturing facilities, electroplating shops, battery production lines, laboratories, and any environment where concentrated acids or alkalis are routinely present on the floor.
Cost: $8–$12 per sq ft installed Durability: 8–12 years under heavy chemical exposure, with correct chemical compatibility matching
Option 3: Polyurea / Polyaspartic Floor Coating
Polyurea is the fastest-growing segment of the industrial floor coating market in 2026 — and the performance data makes it easy to see why.
It cures fast. Walk-on time is typically 1–4 hours after application; forklift traffic can resume within 24 hours. For 24-hour operations or facilities with tight maintenance windows, that speed changes the entire calculus of what’s installable without disrupting production.
Beyond speed, polyurea brings a different structural profile than epoxy. Its elongation at break exceeds 300% — the coating flexes with the concrete rather than resisting its movement. In facilities with significant temperature swings (cold storage, outdoor-adjacent areas, facilities in climates with hard winters), that flexibility prevents the micro-cracking that eventually undermines rigid epoxy systems. Impact resistance runs roughly four times that of standard epoxy, and chemical resistance covers a wider range of aggressive compounds.
Best fit:
Heavy logistics centers and distribution hubs where forklifts run constantly and downtime is expensive
Cold storage and refrigerated facilities where temperature differentials would crack rigid coatings
High-throughput manufacturing plants where the maintenance window is measured in hours, not days
Secondary containment areas in chemical facilities
Polyurea System
Installed Cost (per sq ft)
Standard polyurea
$7 – $12
Polyaspartic
$8 – $14
Heavy-build polyurea with aggregate
$10 – $16
Durability: 10–15 years under heavy industrial use; 15–20 years in moderate conditions
Option 4: Polyurethane Floor Coating
Polyurethane sits in a different position than the systems above — it’s the versatile performer that handles a wide range of industrial conditions without requiring the specialized budget of Novolac or polyurea.
Compared to epoxy, polyurethane floor coating is more flexible (elongation at break of 100–300%), which means it accommodates minor concrete movement without cracking. In facilities that experience noticeable temperature variation or where the slab isn’t perfectly stable, that flexibility is a meaningful practical advantage over rigid epoxy.
Two formulations matter here:
Aromatic polyurethane costs less and outperforms standard epoxy on abrasion resistance, making it the right call for interior industrial environments with no significant UV exposure. Some color shift occurs with prolonged sun exposure, though the physical properties remain intact.
Aliphatic polyurethane is UV-stable — no yellowing, no chalking under sustained sun exposure. It’s the preferred floor coating finish for parking structures, open-bay facilities, outdoor-adjacent areas, and any industrial environment where color retention matters over the coating’s lifespan. Taber abrasion test data shows aliphatic polyurethane outperforming standard epoxy by up to 4x in wear resistance under high-traffic conditions — which is why most professional multi-coat industrial systems use it as the topcoat over an epoxy base.
Warehouses and distribution centers where temperature variation requires some coating flexibility
As a performance topcoat over epoxy base coat to extend full system lifespan
Cost: $4–$8 per sq ft as a standalone system; $3–$6 per sq ft as a topcoat layer over an epoxy base Durability: 8–12 years standalone; extends a full epoxy system past 15 years as a topcoat
Cost Comparison at a Glance
System
Installed Cost (per sq ft)
Industrial Lifespan
Best Suited For
Standard industrial epoxy
$5 – $10
5–10 years
General warehouse, light manufacturing
Novolac epoxy
$8 – $12
8–12 years
Chemical plants, strong acid/alkali exposure
Polyurea / polyaspartic
$7 – $16
10–15 years
Heavy logistics, fast return to service
Polyurethane floor coating
$4 – $8
8–15 years
Parking, open facilities, UV-exposed areas
Five Things That Move the Number on Any Industrial Quote
1. Existing slab condition Surface prep failures account for close to 80% of all industrial floor coating failures. Stripping old coatings, repairing large cracks, and removing deep oil contamination all add to the prep cost — and none of it can be skipped.
2. Total square footage Industrial projects typically run 5,000 sq ft and above. Scale works in your favor: larger areas usually price 15–25% lower per square foot than smaller installations because mobilization and equipment costs get spread across more surface.
3. Coating thickness and coat count High-load forklift traffic zones warrant thicker Novolac or polyaspartic systems. Each additional coat adds proportionally to material and labor costs. Specifying dry film thickness (DFT) per coat in the contract protects you from a contractor applying thinner coverage to reduce material cost.
4. Downtime constraints Projects requiring fast return to service — typically polyurea — carry a 15–30% labor premium over standard epoxy installs because of equipment requirements and application precision. That premium is usually worth it when the cost of extended downtime is factored in.
5. Regional labor rates Industrial-dense areas — port cities, manufacturing centers — typically run 20–30% above national average for skilled flooring labor. Factor this into any benchmark pricing you’re using to evaluate quotes.
Three Questions to Answer Before You Pick a System
What does your floor deal with daily? Forklift traffic volume, chemical types present, whether hot water washdowns happen, and minimum ambient temperature — these four factors narrow the field faster than any other information. Most systems are designed around a specific combination of those conditions.
How much downtime can you actually absorb? A facility that can go dark for 72 hours has options. One where the maintenance window is 12 hours doesn’t — polyurea is essentially the only viable path. Be honest about this before evaluating cost, not after.
Are you pricing upfront cost or total cost of ownership? Epoxy is the cheapest entry point. In a heavy industrial environment, it may need to be replaced in 5–8 years. Polyurea or aliphatic polyurethane runs 40–80% higher upfront, but over a 10–15 year horizon, the total cost of ownership often reverses. Run the math specific to your facility’s conditions before defaulting to the lowest per-square-foot quote.
What to Check Before Signing a Quote
Surface prep method specified: Diamond grinding is the industrial standard. Acid etch alone isn’t sufficient
Dry film thickness (DFT) per coat: Get this in writing. It’s the number that determines whether you’re getting what you’re paying for
Product data sheet (TDS) reviewed: Confirm chemical resistance ratings match your actual facility conditions
Warranty terms: Reputable industrial floor coating contractors provide 3–5 year installation warranties. Shorter than that warrants questions
Cure timeline and return-to-service dates: Every phase of the project should have a defined timeline in the contract
The Bottom Line
There’s no universal answer in industrial floor coating — polyurea costs more than epoxy upfront, but in a high-traffic warehouse where it reduces maintenance cycles and extends years between replacements, the five-year total cost often runs lower than the cheaper alternative. Match the system to the operating conditions, not the line-item price, and the floor earns its cost.
In a garage, moisture is mostly a surface-level concern — something to mop up after a rainy night. In a basement, the floor itself is fighting you. Water vapor pushes up through the slab from the soil below. Humidity settles in and doesn’t leave. The slab expands and contracts with the seasons. And when afloor coating fails in a finished basement, the consequences aren’t just cosmetic — you’re moving furniture, displacing a living space, and starting the whole project over from scratch.
None of that is inevitable. But it does mean the approach that works in a garage won’t necessarily work down there. Moisture has to be dealt with before any floor coating touches the concrete — full stop, regardless of which system you’re considering. This guide walks through what that looks like, which products are worth knowing about, and which coating options actually hold up below grade.
The Real Problem: Why Basement Slabs Are Different
Most homeowners know basements can get damp. Fewer understand the mechanism well enough to make good decisions about it.
A basement slab sits on or below the frost line, in direct contact with soil that holds groundwater year-round. Through a process called moisture vapor transmission (MVT), water vapor is constantly moving upward through the concrete — not as liquid water, but as vapor, driven by temperature and pressure differentials between the soil and the interior air. It happens even in slabs that feel bone dry to the touch.
The catch: once an epoxy or polyurea floor coating cures, it’s essentially airtight. That rising vapor hits the underside of the coating, has nowhere to go, and starts building pressure. The coating blisters. Edges lift. Eventually you get full delamination across the floor — and people assume the product failed, when what actually failed was the decision not to test for moisture before installing it.
This is the single most common failure mode in basement coating projects. It’s also entirely avoidable.
Don’t Choose a Coating Until You’ve Done This
Moisture testing isn’t a nice-to-have. Whatever you put on that floor, the test result should be informing the decision.
Calcium chloride test (ASTM F1869) A sealed dish of calcium chloride sits on the slab for 60–72 hours. The weight gain tells you the moisture vapor emission (MVE) rate in pounds per 1,000 square feet per 24 hours. The safe threshold for most floor coating systems without a vapor barrier is somewhere between 3 and 5 lbs — exceed that and you’re in trouble territory without additional mitigation.
In-situ RH probe (ASTM F2170) A probe inserted into the slab measures relative humidity at depth rather than just at the surface. Most systems flag anything above 75–80% RH as requiring moisture mitigation before coating.
If either test comes back high, the path forward isn’t picking a different coating product. It’s installing a Moisture Vapor Barrier first. A better coating won’t solve a moisture problem — it’ll just fail in a different way.
Moisture Vapor Barrier Primer: What It Does and What to Look For
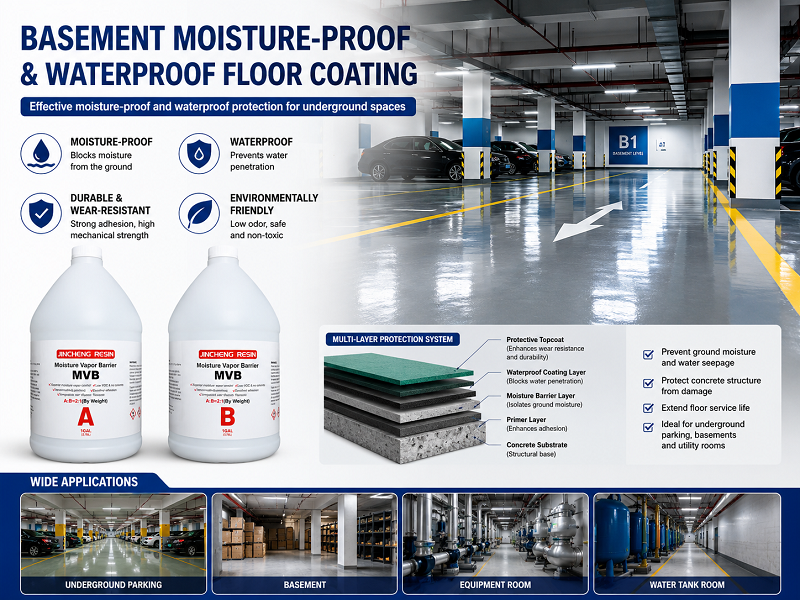
A Moisture Vapor Barrier (MVB) primer is a specialized epoxy compound that goes down before everything else — before the base coat, before any color or decorative layer, before anything. It penetrates the concrete’s pore structure, bonds chemically with the slab, and creates a sealed interface that keeps vapor from pushing into the coating system above.
It’s not a waterproofing membrane. It won’t stop an active water leak or seal a crack that’s taking on water. What it does is reduce the vapor permeance of the slab surface to a level that a floor coating can actually bond to and stay bonded to over time.
A few things matter when evaluating MVB products:
Vapor control rating: Look for products rated to handle at least 20 lbs/24hr/1000 sq ft (ASTM F1869). That covers the overwhelming majority of residential basement slabs
Perm rating ≤ 0.10: This is what qualifies a product as a Class I Vapor Diffusion Retarder under building science standards — the threshold that matters for long-term coating performance
ASTM F3010 compliance: The industry standard for two-component resinous moisture mitigation systems. Not every product meets it; the ones that do have been tested to a defined performance benchmark
Zero-VOC or low-VOC: Basement spaces have limited ventilation. This matters more during application than people usually consider
Products worth knowing:
ArmorPoxy ARM409X — 100% solids, two-part epoxy rated to 20 lbs MVE. Can function as a standalone treatment or as the first layer under a full coating system
Spartan VAPOR PRO — Two-component, ASTM F3010-compliant, approximately 94 sq ft per gallon at 17 mils. Well-established in commercial applications
Bostik Roll-Cote — Water-based, single-component, no mixing required. Combines primer and vapor mitigation in one step — a practical choice for slabs with moderate readings where simplicity matters
LATICRETE VAPOR BAN Primer ER — Single-application system compatible with a wide range of finish flooring types: tile, vinyl, wood, and epoxy coatings
Jinchengresin Moisture Vapor Barrier Primer — Two-component, 100% solids, zero-VOC epoxy built for high-moisture concrete substrates. One feature that stands out in basement applications specifically: it cures at room temperature and at low temperatures — relevant in below-grade spaces that can run significantly cooler than the rest of the house. Industrial-grade formulation focused on preventing blistering, delamination, and long-term coating failure. Worth considering on residential and commercial projects where eco-friendly application is part of the brief
One coat on a properly ground slab handles readings up to 20 lbs in most cases. Above that, the moisture intrusion is likely active rather than vapor-driven, and needs to be addressed structurally — drainage corrections, exterior waterproofing, or a sump system — before any floor coating is a viable option.
Which Floor Coating Actually Works in a Basement?
With moisture handled, here’s how the main options perform in a below-grade environment.
Epoxy
The most common basement floor coating by a wide margin, and the reasonable starting point for most projects.
Epoxy creates a seamless, non-porous surface — good for resisting standing water, chemical spills, pet messes, and general ground-level abuse. It builds at 8–15 mils per coat in 100% solids formulations, which is enough to cover minor surface irregularities. And the range of finishes — solid color, decorative chip, metallic — means it can do real aesthetic work in a basement that’s being finished as living space.
The one thing worth flagging: aromatic epoxy yellows under UV. In a windowless basement, irrelevant. In a basement with egress windows, a stairwell that gets sun, or a walkout — worth knowing, because you’ll see color shift in two to three years.
Materials: $3–$7/sq ft | Installed: $5–$10/sq ft | Lifespan: 10–15 years
Polyaspartic / Polyurea
The higher-cost option, and the one with the most performance margin in challenging conditions.
What makes it better suited to basements than standard epoxy isn’t just the UV stability — it’s the flexibility. Polyurea and polyaspartic systems are elastomeric. They move with the slab rather than resisting its movement. Basement slabs shift more than garage slabs do, driven by soil pressure fluctuations and seasonal moisture changes in the ground. A rigid coating on a slab that’s quietly moving eventually cracks at stress points. An elastomeric one doesn’t.
Cure speed is a practical bonus in finished basement spaces: walk-on time is typically 1–4 hours, full service within 24. That’s one day of disruption rather than three.
Installed: $7–$16/sq ft | Lifespan: 15–20+ years
Epoxy Base + Polyaspartic Topcoat
Ask an experienced floor coating contractor what they’d put in their own basement and this is usually the answer — epoxy base for thickness and build, polyaspartic topcoat for UV stability, flexibility, and surface hardness. The layer sequence runs: MVB → epoxy base → decorative broadcast → polyaspartic topcoat. Each layer does something the others don’t.
Installed: $8–$14/sq ft | Lifespan: 15–20 years
Penetrating Concrete Sealer
Not really a floor coating in the traditional sense — more of a surface treatment. Silane, siloxane, or silicate-based sealers soak into the concrete and reduce absorption without building a film layer on top. The floor looks basically the same after application.
Useful for unfinished storage areas or utility spaces where protection matters more than appearance, and as a first step when a full coating isn’t in the current budget.
Applied: $0.50–$2/sq ft | Lifespan: 3–7 years before reapplication
Where Basement Floor Coating Projects Go Wrong
Nobody tested for moisture. Still the leading cause of basement coating failure, by a significant margin. The slab looks fine, the test gets skipped, no MVB goes in, and the floor starts lifting before the first year is out.
Using a garage kit on a basement slab. Garage-grade DIY epoxy systems are formulated for conditions that basements frequently don’t meet — lower vapor readings, more stable temperatures, better ventilation during application. The products aren’t bad; they’re just not designed for this environment.
Sealing cracks before testing. Crack repair is necessary, but doing it before you know the vapor reading can trap moisture in the slab and increase pressure concentrations under the coating. Test first, then repair, then coat.
Stopping the coating at the floor. The cove joint — where floor meets wall — is a primary entry point for moisture in most basements. The floor coating or the MVB layer should run up the wall 4–6 inches to seal that transition. Contractors who skip this tend to see edge failures before anything else.
Questions to Ask Before Accepting a Quote
Four things worth confirming before any contract gets signed:
Are you testing for moisture vapor before you start? No is a disqualifying answer
If the reading exceeds your system’s threshold, is MVB included in this price? Get it in writing
What’s your surface prep process? Diamond grinding is correct; acid etch alone isn’t sufficient for most basement applications
What topcoat are you finishing with? Polyaspartic or aliphatic polyurethane. Bare epoxy as the final layer is not the right call in a basement
The Short Version
Basement floor coatings fail for one reason more than any other: moisture vapor that nobody tested for and nobody addressed. Fix that first — with a proper MVB primer on a mechanically ground slab — and the coating on top has a real chance of lasting 15 to 20 years.
Get the moisture right, match the coating to how the space actually gets used, and a basement stops being the room you tolerate and starts being the room you use.
Here’s something most contractors won’t tell you upfront: the floors that fail in three or four years usually had nothing wrong with the product. The coating was fine. What went wrong happened before the first drop of epoxy hit the concrete — or in the cleaning routine that followed.
Get those parts right, and a residential epoxy floor coating has every reason to stay intact for 15 to 20 years. Some push longer. The gap between a floor that makes it and one that starts peeling by year five is almost never about which brand was used. It comes down to five things, and most of them are cheaper and simpler to get right than people assume.
Tip 1: Surface Prep Is the Whole Game — Everything Else Is Secondary
Seriously, if you skim the rest of this article, don’t skim this part.
Epoxy needs something to grab onto. It doesn’t stick to a polished or sealed surface — it bonds into the pore structure of concrete that’s been mechanically opened. When surface prep gets rushed or skipped, the coating is essentially floating on top of the slab. It might look fine for a year. Then a corner lifts, and the peeling starts.
What “done correctly” actually means:
Diamond grinding is what professional installers use — a walk-behind grinder with diamond segments that opens the concrete to a CSP 2–3 surface profile. That’s the texture most epoxy floor coating systems are engineered to bond with. Acid etching gets used as a budget alternative, but it’s unreliable on slabs that have any sealer residue, and it can’t flatten high spots or address surface variation the way grinding can.
Two prep steps that routinely get left out — and cause problems later:
Moisture testing. Slabs wick moisture vapor up from the soil below. Apply epoxy over a slab with excessive vapor transmission and you’re going to see bubbling, blistering, or full delamination down the line. A calcium chloride test or an RH probe tells you what you’re working with. If the reading is high, a vapor-blocking primer goes down before anything else. Yes, it adds cost. No, there’s no good workaround.
Crack repair. Hairline cracks can usually be coated over. Anything wider gets filled with an epoxy repair compound first — let it cure fully, then coat. A standard epoxy floor coating bridges minor surface flaws; it doesn’t hold together across a crack that’s still moving.
If the prep is right, everything after it has a real shot at lasting. If it’s not, you’re building on a bad foundation and the clock starts ticking.
Tip 2: A Primer Coat Isn’t Optional — It’s What Holds the Rest Together
Walk through enough failed DIY epoxy installs and you’ll find the same thing missing in a lot of them: primer.
Concrete doesn’t absorb evenly. Some sections pull in resin fast, others barely absorb at all — and when you skip primer and go straight to the base coat, those inconsistencies translate directly into weak adhesion zones, pin-holes from off-gassing, and thin spots that wear through first. It’s not immediately obvious, but by year three it usually is.
Primer closes the surface down so the base coat lands consistently across the whole slab. It also deepens the molecular bond between the concrete and the coating system. On slabs that have minor moisture readings — not high enough to need a full mitigation system, but not zero either — a solid primer coat provides a meaningful layer of protection between the concrete and the epoxy above it.
For polyaspartic floor coating systems, primer matters even more. Polyaspartic applies thin and cures fast — there’s a narrow window to work with. On bare, unprimed concrete, a thin fast-curing coating simply doesn’t have enough time to wet out and bond properly in every section. Primer is what makes that window work.
One practical check if you’re hiring out: ask your contractor directly whether primer is in the quote. It sometimes gets cut to keep numbers competitive. That’s a shortcut with a long tail.
Tip 3: Matching the Topcoat to Your Conditions Is What Separates Good Installs from Great Ones
The base coat gives the system its body. The topcoat is what actually interfaces with daily life — tires grinding in and out, tools hitting the floor, oil dripping from the undercarriage, sunlight streaming through an open door. Pick the wrong one and the system underperforms regardless of how solid the base is.
Why standard epoxy topcoats cause problems in sunny garages. The most widely used epoxy formulations are aromatic — and aromatic chemistry breaks down under UV. It’s not a manufacturing defect; it’s how the chemistry behaves. Give it two or three years of real sun exposure and the floor goes amber. The structure is still intact, but the look is shot.
Where polyaspartic changes the equation. A polyaspartic floor coating used as the finish layer doesn’t have that problem. Polyaspartic is aliphatic — UV stability is built into the molecular structure, not added after the fact. Color holds. Gloss holds. It also cures harder than standard epoxy topcoats, which is relevant in garages where tire temperatures run high coming off summer roads.
Aliphatic polyurethane covers similar ground — same UV story, slightly different working characteristics. Most professional systems that are built to last use one or the other as the final coat over an epoxy base.
The practical call: a covered, enclosed garage with no meaningful sun exposure can use a quality epoxy topcoat and be just fine. If the door stays open most of the day, or any part of the floor catches direct light, go with polyaspartic floor coating or aliphatic polyurethane. It’s not a massive cost difference, and it’s the thing that keeps the floor looking the way it did on day one five years later.
Tip 4: Your Cleaning Products Are Probably Working Against You
An epoxy floor coating handles oil, fuel, most automotive fluids, and the general punishment of a working garage without complaint. The topcoat is tough, but it has specific weaknesses — and a lot of common cleaning products land right on them.
Avoid these:
Bleach and bleach-based cleaners — sodium hypochlorite doesn’t just clean the surface, it slowly etches it. You won’t notice at first. Over a year or two of regular mopping, the finish goes dull and micro-abrasions start collecting grime
Ammonia-based products — similar degradation pattern, particularly on polyurethane topcoats
Concentrated citrus degreasers — useful at high dilution for serious grease, but straight or lightly diluted citrus-based solvents soften standard epoxy topcoats over time
Anything abrasive — steel wool, scrubbing powder, rough pads. Stubborn stain or not, this is the fast track to a scratched finish
What actually works well:
pH-neutral cleaner in warm water is the everyday standard — Simple Green at the recommended dilution is probably the most commonly cited product in the flooring trade for this. For grease and oil, a degreaser marked safe for sealed or coated concrete, applied and rinsed off quickly rather than left to soak, cleans without compromising the topcoat. Microfiber mop over string mop — less residue, no abrasion.
Last thing on cleaning: don’t leave standing water on the floor. A spill that dries in five minutes is nothing. A puddle that sits near an edge or seam for a few hours, repeatedly, eventually finds its way under the coating. Clean it up when it happens.
Tip 5: Schedule a Topcoat Refresh Before You Actually Need One
This is the one that slides under the radar for most homeowners — and it’s the difference between a 15-year floor and a 7-year floor that costs twice as much to fix.
Epoxy floor coating systems wear from the top down. The topcoat gradually loses gloss, collects fine scratches, and becomes slightly more porous over time. Most people don’t act until the floor looks noticeably rough. By that point, the topcoat isn’t just worn — it’s compromised enough that a simple recoat won’t cut it. You’re looking at grinding back and starting over, which costs significantly more than a maintenance refresh would have.
The move is to catch it before that happens.
Watch for these signs that a refresh is due:
The floor looks dull even right after cleaning
Scratches are visible when light hits the surface at a low angle
Water no longer beads or sheets across the surface — it just soaks in
Small areas look noticeably more porous or matte than the rest of the floor
When you see those signals, a topcoat refresh is still a simple job: scuff the surface lightly, clean it thoroughly, roll on a fresh topcoat. No grinding equipment, no base coat work, no major disruption. A two-car garage typically takes a professional one day. Under normal residential conditions, most epoxy floor coating systems need this every 5 to 8 years.
Polyaspartic floor coating systems run longer between refreshes — closer to 8 to 10 years in a residential setting, because the topcoat holds up better to UV and abrasion. But the same rule applies. Wait too long and the refresh window closes. Get to it while the base coat is still in good shape, and the whole system keeps going.
The Short Version
These aren’t complicated. None of them require special tools or unusual knowledge.
Grind the concrete properly, test moisture, fill cracks — all of this before any coating goes down
Lay a primer coat — don’t skip it to save time or money
Match your topcoat to your conditions — sun exposure means polyaspartic floor coating or aliphatic polyurethane, not standard epoxy
Clean with pH-neutral products, wipe up spills before they sit
Refresh the topcoat on a schedule — before it fails, not after
Do those five things and 15 years isn’t a stretch goal. It’s just what happens.
Walk into the right garage or showroom and it stops you in your tracks. The floor looks like liquid metal froze mid-flow — shift the angle, the pattern shifts with it. Most people’s first thought is that it can’t be a coating. It looks too deliberate, too custom, too much like something that took years to plan.
It is a coating. And it can go on the concrete floor you already have.
This guide covers the questions that actually matter before you commit to metallic epoxy floor coating— what it is, how it’s made, where it works, what it costs, and what tends to go sideways if you’re not prepared.
What Is Metallic Epoxy Floor Coating, Actually?
Metallic epoxy floor coating is a decorative system that suspends metallic pigments or pearlescent additives inside a clear epoxy resin. Unlike standard solid-color epoxy or flake systems — where the result is mostly determined by the product itself — the final look of a metallic floor is actively shaped by the installer while the material is still wet. Compressed air, spray bottles, propane torches, squeegees, and specialized tools are all used to push pigment around, creating movement, depth, and pattern.
That’s why no two metallic epoxy floor coating installs look exactly alike. Same pigments, different installer, different day — the floor comes out differently. That unpredictability is what makes it striking. It’s also what makes the skill level of whoever applies it matter more than any other variable in the project.
How Is It Actually Installed?
A complete metallic epoxy system runs through four distinct phases:
Phase 1: Surface Preparation The concrete has to be mechanically ground — typically with a diamond grinder — to achieve a CSP 2–3 surface profile. That roughness is what gives the epoxy something to grip. Any existing coatings, sealers, or contamination get removed first. Moisture levels in the slab need to be tested; a slab that’s pulling moisture up from below will cause the coating to delaminate later, regardless of how well everything else is done.
Skip corners on this step and you’re wasting everything that comes after it. That’s true of most floor coating systems, but it’s especially true for metallic epoxy — surface flaws show more clearly under a reflective finish than under a flake broadcast.
Phase 2: Primer Coat A dark-colored epoxy primer — usually black or deep charcoal — goes down first. It seals the concrete and creates the backdrop that the metallic layer reads against. Dark primers make the pigment colors richer and give the finished floor more perceived depth.
Phase 3: The Metallic Layer (Where the Work Happens) Metallic pigment powder gets blended into clear epoxy resin, poured across the primed surface, spread with a squeegee, and then manipulated while it’s still moving. Air guns, spray bottles of denatured alcohol, and propane torches are the main tools — each one creates different movement in the pigment. Installers wear spike shoes to walk on the wet surface without disturbing what they’ve already done.
This is where the experience gap between installers is most visible. Two people using the same products and the same tools will produce completely different floors based on timing, pressure, and technique.
Phase 4: Topcoat Once the metallic layer cures, one or two coats of clear protective topcoat seal the pigment in and add the abrasion and chemical resistance the floor needs for daily use. The topcoat choice matters more than most people realize — more on that below.
Full installation typically takes 2 to 3 days. Light foot traffic is generally possible within 1 to 3 days after the topcoat application. Full chemical cure takes 7 to 14 days — avoid parking vehicles or placing heavy stationary objects on the floor during that window.
What Patterns and Effects Can You Get?
Marble Effect — white, gray, and gold pigments flow together to create veining that reads like natural marble. Clean, high-end, works in almost any upscale setting.
Lava Flow — high-contrast pigments spread over a dark base, creating the impression of molten material moving across the surface. Dramatic, best in spaces designed to make an impression.
Galaxy / Cosmic — deep dark base with silver or multi-color accent pigments scattered through it. Reminiscent of deep space. Popular in display-focused garages.
Ocean / Water — layered blues that create a sense of depth and movement. Most effective in spaces with good natural light; looks flat in dark garages.
Geode — mimics the crystalline interior of a geode, with concentrated patterning and high color contrast. Works best as an accent area rather than a full floor treatment.
In 2026, the color directions getting the most traction are silver-gray, champagne gold, and midnight blue — neutral tones that complement modern and industrial interiors without looking like a trend that’ll feel dated in three years.
Where Does It Work — and Where Doesn’t It?
Residential Garages The most common application by volume. For homeowners who want something beyond the standard gray flake system, metallic epoxy floor coating turns a basic garage into something that photographs like a showroom. It handles daily vehicle traffic without issue and hides minor surface wear well under its reflective finish.
Basements A metallic floor changes the character of an unfinished basement faster than almost anything else — no carpet, no tile, no ceiling work required. It’s moisture-resistant when properly installed and easy to clean. The key qualifier is that sub-slab moisture has to be tested and addressed during prep; below-grade slabs are more prone to moisture vapor transmission than garage slabs.
Commercial Spaces Retail showrooms, car dealerships, fitness studios, restaurant entryways — spaces that need to create an impression at first glance. A boutique hotel lobby in Shanghai used copper and silver metallic epoxy floor coating with a polyaspartic topcoat and achieved a seamless high-gloss surface that held up under heavy daily foot traffic.
Where It Doesn’t Fit Industrial facilities with sustained heavy chemical exposure, and outdoor surfaces that receive direct sun. Standard epoxy topcoats yellow under UV exposure — a metallic floor that starts yellowing loses most of its visual appeal quickly. If the application involves outdoor or sun-exposed areas, a polyaspartic topcoat becomes mandatory, not optional.
What Does It Cost?
Metallic epoxy floor coating runs higher than standard solid-color or flake epoxy systems. The material cost is higher, and the application takes more skill and more time. 2026 pricing by project type:
Project Type
Per Square Foot
Typical 2-Car Garage Total
Base metallic epoxy system
$5 – $8
$2,000 – $4,000
Premium formulas / complex designs
$8 – $12
$4,000 – $6,000+
Commercial spaces (large area)
$6 – $10
Varies by footage
What moves the number higher: slab condition (crack repair and old coating removal add cost), design complexity, installer experience level, and local labor rates.
Before signing anything, confirm that concrete grinding, crack repair, and the topcoat are all included in the quote. Some contractors price low upfront and then invoice separately for prep work — which is the most expensive part of the job.
The Topcoat Decision Matters More Than People Think
You can have perfect pigment work on the metallic layer and still end up with a floor that disappoints in two years if the topcoat is the wrong choice.
Epoxy Topcoat Lowest cost option. Poor UV stability — in any space that receives meaningful sunlight, yellowing within 2 to 3 years is likely. The yellowing shifts the apparent color of the metallic pigments underneath, making the floor look aged before its time. Acceptable for fully interior spaces with no sun exposure.
Aliphatic Polyurethane Topcoat Significantly better UV stability and scratch resistance than epoxy topcoat. This is the most common choice for residential metallic epoxy floor coating installs in 2026. Keeps pigment colors truer for longer and handles the day-to-day abrasion of a working garage well.
Polyaspartic Topcoat Best UV stability and durability of the three, plus the fastest cure time. The preferred topcoat for commercial high-traffic applications and for any residential install where the floor gets direct sun exposure. Higher upfront cost, but the color retention and longevity justify it in the right situations.
Maintenance: What It Actually Takes
Day-to-day upkeep isn’t demanding. Sweep or dust mop regularly to keep abrasive particles off the surface, wet mop weekly with a pH-neutral cleaner, clean up spills quickly — especially acidic ones like citrus or wine — and use felt pads under furniture to prevent scratching when things get moved around.
Every 5 to 7 years, depending on traffic and wear, a fresh topcoat can restore the original gloss and protective layer.
One hard rule: stay away from bleach, ammonia, and acid-based cleaners. They degrade the topcoat over time, and once the surface loses its sheen, it picks up staining more easily. A dull metallic floor is a much less impressive metallic floor.
DIY or Professional Install?
Straight answer: metallic epoxy is the least forgiving floor coating system to DIY.
Standard flake epoxy? A careful homeowner with proper prep and good instructions can pull off a solid result. Metallic is different. The design work in Phase 3 requires feel — knowing when to hit the surface with air, how much pressure, when to walk away and let it settle. That knowledge comes from doing it, not from watching it. The most common DIY outcomes are uneven pigment distribution, unnatural-looking patterns, trapped air bubbles, or delamination from inadequate surface prep.
DIY kits exist and they’re fine for homeowners who want to experiment and aren’t attached to a specific outcome. But if the point is a floor worth showing off, the installer matters as much as the product. Find someone with a portfolio of actual metallic installs — not just flake work — before committing.
Quick Answers to Common Questions
How long will it last? In a residential garage with an aliphatic polyurethane or polyaspartic topcoat, a well-installed metallic epoxy floor coating system typically holds its appearance for 10 to 15 years. High-traffic commercial spaces may need a topcoat refresh at the 5 to 7 year mark.
How soon can I use the floor after installation? Light foot traffic is generally safe within 1 to 3 days after the final topcoat. Full chemical cure takes 7 to 14 days — no vehicles, no heavy equipment sitting in one spot during that period.
Can it go over an existing coating? The existing coating has to come off first — there’s no shortcut here. Old paint, sealers, and failed epoxy all need to be ground off before the new system goes down. That removal work adds time and cost, so confirm it’s accounted for in any quote you receive.
One Last Thing
Of all the floor coating systems available, metallic epoxy floor coating has the highest ceiling for visual impact — and the smallest margin for error. Get the installer right, get the surface prep right, and pick a color direction that actually fits the space. Those three decisions determine whether you end up with a floor that still looks worth the money a decade later.
Walk into any flooring showroom in 2026 and you’ll hear three names repeated constantly: epoxy, Polyaspartic, and polyurethane. Every contractor seems to have a favorite. Every product page claims theirs lasts longest. And somewhere in the middle of it all, you’re trying to figure out what actually goes on your floor.
This isn’t a manufacturer comparison. It’s a breakdown of how these three coatings actually perform — on hardness, lifespan, chemical resistance, UV stability, and cure time — with real numbers where the data exists.
First, What Are These Coatings Actually Made Of?
Before getting into performance numbers, it helps to understand what separates these materials chemically. The differences aren’t just marketing.
Epoxy is a two-part thermoset system — resin plus hardener — that cures into a rigid, chemically bonded layer on top of concrete. It’s been the dominant floor coating in garages and industrial spaces for decades. 100% solids epoxy (the professional-grade version) builds at 8–15 mils per coat, thick enough to self-level and fill minor surface flaws.
Polyaspartic is technically a subclass of polyurethane chemistry, but it behaves very differently in practice. It’s formed by the reaction of an isocyanate component with an amine-based resin blend. The result is an elastomeric coating — meaning it flexes rather than staying rigid. It cures extraordinarily fast (minutes to hours, not days) and builds strong molecular bonds even in humid or cold conditions that would compromise epoxy.
Polyurethane (specifically aliphatic polyurethane, the flooring-grade version) sits between the two. It applies in thinner layers than epoxy (typically 2–3 mils), has more flexibility, and handles UV and chemical exposure better than standard epoxy. Most often used as a topcoat over an epoxy base, though it can function as a standalone system in the right applications.
The Data Comparison: How They Stack Up
Hardness and Compressive Strength
Hardness is the most misunderstood metric in floor coating comparisons. Harder isn’t always better — a coating that’s too rigid can crack when the concrete beneath it flexes or settles.
Coating
Compressive Strength
Shore D Hardness
Elongation at Break
Epoxy (100% solids)
Up to 12,000 psi
80–90
2–5%
Polyaspartic
4,000–8,000 psi
40–80 (varies by formulation)
300%+
Polyurethane
3,000–6,000 psi
50–75
100–300%
Epoxy wins on raw compressive strength — it’s the hardest of the three. That’s why it’s preferred under heavy static loads, like machinery that sits in one place. But that rigidity is also its weakness: epoxy has almost no elongation, meaning it doesn’t bend. Concrete shifts with temperature and seasonal movement. A rigid coating sitting on a moving substrate eventually cracks.
Polyurea’s elongation of 300%+ means it can stretch and return without cracking or delaminating — a meaningful advantage in climates with significant temperature swings or on slabs that aren’t perfectly stable.
Lifespan Under Real Conditions
Coating
Residential Garage
High-Traffic Commercial
Industrial/Heavy Use
Epoxy
10–15 years
5–8 years
3–5 years
Polyurea
15–20+ years
10–15 years
7–12 years
Polyurethane
8–12 years (standalone)
6–10 years
4–7 years
A few things worth noting here.Polyaspartic lifespan numbers assume proper installation — specifically, adequate surface preparation and a quality primer coat. Rushed single-day installs that cut corners on prep can cut that lifespan significantly. Epoxy’s numbers assume an indoor, UV-protected environment. Outdoor or sun-exposed epoxy degrades faster.
Polyurethane used as a standalone system has a shorter lifespan than either, but as a topcoat over an epoxy base, it meaningfully extends the overall system’s performance and UV resistance.
Abrasion Resistance
This is where the conversation gets more nuanced than most product pages admit.
Epoxy is hard, but hardness and abrasion resistance aren’t the same thing. A harder surface can chip and fracture under impact, while a slightly softer, more flexible surface absorbs the blow and stays intact.
Industry Taber abrasion test data consistently shows polyurethane outperforming standard epoxy on wear resistance — one study cited polyurethane floors lasting up to four times longer than uncoated epoxy floors in high-traffic conditions. Polyaspartic resistance to abrasion is rated at roughly 2–3x that of standard epoxy in heavy-duty applications.
That said, in low-to-moderate traffic residential garages, the difference between a quality epoxy and Polyaspartic on day-to-day abrasion is marginal. You’d need a decade of heavy traffic to see it clearly.
Chemical Resistance
Chemical Type
Epoxy
Polyaspartic
Polyurethane
Motor oil / gasoline
Excellent
Excellent
Very Good
Brake fluid
Good
Excellent
Very Good
Battery acid
Good
Excellent
Good
Solvents (paint stripper, etc.)
Moderate
Excellent
Very Good
Caustic cleaners
Good
Very Good
Excellent
Hot water / steam
Moderate
Good
Excellent
Epoxy holds up well against the common garage spills — oil, fuel, and most household chemicals. Where it starts to lose ground is against solvents and prolonged exposure to caustic or acidic substances.
Polyaspartic handles the widest range of chemical exposure, including solvents like methylene chloride (the active ingredient in most paint strippers) that will degrade epoxy over time. This is why Polyaspartic dominates in food processing plants, chemical manufacturing facilities, and automotive service bays.
Polyurethane has a particular advantage in environments with hot water or steam exposure — think commercial kitchens or food production lines where frequent high-temperature washdowns are the norm.
UV Stability
This is probably epoxy’s most significant real-world limitation.
Standard epoxy — including most 100% solids garage floor systems — yellows and chalks under sustained UV exposure. It’s not a surface issue; it’s a chemistry issue. Aromatic epoxies (the most common type) break down under UV radiation. The timeline varies, but in a garage that gets significant sun exposure through the door, you might see visible yellowing within 2–3 years.
Polyaspartic and aliphatic polyurethane are both UV-stable. They maintain color and gloss under sun exposure without the yellowing that makes an epoxy floor look old before its time.
Coating
UV Stability
Outdoor Use
Epoxy
Poor — yellows within 2–5 years outdoors
Not recommended
Polyaspartic
Excellent — color-stable for lifespan of coating
Suitable
Polyurethane (aliphatic)
Excellent — designed for UV exposure
Suitable
If your garage door is open most of the day or the floor gets direct sun exposure, this matters more than any other metric.
Cure Time and Return to Service
Coating
Walk-on Time
Drive-on Time
Full Chemical Cure
Epoxy
12–24 hours
48–72 hours
5–7 days
Polyaspartic
1–4 hours
6–24 hours
24 hours
Polyurethane
4–8 hours
24–48 hours
3–5 days
Polyaspartic cure speed is genuinely striking. Some formulations reach walk-on hardness in under an hour. That’s why it’s the coating of choice for commercial projects where downtime costs money — a warehouse or distribution center can be coated and back in operation within a day.
For residential use, the difference between 24-hour and 72-hour cure is mostly a matter of convenience. But for businesses, it’s a real operational consideration.
Cost Comparison
Coating
Material Cost (per sq ft)
Professional Install (per sq ft)
Typical 2-Car Garage Total
Epoxy (100% solids)
$3 – $7
$5 – $10
$2,000 – $5,000
Polyaspartic
$6 – $12
$7 – $16
$3,500 – $8,000
Polyurethane (topcoat)
$2 – $5
$4 – $8
$1,500 – $4,000 (as topcoat only)
Epoxy is the most cost-accessible of the three for a complete floor system. Polyaspartic carries a higher upfront cost, though the longer lifespan and lower maintenance needs change the calculus on total cost of ownership over 15–20 years. Polyurethane as a standalone system is cheaper short-term but underperforms over time; as a topcoat layer over epoxy, it’s the most common way to get UV stability and improved abrasion resistance without paying for a full Polyaspartic system.
Head-to-Head Summary
Performance Factor
Epoxy
Polyaspartic
Polyurethane
Compressive Strength
⭐⭐⭐⭐⭐
⭐⭐⭐
⭐⭐⭐
Flexibility / Crack Resistance
⭐⭐
⭐⭐⭐⭐⭐
⭐⭐⭐⭐
Abrasion Resistance
⭐⭐⭐
⭐⭐⭐⭐⭐
⭐⭐⭐⭐
Chemical Resistance
⭐⭐⭐⭐
⭐⭐⭐⭐⭐
⭐⭐⭐⭐
UV Stability
⭐⭐
⭐⭐⭐⭐⭐
⭐⭐⭐⭐⭐
Cure Speed
⭐⭐
⭐⭐⭐⭐⭐
⭐⭐⭐⭐
Upfront Cost
⭐⭐⭐⭐⭐
⭐⭐
⭐⭐⭐⭐
Long-Term Value
⭐⭐⭐⭐
⭐⭐⭐⭐⭐
⭐⭐⭐
So Which One Is Actually the Most Durable?
Measured purely by lifespan, abrasion resistance, flexibility, and chemical range: Polyaspartic wins. It’s not particularly close in high-traffic or chemically demanding environments.
But “most durable” and “best for your project” aren’t always the same thing.
Epoxy is the right call if:
Budget is a primary constraint and the floor sees moderate residential use
The garage is indoors with limited UV exposure
You want a thick, hard surface that handles heavy static loads
You’re doing a DIY install — epoxy is far more forgiving to apply than Polyaspartic
Polyaspartic makes sense if:
You want the best long-term performance and are willing to pay a premium upfront
The floor gets direct sun exposure
The space is commercial or high-traffic
Fast return to service is important (business downtime, rental properties, etc.)
Your slab has minor movement or you’re in a climate with significant temperature shifts
Polyurethane as a topcoat is often the smartest middle ground:
Pair a quality 100% solids epoxy base with an aliphatic polyurethane topcoat
You get epoxy’s thickness and hardness as the foundation
Plus polyurethane’s UV stability, scratch resistance, and chemical range on the surface layer
Total cost stays closer to a standard epoxy job while addressing most of epoxy’s weaknesses
Most professional floor coating contractors running multi-coat systems are already doing exactly this — epoxy base, polyurethane or polyaspartic topcoat — without always explaining why. Now you know the reasoning behind it.
The Bottom Line
There’s no universal winner. Each coating was built for different conditions, and the marketing noise around all three tends to oversimplify what the actual performance data shows.
If your floor is in a sunny garage that doubles as a workshop, Polyaspartic or an epoxy-polyurethane hybrid is worth the extra cost. If you’ve got a covered indoor garage with light to moderate use, quality epoxy installed over properly prepared concrete will serve you well for ten years or more.
Get the surface prep right regardless of which coating you choose. That single variable affects durability more than the chemistry does.
Shopping Basket
Manage Consent
To provide the best experiences, we use technologies like cookies to store and/or access device information. Consenting to these technologies will allow us to process data such as browsing behavior or unique IDs on this site. Not consenting or withdrawing consent, may adversely affect certain features and functions.
Functional
Always active
The technical storage or access is strictly necessary for the legitimate purpose of enabling the use of a specific service explicitly requested by the subscriber or user, or for the sole purpose of carrying out the transmission of a communication over an electronic communications network.
Preferences
The technical storage or access is necessary for the legitimate purpose of storing preferences that are not requested by the subscriber or user.
Statistics
The technical storage or access that is used exclusively for statistical purposes.The technical storage or access that is used exclusively for anonymous statistical purposes. Without a subpoena, voluntary compliance on the part of your Internet Service Provider, or additional records from a third party, information stored or retrieved for this purpose alone cannot usually be used to identify you.
Marketing
The technical storage or access is required to create user profiles to send advertising, or to track the user on a website or across several websites for similar marketing purposes.